Showing posts with label Remodeling. Show all posts

Tuesday, October 19, 2010

Zombie Baby's Nursery: Stage 1


WARNING:
Longest post in My Happy House History. :)
*As always, photos can be clicked on to see larger- detail shots are definitely worth the click

So I'm finally getting around to posting the first stage of the nursery. It's already been quite the process, but luckily the actual labor has been all Carl. I just get to do the research for the fun stuff. I can't reveal the mood board yet as it would be a pretty dead giveaway to the gender, but that has to wait a bit longer (T minus 25 days until the big announcement on that)!

Let's start at the very beginning.

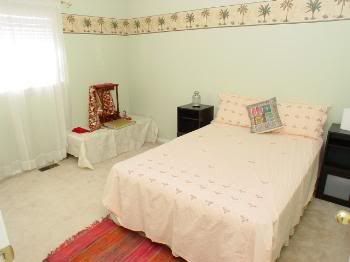
The Room: We chose the smaller of the 2 extra bedrooms for the nursery. We had made that decision before we even moved in and decided the larger room would be the guest room. We plan on having multiple kids, so we wanted the larger room for the older child down the road. Plus, the guest room needed more space with a bigger bed and whatnot. This is what we were working with when we moved in, minus the actual previous owner's belongings. Doesn't the Middle Eastern Decor really blend with the tropical vibe border? ::::insert sarcasm here::::

Stage One
The first steps to this room were a new window, removing the lovely border, painting it a neutral color (mostly because we had our very own oops paint to use up anyway), painting the ceiling white and switching out all the door hardware (closet and actual entry door) to brushed nickel.
The window also received a custom casing job from Carl. Oh he's so handy, I love it! You can really see the difference if you click on the up close photo of the window up there to see it larger. It's unbelievable what a difference the casings made in the whole house.


That was how the room looked until we found out about Zombie Baby. I think I got the words "I'm Preg..." out and Carl was ripping up the carpet. As a baby, my dearest was riddled with allergies, and by the advice of his mother, we opted for hardwood in the nursery. I'm not a fan of carpet in living spaces, but I do enjoy the cushy feel under my feet when I get out of bed. But the toss up of comfort to potential health benefits was easily won to health. Plus, who doesn't love the look of hardwood floors? (If you raised your hand, put it back down. Let's pretend like you didn't and we'll never talk about this again. :) )

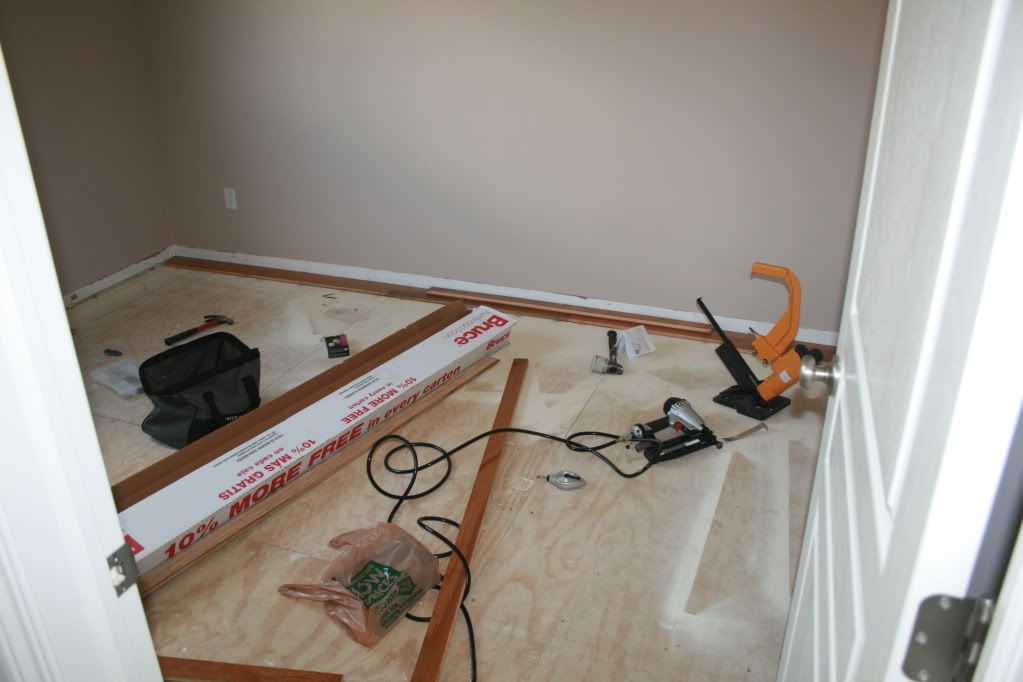
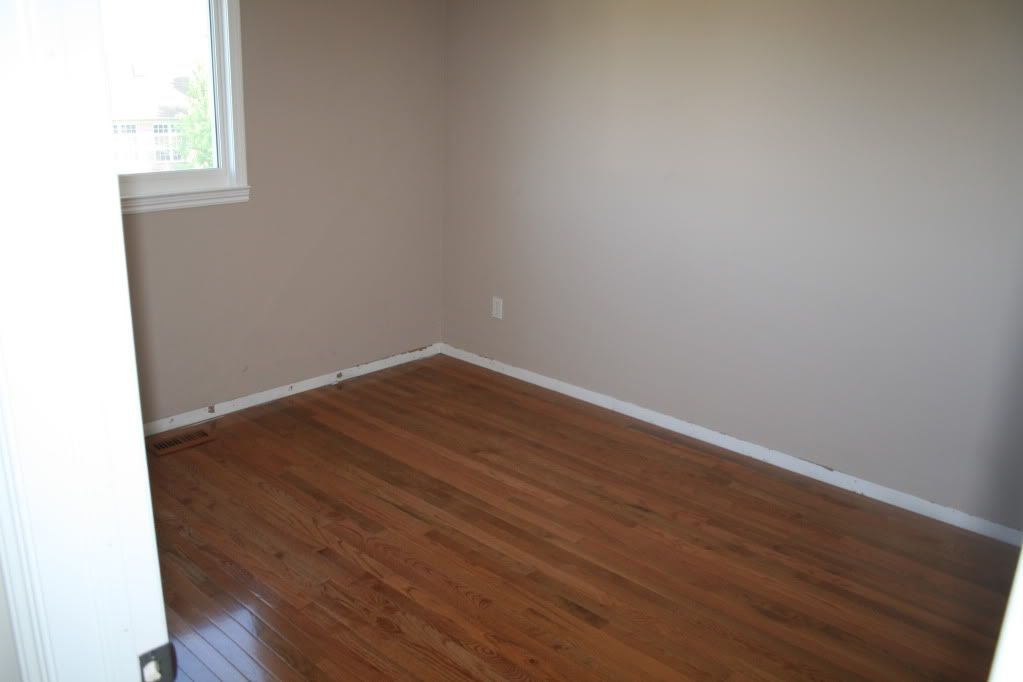


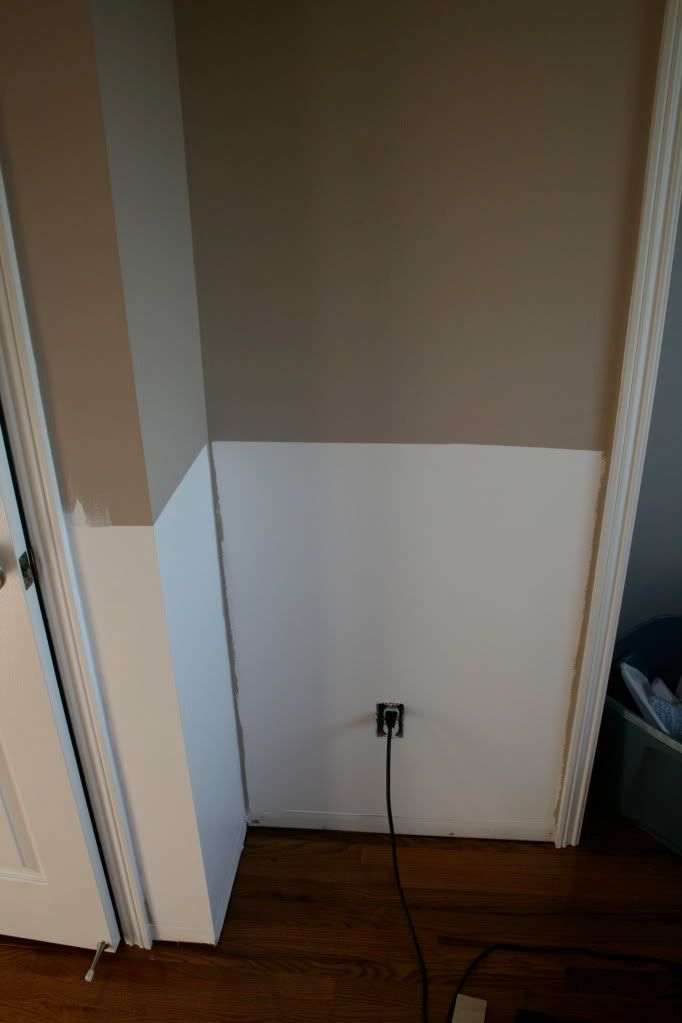
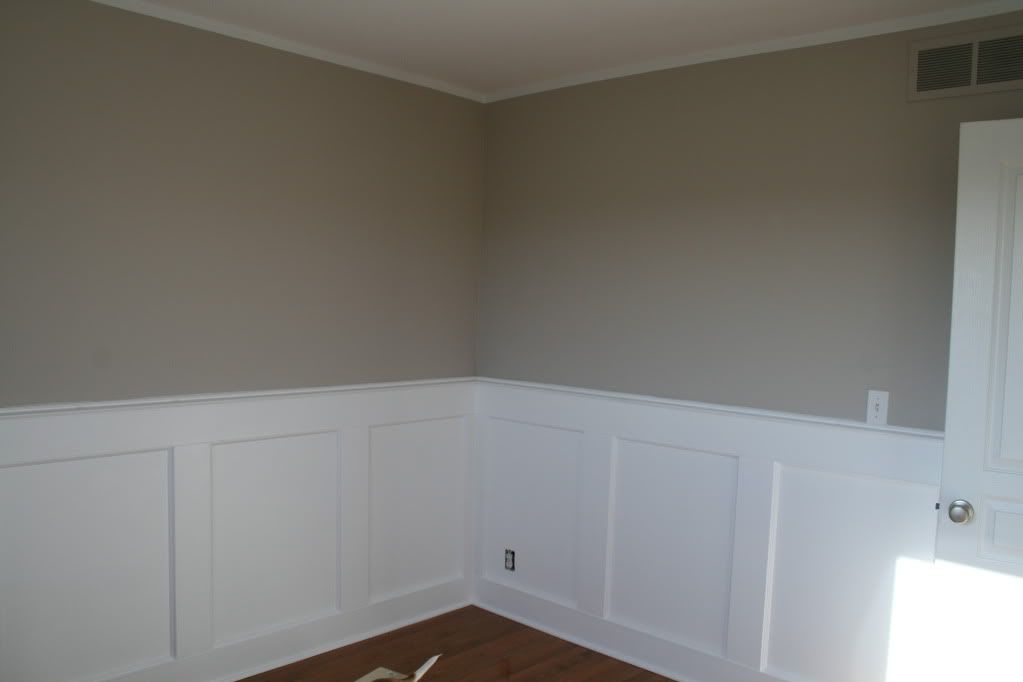
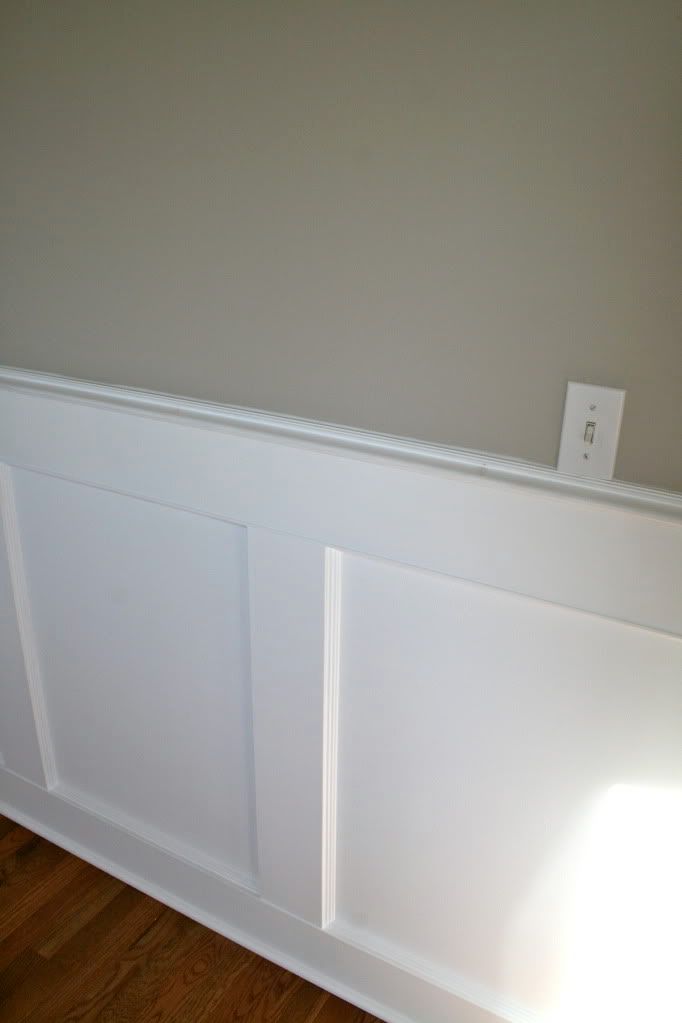
Then, my first request was wainscoting. This was something Carl had been wanting to try his hand at for quite some time anyway, so he was definitely up for the challenge. I was having a hard time pulling together all the details for the room, but this, I knew, was on my wants list. So it began. I think Carl might have shed a few pounds running up and down the stairs to make cuts seeing as the walls and floor aren't perfectly square, which means odd angles. Multiple times he expressed his disgust for this project, but it's only because 1. he doesn't know how to do things simply. This is one of the nicest wainscoting designs I've ever seen. And 2. he likes everything to be perfect. (Obviously, he married me.) Luckily, Carl's dad was there to get him started on the project. But I give credit to that boy, he really did the majority of the work himself.

The start:
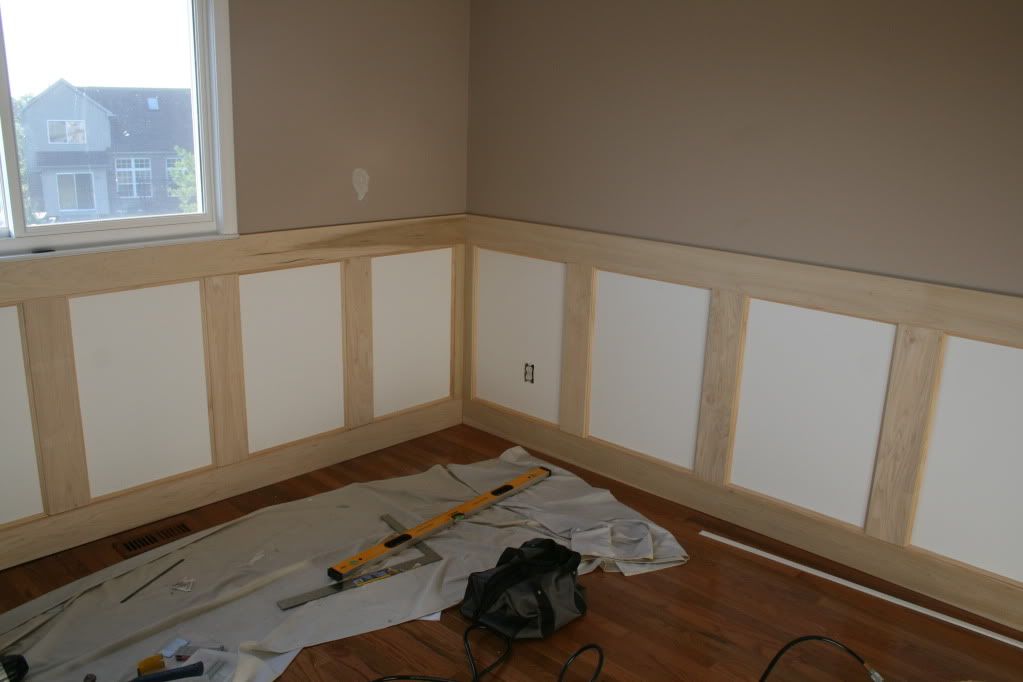
The sort of finished product- this is before patching and painting the second coat and then cleaning up the paint line as well. But all the wainscoting is up, the new color is on the wall, and the light switch was moved up a couple inches to accommodate the height of the trim.
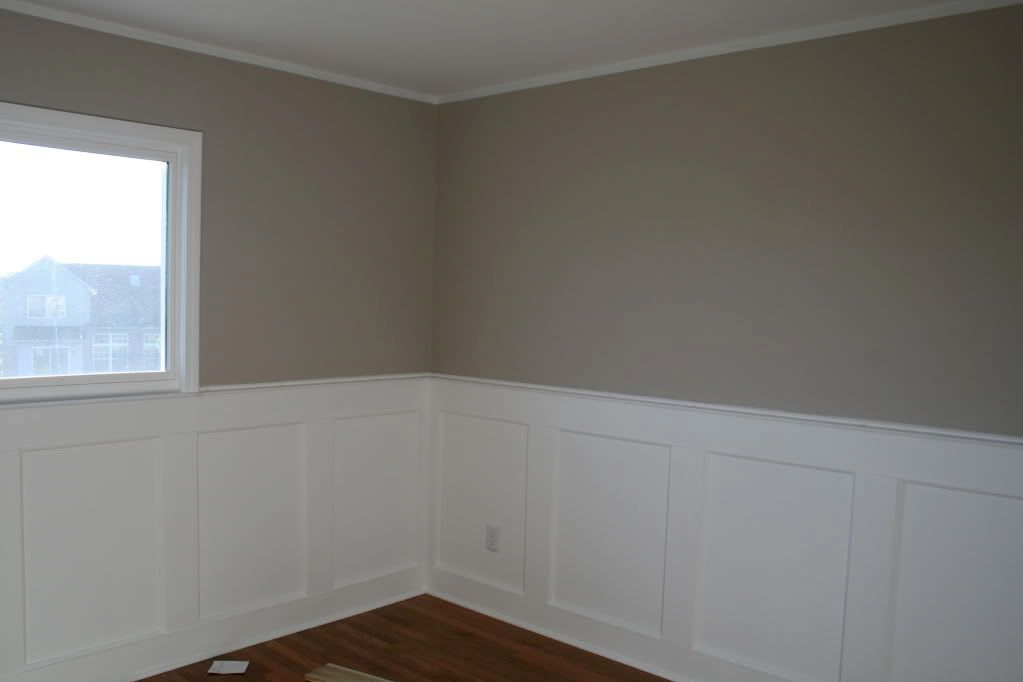

I need to get a better close up shot too:
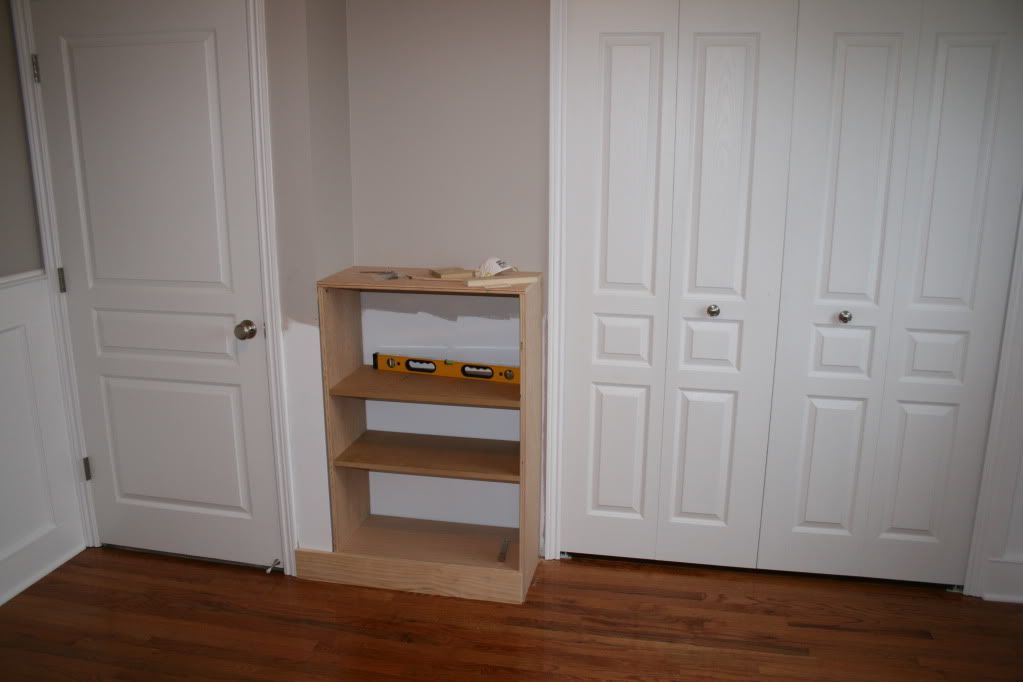
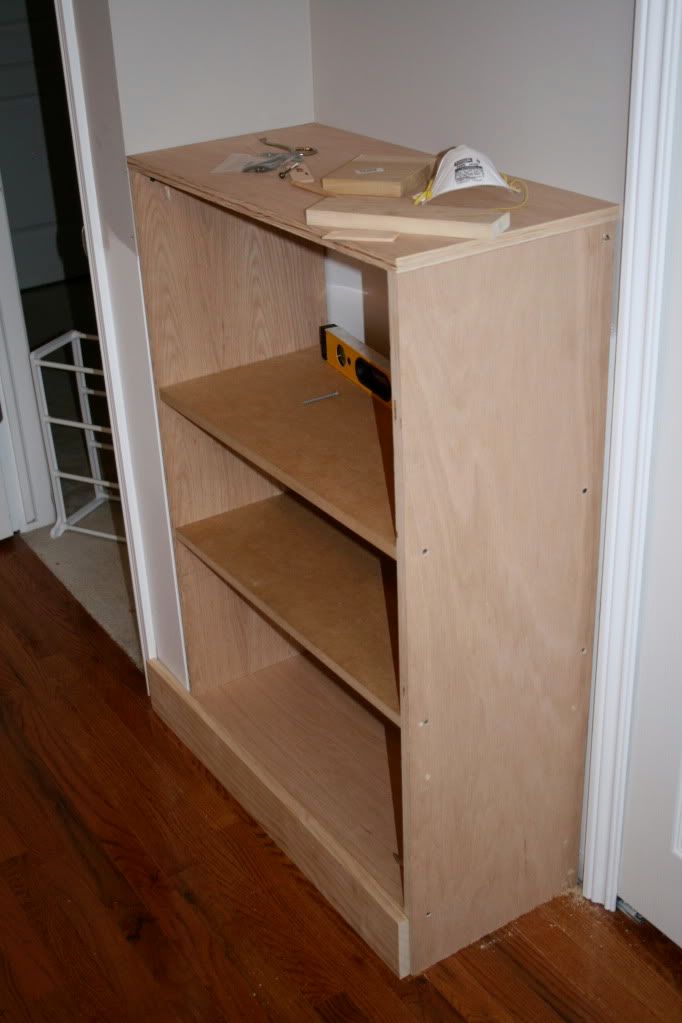
Next up was determining furniture placement- at least a rough mock up which led me to the conclusion that I wanted a built in shelf for the awkward little cut out next to the closet. So again, Carl and his dad went at making all my wildest dreams come true. They himmed and hawed over the design, the measurements, the details, but came to a conclusion and got down to business.

Awkward:

Becoming Less Awkward:

Even a little less awkward with the trim up. The goal was to match the trim to the wainscoting. The up close detail shot really gives you a good look at all the little pieces that went into the big picture. Carl says it's strong enough for climbing on, which might be a good thing, because if all the kicking I get is any indication of the active lifestyle Zombie Baby will have, this shelf better be sturdy!


And that's that. I'll stop here, mostly because this gets you caught up to present day. I'll be back to show you the finished product once the bookshelf is patched, primed and painted. Next on the project docket is the crib which is being worked on as I type. Literally. Carl took the week (HA! more like 2 days) off to work on the furniture. They bought all the materials and are finally ready to start cutting and building.

Oh and for anyone that is interested, I will be doing a full cost breakdown at the end of this project. But I will definitely wait until the end on that one. Yikes...that will be a post in itself!

Oh oh, and for fun, here is a photo (since this post is all baby related anyway) from our trip to the pumpkin patch this weekend. Zombie Baby is making a lovely appearance in all my photos nowadays!

That's it for now! As always I love your comments and if you have any questions, I'm happy to answer them.

Sunday, September 27, 2009

Spare Bedroom...Guitar Room...Future Nursery

One of our main criteria when searching for a home was that it had 3 bedrooms + an office. Our plan is to fill two of those bedrooms with little Molly & Carls...one day. But for now, one serves as a guest room, and the other, is well, nothing. We don't need another guest room, and it's going to be the future nursery, so we didn't want to spend any money fixing it up only to turn around in the next year or so to redo it all again. We just wanted to paint it and give it a few minor updates. So with a budget of like $10, we did our best.

(Please note: This room has been on the weekend plan a few times, but not completed. I didn't put it on this week, and Carl hopped right to it. I think I should take note of this.)

Here is how it looked before with the previous owner's goods:
It was a dull, chipped up green paint with a palm tree border :/ Not to mention, the border was taped on the wall. Not even glued. From what I could tell, the room used to be a nursery for the first owners. The second owner's took down whatever kid border was there, but didn't feel like removing the glue. So they just taped up this lovely palm tree one to cover the glue marks. Nice.

Our first step was a new window- but due to the settling of the house, everything had shifted. And now our windowsill was all torn up :(


On a week that Carl was gone, I took down the wallpaper, and cleaned up the walls. After that, Carl cased the window, swapped out the light fixture and the brass door hinges and knob. Then this weekend, he got to painting!


So here it is in it's limbo state. It will essentially be the guitar room for now. We are debating on hanging the guitars on the wall and making it look a little more finished. The nice part is that we have an AeroBed, so if we do have extra guests, this will now make a nice spot for overflow! We also moved our desktop up there, which gives me more room in the office since it was sitting on my desk. Our main goal for this room was to have it look decent and to have it ready for when we do start a family so all we have to do is paint and decorate. I'd say, mission accomplished.

Like I said, we didn't want to spend much in this room at all, so I'll break down the budget.

Paint: $0 (Ok. It did cost money, but it was an oops paint, on our part. It was actually meant for the hallway, but the paint matched up wrong. Rather than just get rid of it, we used it here for a nice neutral base.)

Light Fixture: $0 (The in-laws replaced some of their's and gave us this. We just didn't want the ugly brass one in there, so a nice neutral white works until we need something with more style- sorry, no before pic of the ugly brass one)

Door Hinges and Knob: $30 (Although, we used credit card reward gift cards with it, so really...) $0!

Molding and paint for the window: $15 (Approx...but again, used gift cards)

So for our cost of $0, and an actual cost of about $50, we were able to reach our goal of neutrality in this room.

Hope your weekend is going well! I'll check in tomorrow to round up how mine went!

Thursday, September 10, 2009

Transformation Thursday: Window Casings

This is seriously the last time you will hear me talk about these darn window casings, promise. Unless I need to clean them, then you might. But otherwise, never again. They are done. Dooooone! Sing it with me, Doooooooooone! What seemed like a rather small, inexpensive task turned into a long, drawn out one, but at least it was still rather inexpensive.

With less than $200, a little help from Carl's dad, and a whole bunch of sweat, we went from all our windows looking like this (you can click on any picture to make it much larger):


And this:

To this:


And this!
It's a little tough to tell in the pictures, so here they are up close. You can see the molding around the edge of the window a little better here:


And here:

I didn't feel you needed to see ALL the windows, but the transformation was basically the same on the rest. Plus, I already showed you the kitchen window here. So that's it. Our plan to slowly bring our builder grade house to something a little more custom is finally taking a decent sized step!

Any transformations happening in your neck of the woods?

Sunday, August 23, 2009

Carl's LEAST Favorite Project

It takes a lot for Carl to dislike a home improvement project. I can't think of anything he has tackled that hasn't been finished, and some of the projects he has done with little experience. But I'm sure you can see, he's a rather hardware handy kind of guy.

So to the project that he mentioned MULTIPLE times that he was not enjoying: the kitchen window. Let's take a look at the before. All that we had done at this point was take down the 1997 valence. (You can click on it to see it larger)


So we replaced the window along with every other window in the house.


And then we added new blinds- cordless and wandless and Carl built and installed the window casing. None of our windows had casings on them except for the sliding glass door and front door. They all looked so unfinished! He also painted the trim, so it's a bright, fresh white. Much better now, don't you think?


He also had to remove the hardware from the sliding glass door's 1997 valence and vertical blinds, and that trim also got a fresh coat of paint. I showed the new door before, but this is the full picture now all finished.

Here it is with the old door and window treatment hardware:


And here it is all DONE!


For the little amount of time he was home this weekend, he accomplished a ton! It's amazing what a little paint, wood and time (well...a lot of time) can do!

Saturday, August 8, 2009

Backyard Love: A Little Paint & Outdoor Speakers

When we moved into the house, there were some awful steps leading out the sliding glass door to the backyard. I guess we were fortunate there were steps and a concrete patio, but the steps...well they weren't anything to write home about.


It also had a very lovely railing. Sorry for the awful picture, but I didn't think to take a proper "before" shot before Carl went at it with a saw.


Well, we have really depleted our renovation budget with other projects, so the money was just not there to completely redo the steps. So instead, we took the cheap route with a bucket of paint! It's not a permanent solution, but they definitely look better!


So on top of that, I bought Carl outdoor speakers for his birthday. It was quite the process of running the wires from the family room receiver, down through the basement and outside, but Carl said it was well worth it. He mounted the speakers above the sliding glass door (which is getting replaced tomorrow!!! Stay tuned for that!). The wires are actually existing ones from the phone and such, so he just zip tied the speaker wires behind those.


But that's not all folks! Of course he wanted to make it a touch more complicated. He wanted a volume knob outside as well. So he decided to install one into the side of the stairs. He inserted an electrical box, a volume knob, and a cover to protect it from wet weather.


So of course we spent the evening outside, eating pizza on the grill and jamming to some tunes! It was the perfect way to end our very busy weekend! But I'll explain all the productivity tomorrow.

Tuesday, August 4, 2009

Monday...Errr Wednesday Weekend Roundup

Well, we didn't get a ton done for our weekend since we were on vacation, but we still managed to get a few things done Monday night and then a ton done on Tuesday. Carl switched out the brass on the front door and screen door. Looks quite a bit better, don't you think?

Before with the brass kickplates and handles and white door (The house numbers are brass too...but I had them blurred out on these old photos):


After with the new color on the door, brushed nickel hardware on both doors and the numbers are spray painted black:


I did our piles and piles of laundry! Since we had gone shopping at the outlet malls, I picked up a few decor items for the house. Yay!

New coffee table decor:


New dining room centerpiece- I have some things to add to it but haven't made a solid decision yet:


And my Charlie Brown Christmas Tree. I wasn't loving the other vase and flowers I had, and this is like the 6th thing I have tried there. I think I like it as more of a Fall/Winter item, but it's going to have to work for now.


Overall, it was a really productive "weekend" not to mention our anniversary was great! Plus, Carl is home all week, yay! So hopefully I'll have a few more of his updates soon.
Blog Widget by LinkWithin