Showing posts with label organizing. Show all posts

Wednesday, December 14, 2011

Tackle It Tuesday: Calendar

Tonight, I updated our calendar system. Time for January. It's going to be an emotional month :) Let's focus on something else. Heeeeey Snowman! You're cute!


Snow snow snow! Share your Tackle It Tuesday link below!

Thursday, November 17, 2011

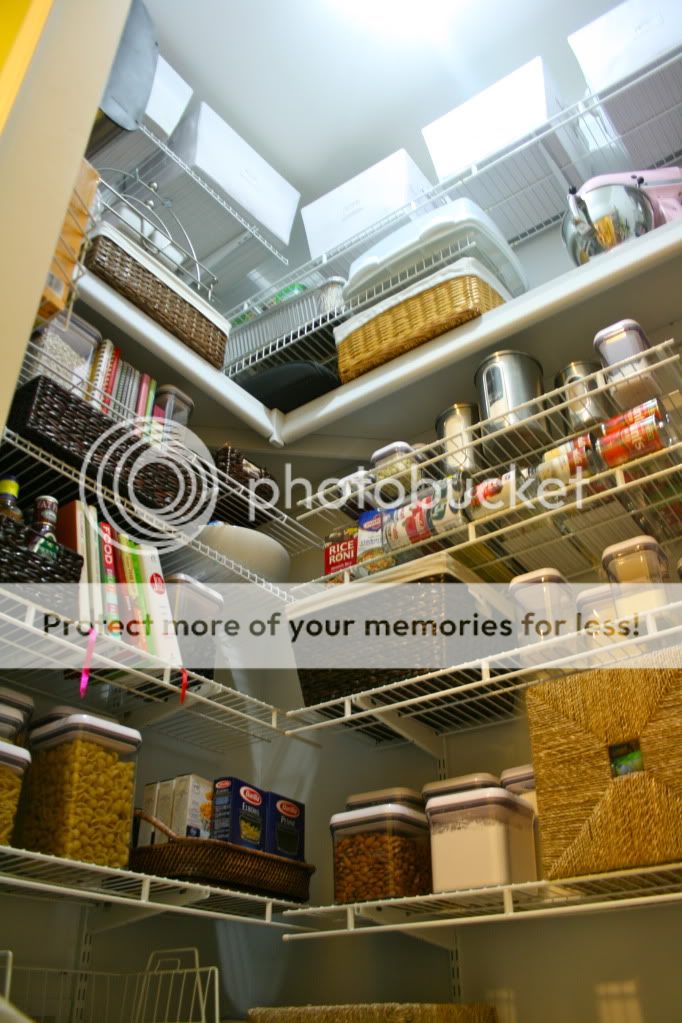
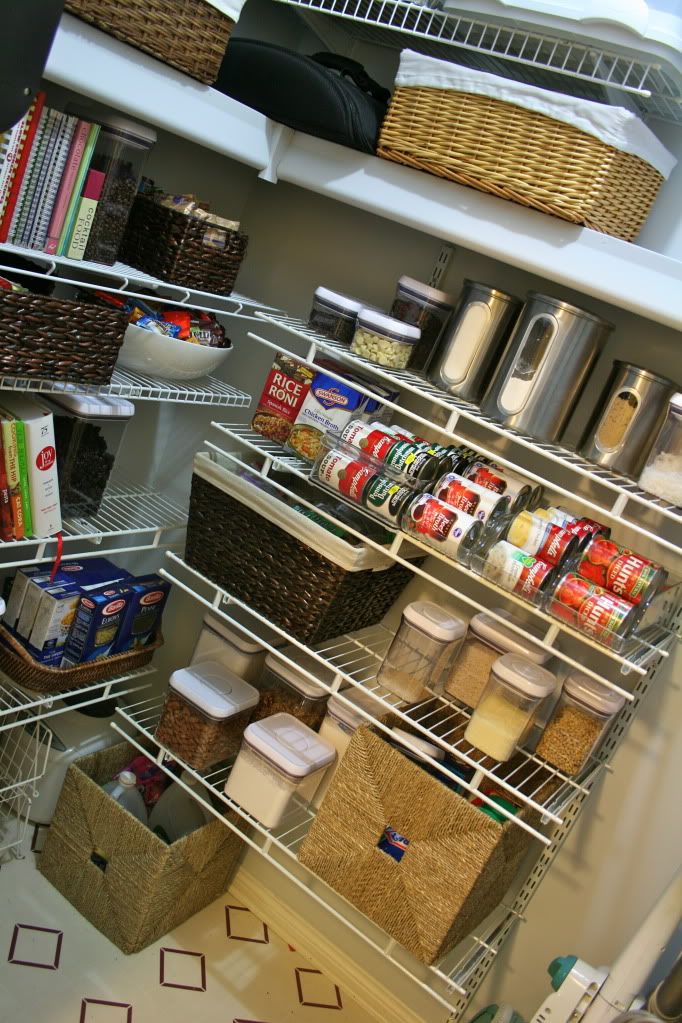
The Big Pantry Reveal

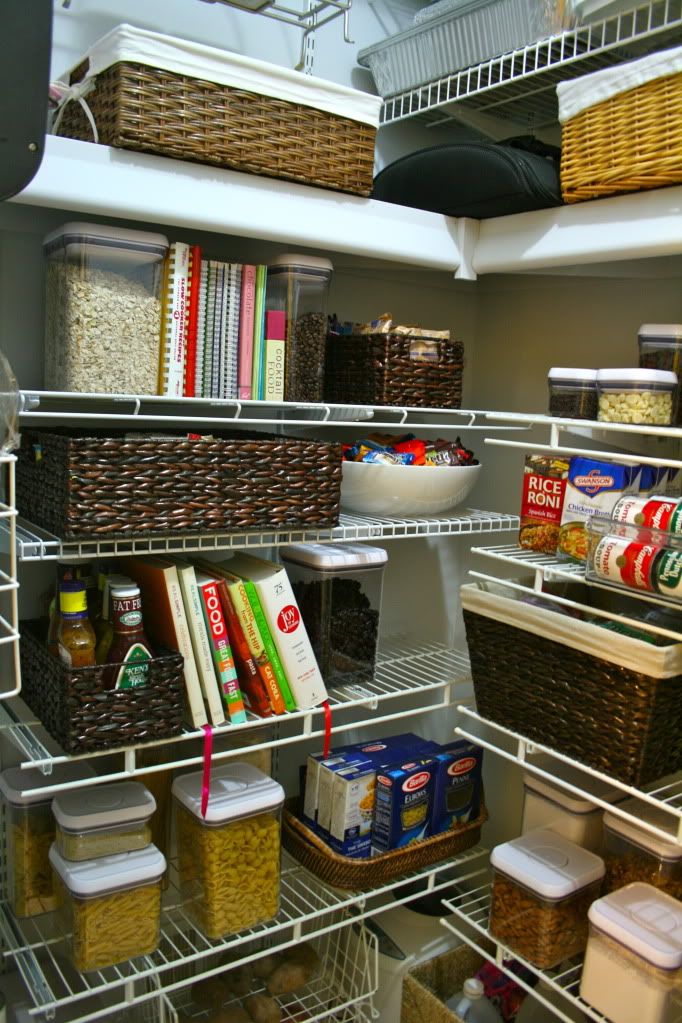
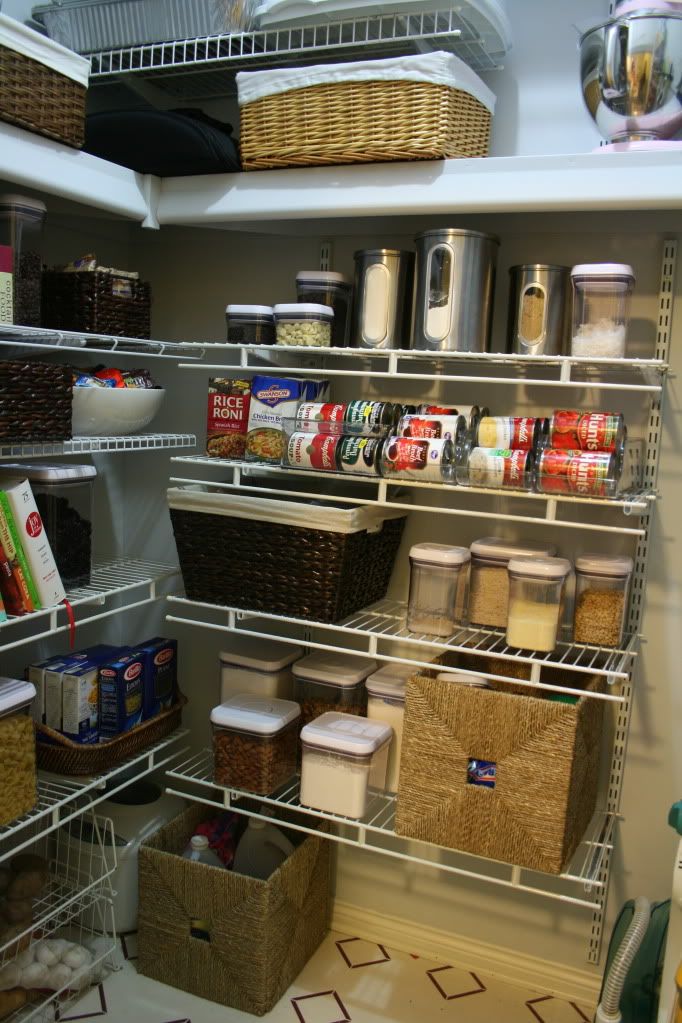
I've been slightly excited to show this to you guys. Maybe it's a bigger deal to me because I use this room multiple times a day, but still, hopefully you'll enjoy it as much as me! Up until just a few days ago, on a good day, my pantry used to look like this.


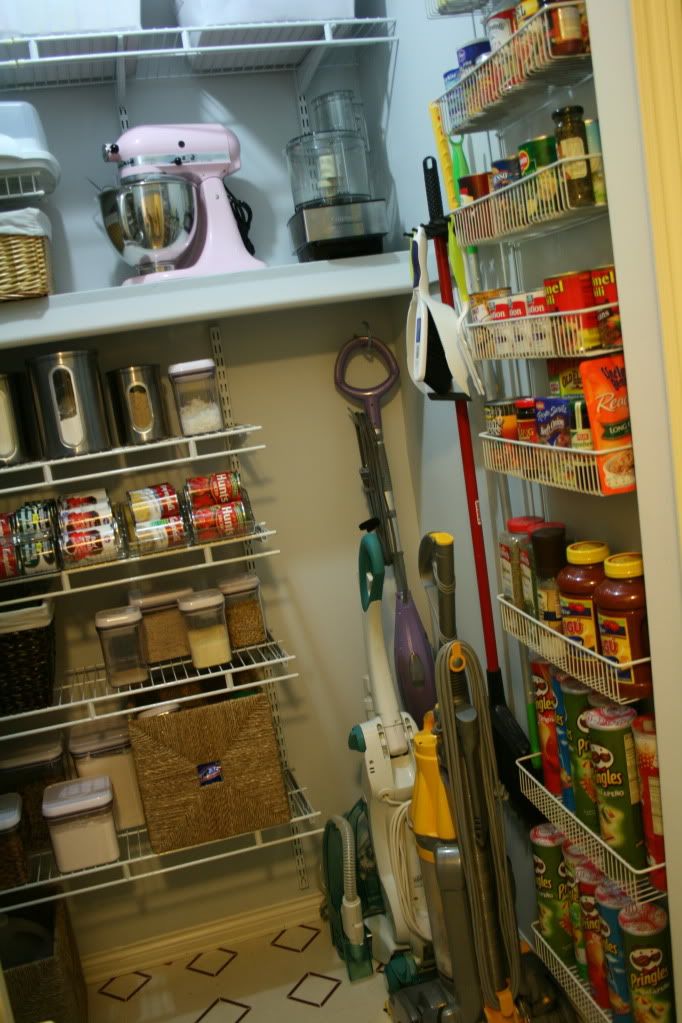
And while I loved my pantry just the way it was, I wanted more for that awesome little space. It truly is an extension of my kitchen, and since my kitchen is anything but large, maximizing the pantry is key. Oh and I wanted it to look pretty, am I asking too much? Perhaps, but that didn't stop me from trying. I'll save all my dialogue for the end. So if you want my tips and tricks, be sure to get all the way to the bottom!


How to achieve the pantry of my your dreams:
  1. Really only stock the items you need. I ditched a few things I really didn't need and have a pile of stuff to donate.
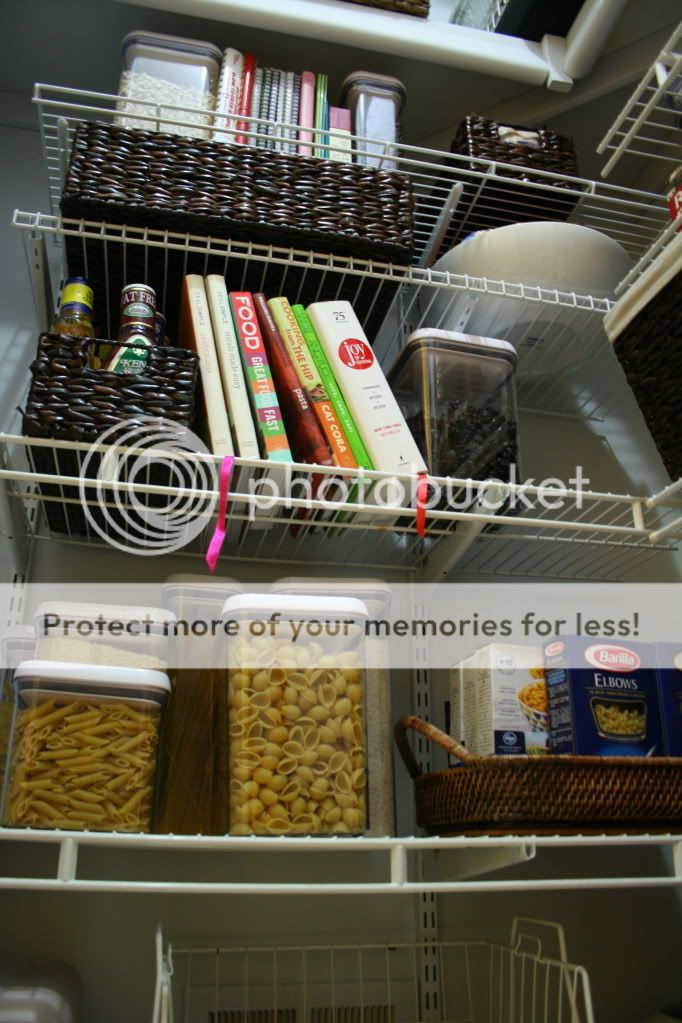
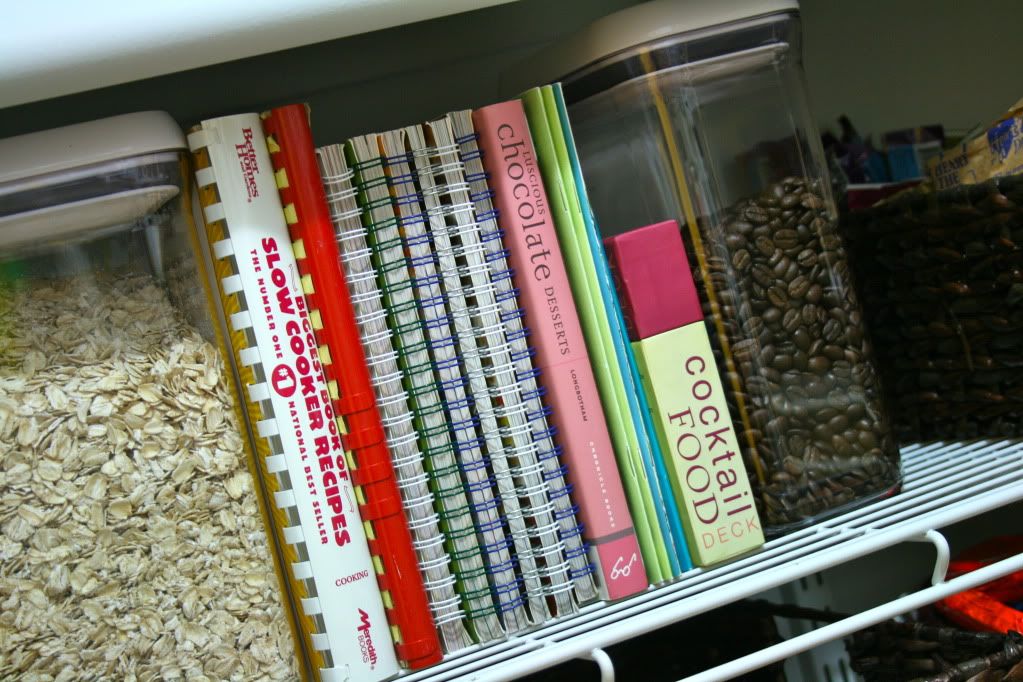
  2. Visually break up the shelves. A nice balance of baskets, containers, cookbooks, and serving platters helps big time!
  3. Uniformity is somewhat key. I wasn't about to drop $$$$ on new baskets when I had quite a few I could repurpose. I actually like the variety there, but I wanted to have all the same containers for the most part. So I spent some money on those.
  4. The wire rack on the side wall was one way to house can goods, but I needed a better solution for items I keep in bulk (diced tomatoes, chicken broth, etc.). Fridge bins work great for this! They are clear, so they go with whatever theme you have and are the perfect size since they are for soda cans.
  5. Don't overfill the shelves. This one was hard for me to do because I really do need all the space in there, but I'll show you something I did later that really helped with this!
  6. Make sure to use all the vertical space! The way the pantry was originally set up, there was a good couple feet above the shelf that wasn't used because I just didn't have that many tall items. We added the wire shelf up top, instant space. And notice on the left, where I have some serving pieces, those little "S" hooks. Again, vertical space. It still looks aesthetically pleasing by not looking crowded, but without those hooks, I'd lose an entire space for a basket.
  7. When using that top vertical space, be smart about it. I kept all the canvas baskets at the very top light in weight. Linens, chips, cereal, etc. are easy to get down without fear I'll knock myself unconscious when I need to get them down.
  8. Keep the color scheme light. The paint we chose was some paint we had bought and weren't able to use the perfect paint for the little closet space with no natural light. (Platinum by Ace) However, I'm pretty sure any paint would have been an upgrade from builder grade beige, and especially so seeing as the ceiling white came about 2 feet down the wall with a jagged line to finish it. Seriously builders?
  9. The floor is still sad, but we want to tile it, along with the attached laundry room down the road, and we just aren't ready to do that yet. Don't worry floor, you'll be happy soon :)

And that's the big pantry reveal! I hope you enjoyed it, and I hope even more that it gave you some ideas for your own pantry space! Keep in mind, it doesn't need to be a huge pantry to be organized and look beautiful! As always, hit me up with questions if you have any :)

Tuesday, November 15, 2011

Small Clothes: Big Organization- A Peek Into Cam's Room

I've received one question multiple times:

How do I organize Cam's clothing?

I've wanted to answer it for awhile, and finally got the kick in the butt I needed when my dear friend Elizabeth asked me to guest post over at her blog, Our Life. Go check it out and give her some love! If you've already been there this week, the following might be a repeat for you. If not, read on to see just how I organize all Cam's clothing!

Tiny clothes are adorable, but for some reason, at first, I was thrown for a loop when it came to organizing them. I finally got in a good groove, but I'll be honest, something about making the clothes smaller made them more daunting for me. What I've found that works for me is using his closet for the most part, but a good closet organizer is a must in my opinion! We bought the Rubbermaid System that is sold at Lowe's, and it was easy, or I suppose it looked easy to install. Carl does all the hard labor around here, other than the cleaning, and having babies I suppose.

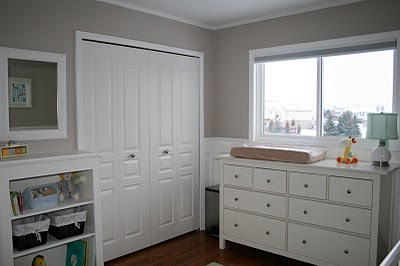
First, let's get a reminder of Cam's room.


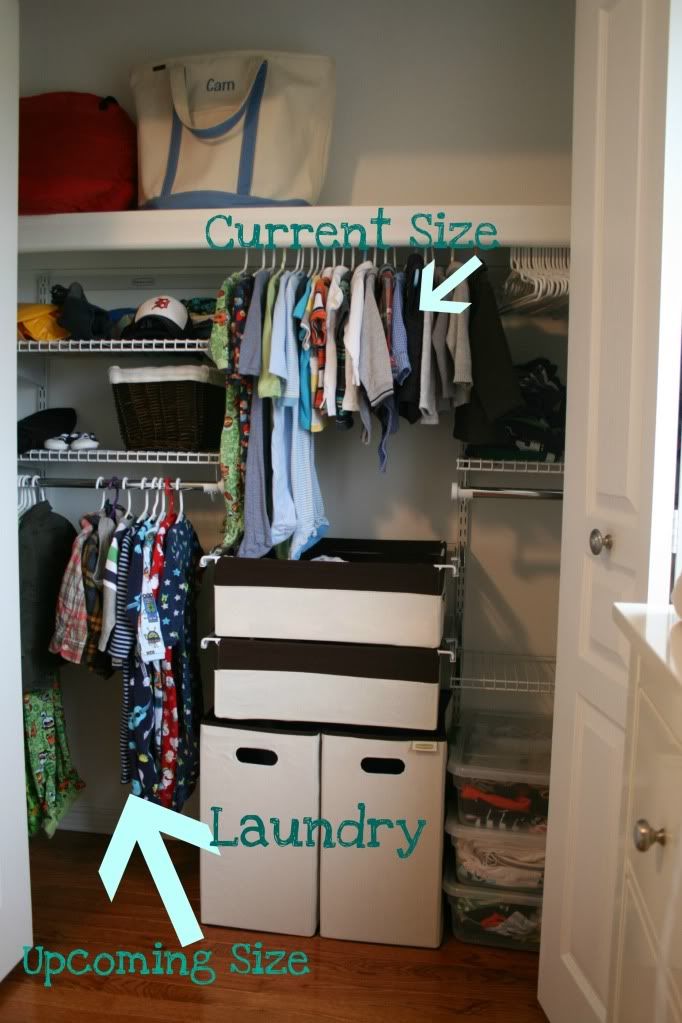
Now, onto the task at hand. I keep Cam's current size in the top middle section, and then the upcoming size to the bottom left. I like to do it this way because more often than not, it seems like he is bridging two sizes, especially depending on the brand of clothing. I also use two bins for his laundry. I wait until I have a full load, take the bin downstairs, and use it to carry all the folded laundry back upstairs. Sometimes I don't get the whole process done in one day, so I like having two :)

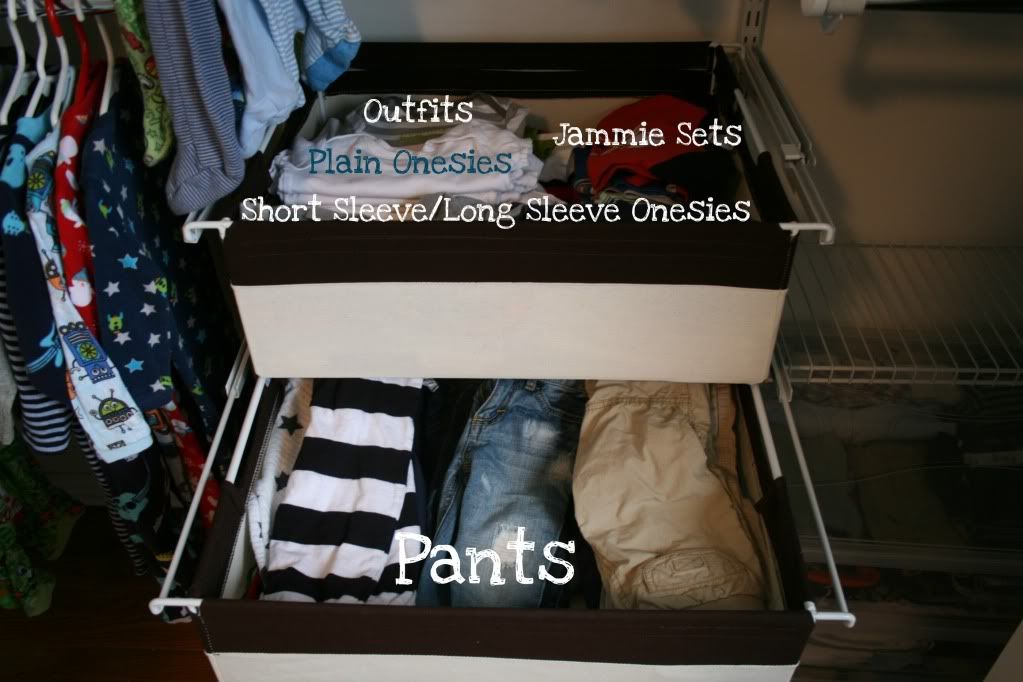
These two drawers are really useful for items that don't hang well. I've labeled it pretty thoroughly so no further explanation here.

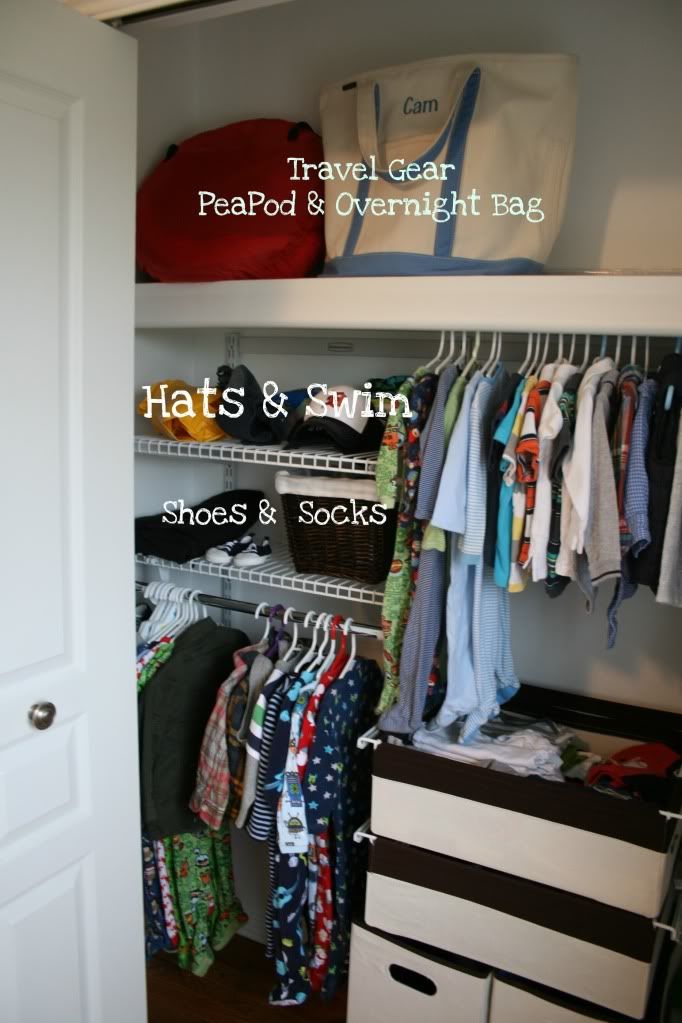
Right now, Cam is able to fit in 6-12mo and 12-18mo, so I'm already having him rock the sleepers on the bottom left. One is a winter snowman one which is making me ridiculously excited for the holidays! Up top is one of my favorite gifts we've received. My sister buys each niece, nephew and her own kids one of these bags. My Godson/nephew chose the blue color. We use this bag all the time! It's perfect for 1-3 night stays.


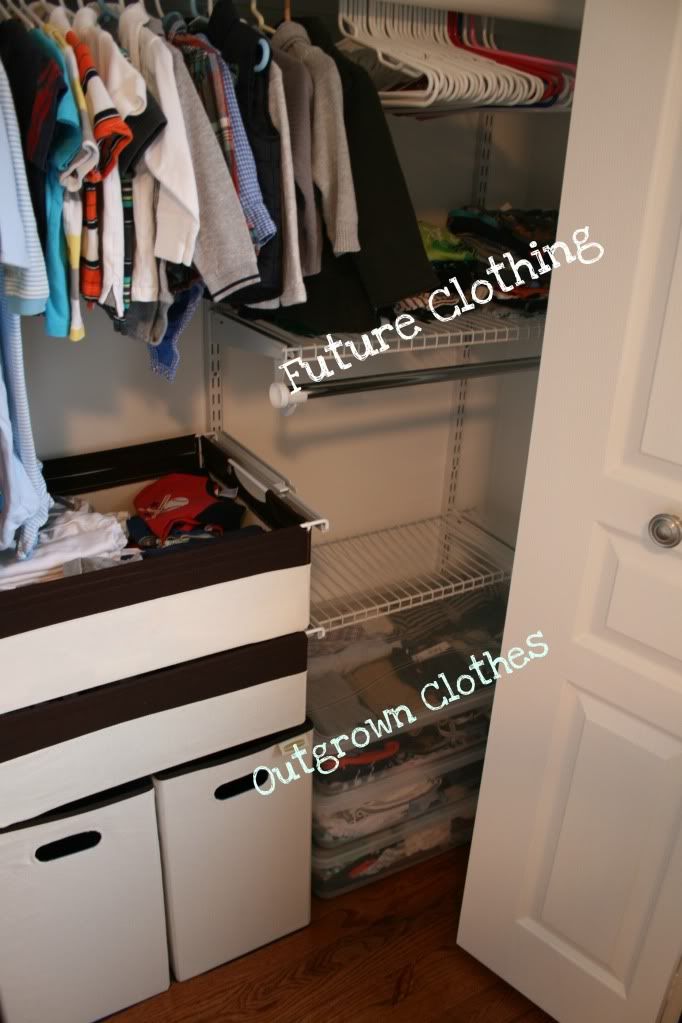
Bottom right are storage bins. The bins of tears, because I cry when I have to put away itty bitty clothes when my chunka chunk moves up a size. We have a spot in the basement for these, but things are a bit of a disaster down there right now, so I'm storing them in his closet since we have the space. The shelf is where I store clothes that are further out, like a year+ down the road. I have issues with clearance racks. Really, really, big issues.


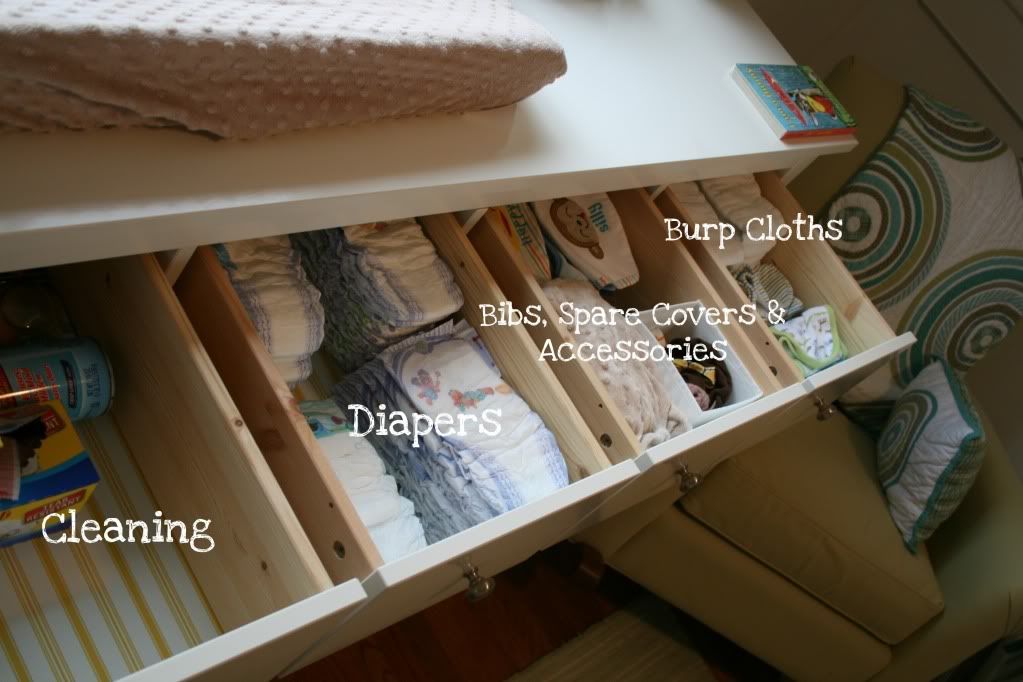
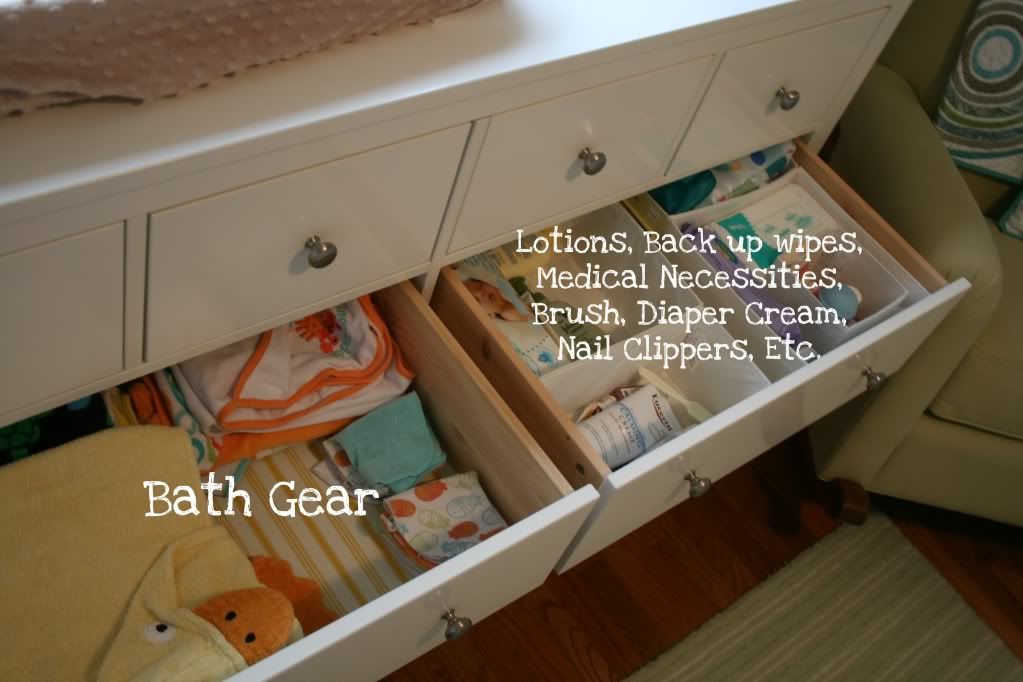
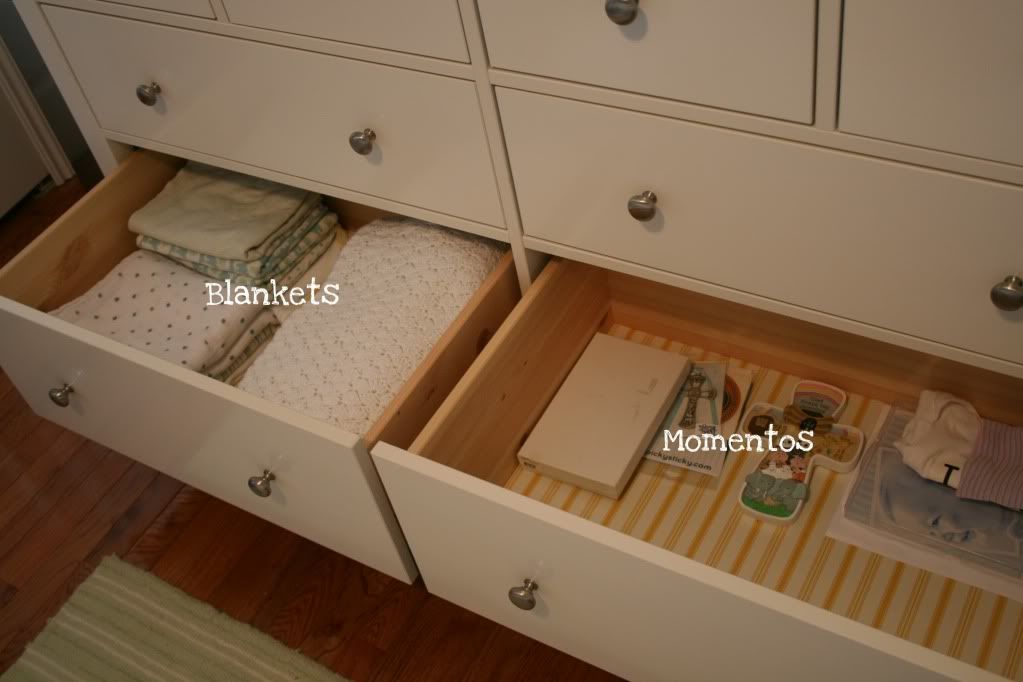
The only other clothing type storage we have is the Hemnes dresser from Ikea. It also doubles as our changing table. If you are looking for an all purpose piece that will grow with your little one, look no further! I love this dresser! And wait until you see how much it stores.


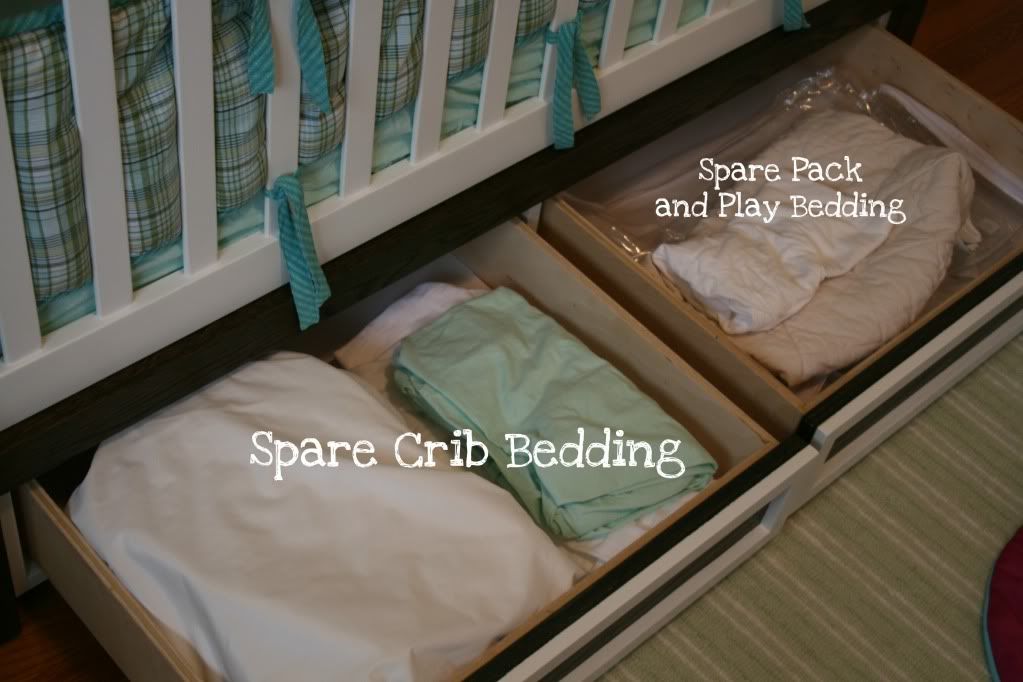
Oh, I lied. There is one other piece of storage. Carl and his Dad made Cam's crib. Yeah. I'm kind of lucky in the "the men in my life know how to build stuff and stuff" way. I requested a specific crib design because it had more storage. The crib sits on a base with two drawers.

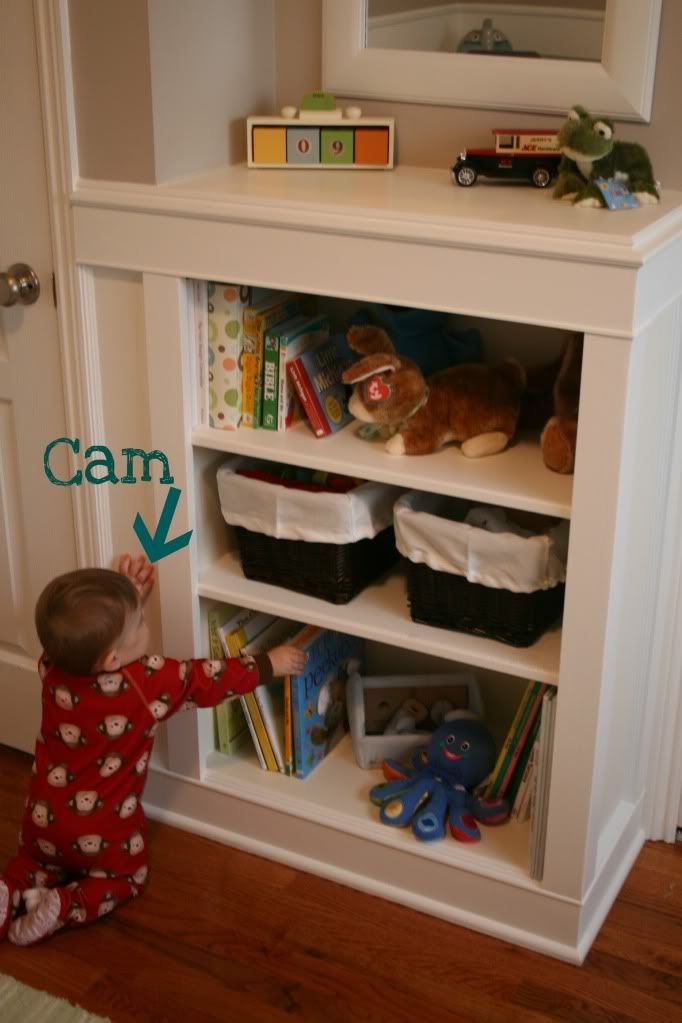
We don't keep a lot of toys in Cam's room, but what few ones we do, we keep on his custom made built-in bookcase made, again, lovingly by Carl and his Dad.


Are you inspired? Is your closet, or maybe your little one's closet about to get organized? I hope this is the answer some of you were looking for, and if you need further explanation on anything, you know you can just ask!

Tuesday, September 20, 2011

Things I'm Digging


Another post to tell you about stuff I dig. I am in no way compensated for this, I just want to tell you about things I like :)

Cleaning: At first I wasn't in love with the Shark Mop. I have since changed my mind. I love it to quickly disinfect my kitchen floor between big cleans!


Food: You know I'm obsessed with stripes, so why not incorporate it into my cheese? This stuff is amazing!
Drink: Pumpkin Spice coffee is my vice. I just ordered some of this from Amazon and am slightly annoyed that I waited so long to do so this year.


Scents: This Spiced Cider candle from Bath & Body not only smells yummy, but it also is getting me pumped for the holidays with it's cute design.


Organizing: These little cubbies from Ikea have proven to be winners time and time again. Watch for a post coming up showing you how to use them in an unexpected way!


What are you digging right now??

Tackle It Tuesday: My Monica Closet


You know how everything in life can be compared to a moment on Friends? Well here is one for you. Remember the episode with the closet? The one where Monica won't let Chandler see inside it and it turns out it's because it's her junk closet. It's her messy space. Well, let me introduce you to My Monica Closet.


What's that you say? It doesn't look THAT bad? Oh....perhaps that's because you know I'm awful at remembering the "before" photo and that's after I had already taken all of this out.


It had been awhile since I purged our guest room closet, AKA my off-season or rarely worn items closet. I have a bad habit of holding on to clothes thinking "I miiiiight need to wear this one day." I don't. I forget I even have the stuff. It was time to purge. So I started piles. One for donating and one for an honest to goodness I really will wear this again, including winter coats and such.

I organized everything going back in the closet. Along with the clothes, we keep our luggage, some spare bedding, purses, sleeping bags and our air mattress for extra guest sleeping space in here.


Last step is to fold all the clothes I'm donating, put them in bags/boxes and schedule a pick up from our local charity organization.
I ended up donating two very large black garbage bags full of clothes. Man does that feel good! Yeah, it really does. Go tackle something that's been weighing on you!

Tuesday, September 6, 2011

Our DIY Daily Organization System

I've been coveting Pottery Barn's Daily System for I don't even know how long! I've been telling Carl for quite some time that we need a family calendar. And as much as I love my technology, I just really like to be able to view a calendar, right in front of me and not have to check a device to see what I have coming up that month. Once we furnished the office, I knew the calendar would find a home there. We measured, configured and tried to determine a way to make the PB Daily System work for us. It wasn't happening. We decided the cons outweighed the pros.


Pros:
Molly really likes it.

Cons:
The dimensions weren't fitting on either available wall in the office
The cost...it would have been over $250 to get what we needed, plus shipping

Boo, friends, major boo. But the bonus is that we came up with a new plan! Yippee! I came up with the idea to make our own daily system out of frames- using them as whiteboards. I wanted two calendar boards so I could see a month ahead at a glance, one blackboard for quick notes, and such and then one frame to house our to do and to file folders.

Step 1: Buy the materials
4 frames
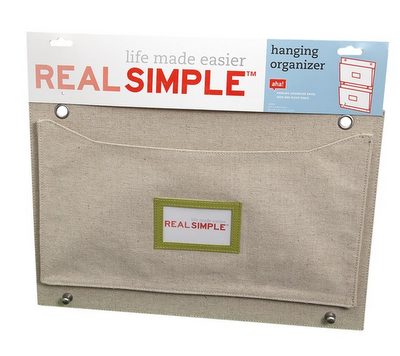
2 wall organizers (pictured below)
Black chalkboard spray paint
Frosted glass spray paint
Black poster paint marker
Wall hooks
Clear silicone

We chose these hanging organizers because of the simplicity and the fact that they hooked on to one another. Love em! More on these later.

Step 2: Make the whiteboards
We removed all the materials from the frames. We used two rectangle frames for two calendars, so we could view a month ahead at a glance. We used a ruler and level to draw out the lines for the calendar on the backside of the glass, then sprayed it with two coats of frosted glass spray paint. We inserted the glass back in the frame and used some clear silicone to keep the glass from moving around. Leaving the back off would allow the wall to show through, making that the background color.


Then, for the blackboard, we used a longer, skinnier rectangle frame. Again, we removed all the inserts, but this time we sprayed the back with a blackboard paint. Upon turning it around, we realized it looked really awesome and went with making it a black dry erase board. However, we can always turn the glass around if we want since we were able to put the backing on that one.

Step 3: Configure hanging organizers

We took the hanging organizers, and hooked them together, as they are made to do that. We purchased a larger frame, replace the inserts with a backer board cut down to the frame size. Carl simply stapled the organizers to the backer board, and put it back in the frame.


Step 4: Time to hang!

We used some one step brass hooks. We wanted something that would make the frames easy to come off the wall, especially for the calendars. It makes filling out an entire month much easier!


Step 6: Enjoy Your Organized Life :)


Now I just need to sort the top shelf, including finding a fun way to keep all my dry erase markers organized! I'll be keeping a look out for a good solution.


So what was the cost on our project?
4 frames.................................................$81
2 wall organizers (pictured below).......$30
Black chalkboard spray paint...............$4
Frosted glass spray paint......................$4
Black poster paint marker....................$3
Wall hooks............................................$2
Clear silicone........................................ Free- we had some on hand
Total......................................................$124!

That's quite the cost difference! Not to mention, it was the right size for our wall! I'm loving filling out the calendars and I finally have an easy spot for my "To Dos" and "To Files." The second is especially helpful when I can't really be in the office during the day, but I can sneak in there to toss some stuff up there to organize later.

So did I inspire you to make your own daily organization system? Maybe not, but perhaps you can find inspiration in another pricey item and make it your own!

Tuesday, August 30, 2011

Tackle It Tuesday: Workin the Kitchen

It's a late Tackle It Tuesday for you guys, I apologize! We are helping Carl's cousin and wife move and store their things. My tackle was done far earlier than this post :)

Like I said yesterday, I have tons of kitchen ambition this week. Other than the process of getting the appliances in (which will be it's own post), the first thing I knew I wanted to do was clear out our large cupboard next to the fridge. We no longer need our massive toaster oven since the microwave does double duty now, so I wanted to rearrange it. I also needed space to store some extra baking pieces that came with both the oven and microwave.

I realize my before and after are not all that different from on another. I apologize in advance for that. But they are quite different to me.

Before: Functional, for sure, but housing more than we needed.

Practically everything in this photo was in the cupboard. It covered the kitchen table, counters, stove and spilled into the dining room. It's a big cupboard.

Once I had everything out, I cleaned the interior down with a hot water, concentrated Lysol mixture and then carefully put everything back.


I make sure all my plastic storage has a matching lid. That's a big pet peeve of mine. It's a deep cupboard, so I try to make sure if I need to reach something in the back, I only have to move one set of items. I also put the most used items in the front- glass mixing bowl, lettuce spinner, food chopper, Pyrex storage, etc.

Getting rid of the huge toaster oven, amongst other small objects made enough room for the new stuff as well as all the old stuff to fit nicely. And the fact that it's super clean now just makes my little heart happy.


You tackled something today. I know you did. I didn't even have to remind you. Way to GO!!! Now share your link here or tell me what you did in the comments! I'm always looking for inspiration for my own tackles!!


Blog Widget by LinkWithin