Showing posts with label DIY. Show all posts

Sunday, November 25, 2012

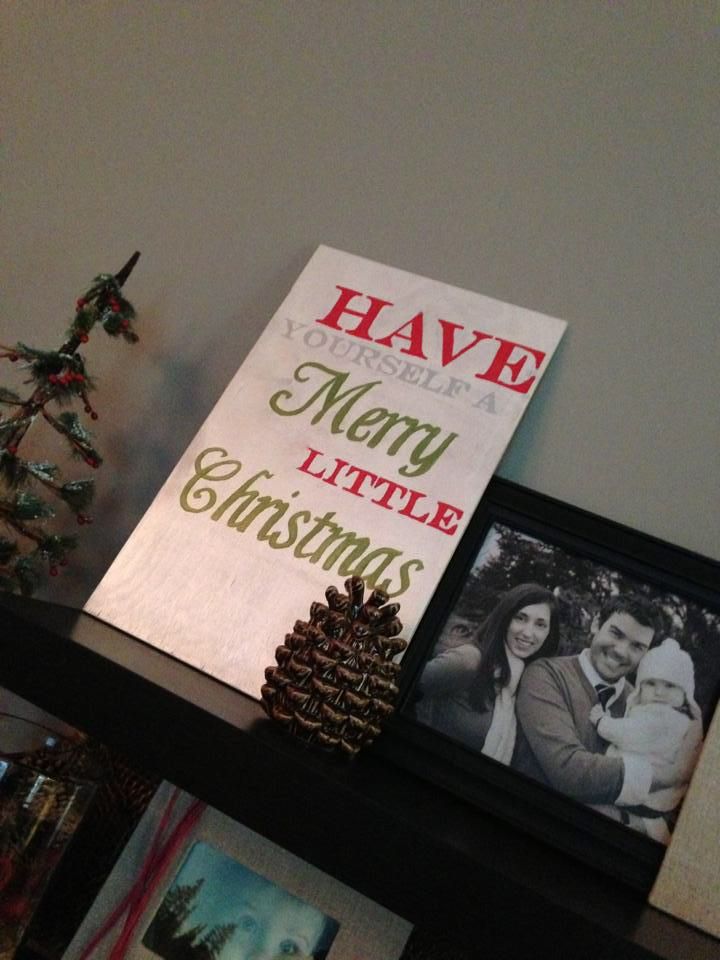
DIY Christmas Sign

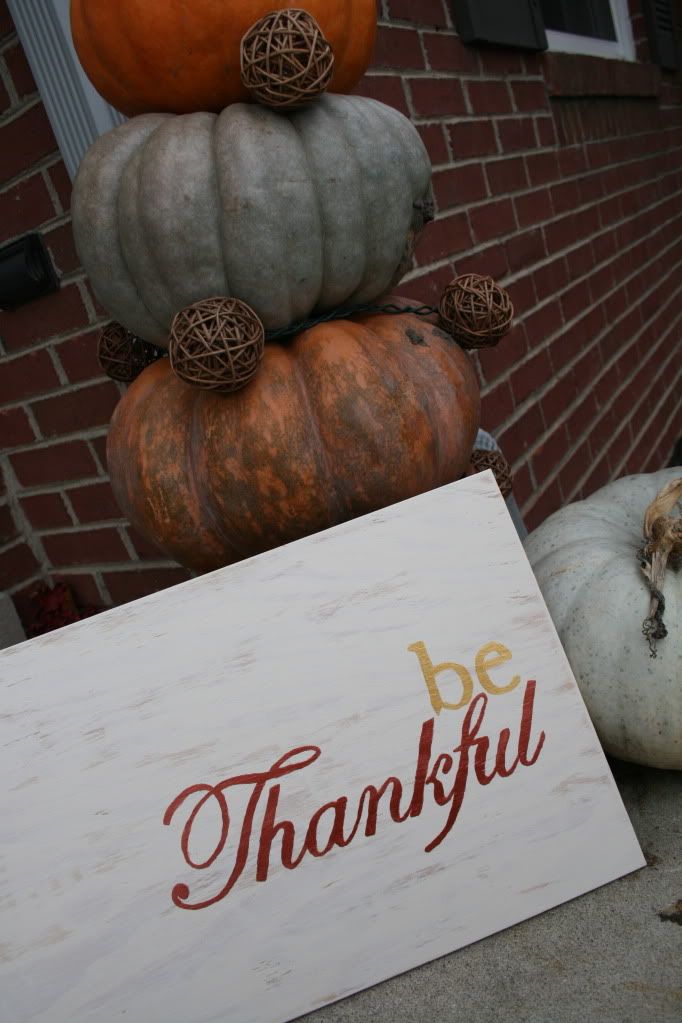
Last year, I made this adorable "be thankful" sign to add to my fall decor.

For about $17, I made what others are selling for upwards of $70.  For no additional money, I flipped the sign and made a Christmas version this year.


What you need:
  • A piece of plywood, cut to 18in x 11 1/4in
  • White Metallic Paint
  • Colored paints of your choice (For this I used a metallic green, red and silver)
  • A foam brush
  • Small paint brushes
  • Carbon Paper

1. Give the plywood a light sanding, wipe off dust

2. Using the foam brush, paint the wood with the Metallic White paint. Use long strokes and if you want the rustic look, don't worry about complete coverage. Allow that to dry for one hour.

3. Decide on a saying, font, size and placement of your saying. You can easily download different fonts at websites like www.dafont.com.

4. Print the saying out, and cut it down to the word. It doesn't have to be perfect, just cut off the major excess.

5. Tape the saying on your board as you want it, (I just did one word at a time) and place the carbon paper, carbon facing down, under your piece of paper. Trace the outline of your word.

6. Remove the carbon paper, and paint your traced word.

7. Repeat steps 4-6 until your words are complete.

8. Give your words at least 2 coats of paint to really have full coverage.  Allowing the paint to dry completely between coats helps to cover the carbon outline faster.

Wednesday, January 25, 2012

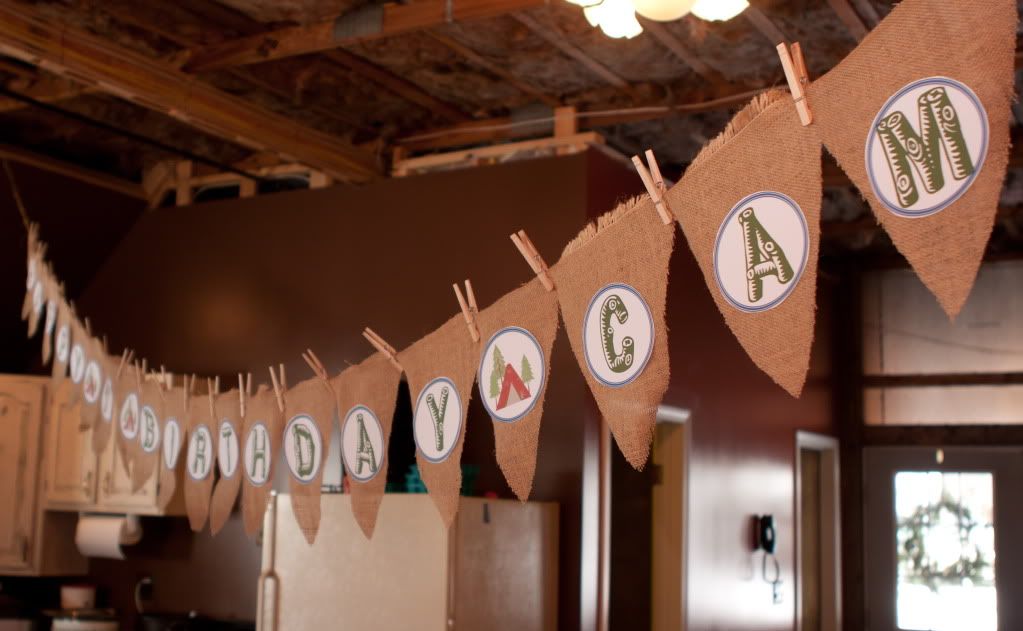
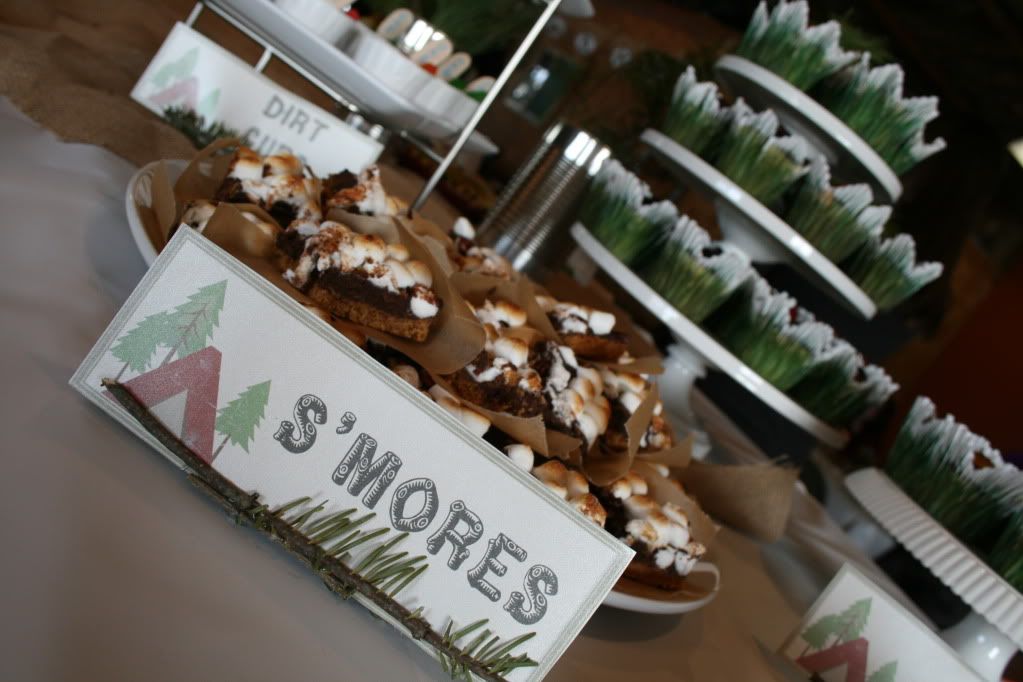
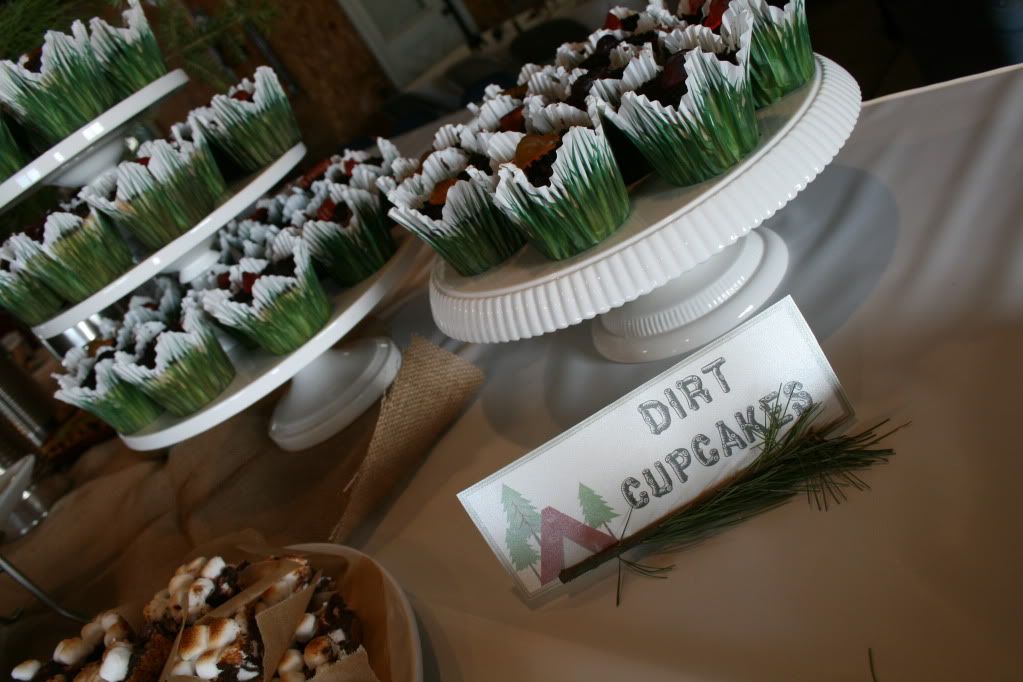
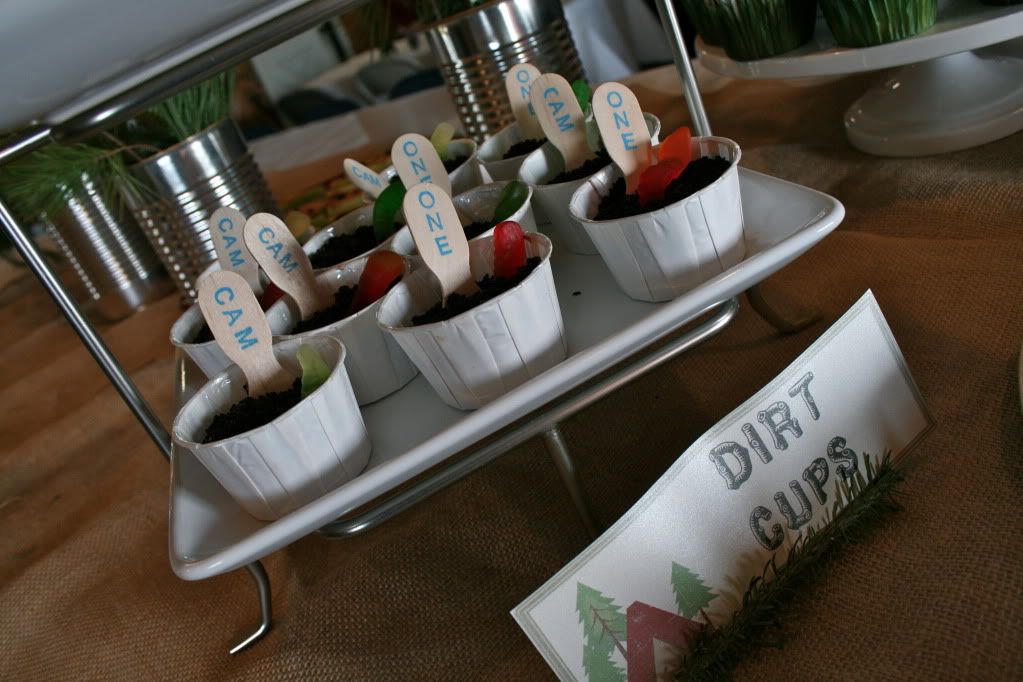
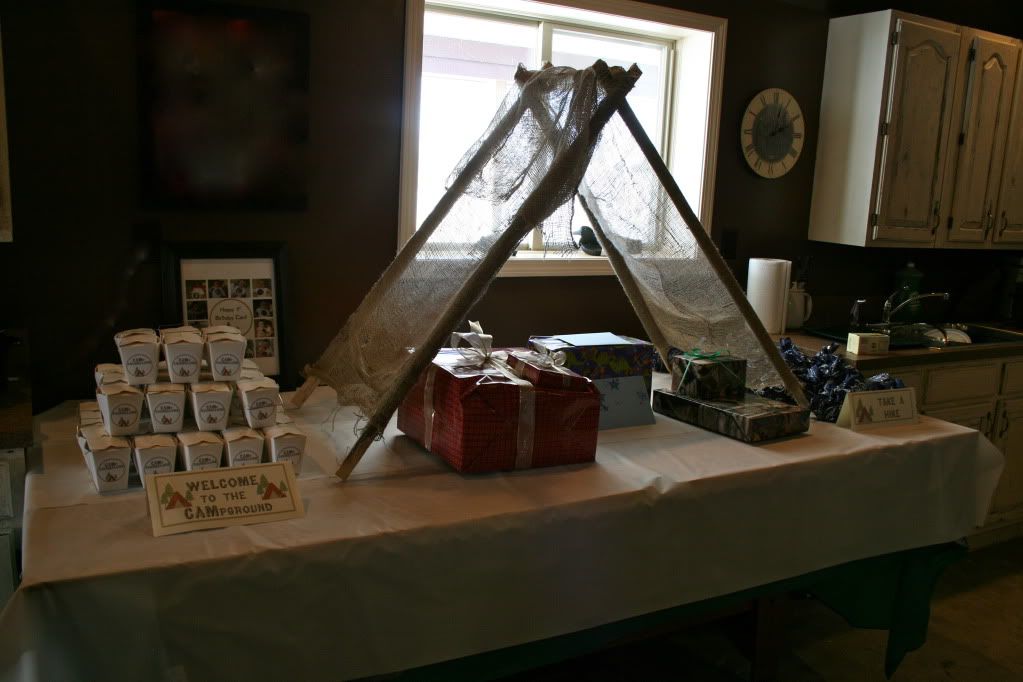
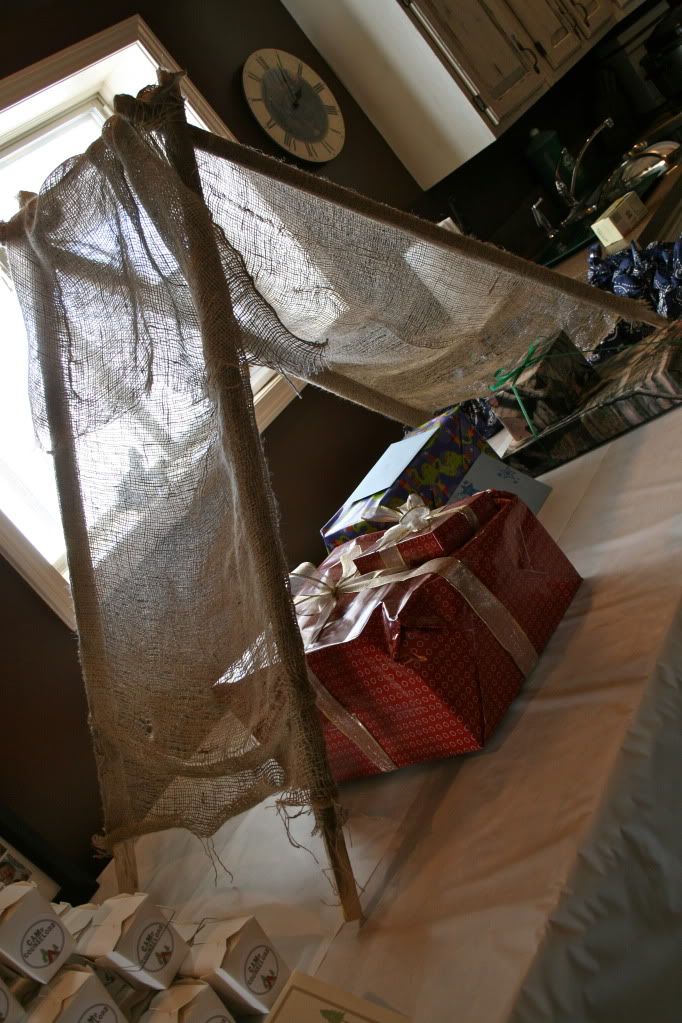
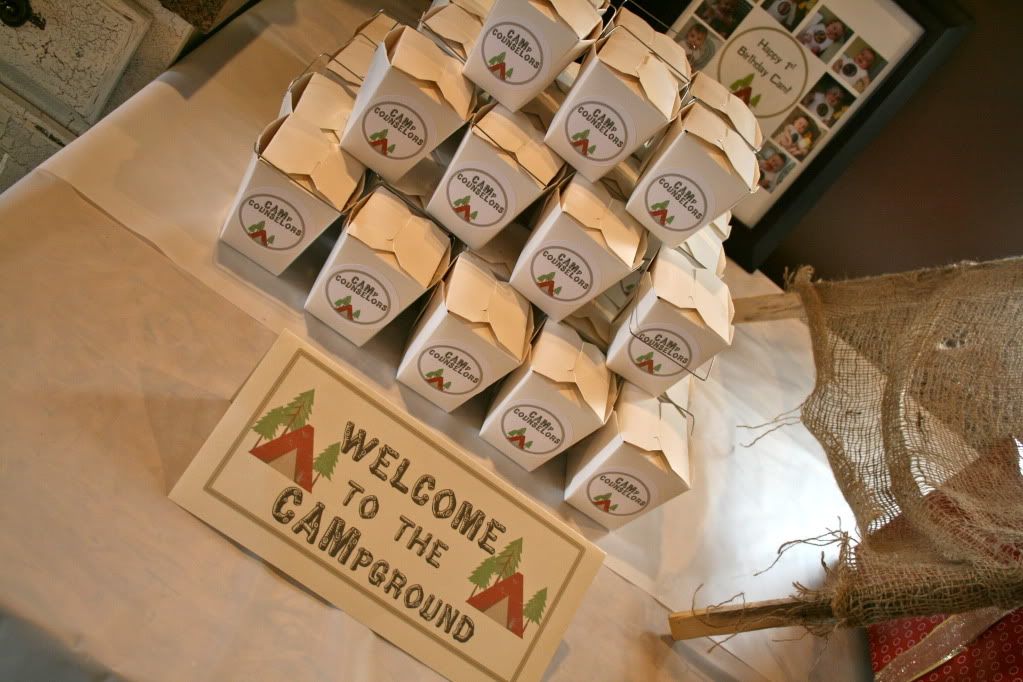
Happy CAMper Birthday Party!


MY baby. My BABY. My itty, bitty, teeny, tiny baby turned 1 yesterday. Yep. 1 Whole Year Old. I'll save the tears for my pillow, and instead share with you the celebration part. The part that helped this entertaining loving momma look past the fact that we were entertaining because my baby is now a toddler.

Months ago, I was trying to come up with a theme of sorts. I thought the whole "Winter ONEderland" thing was adorable, but probably better suited for a girl. Back to the drawing board, and it dawned on me. Let's have a CAMping party. And it began. I am certainly not the first one to have a camping themed party, because as soon as I started searching I was bombarded with tons of cute ideas. I do believe, as far as the Internet goes, that I was the first person to have a CAMping party though, and that is where my creative intellectual property ends :)

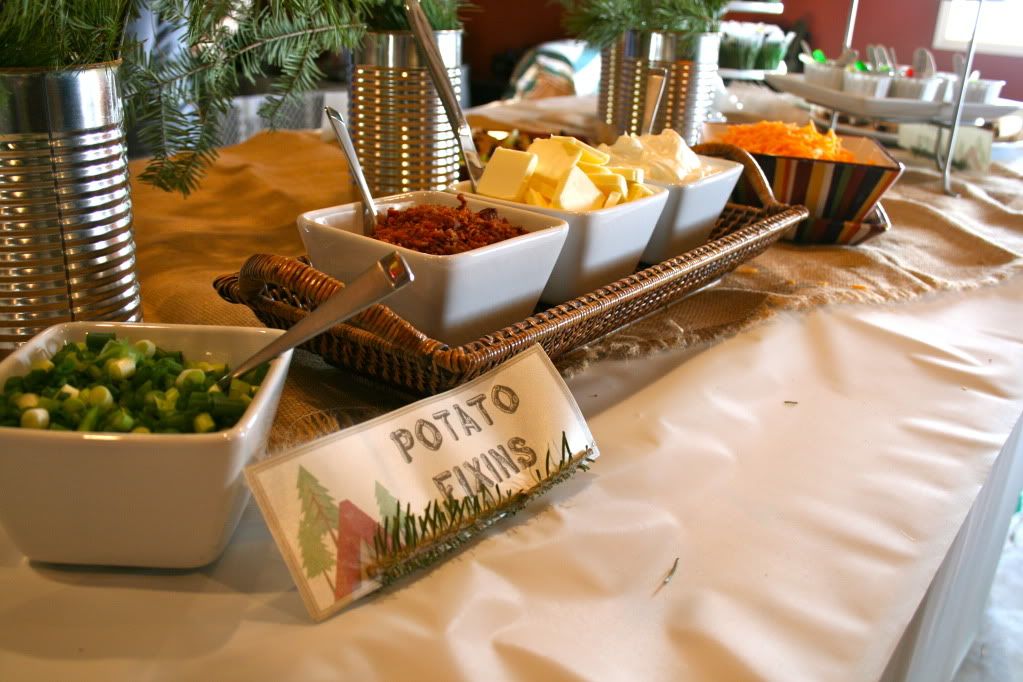
I will warn you. It's time for photo overload. I am going to keep the dialogue to a minimum or this will, seriously, be the longest post in Blogger history.  Please feel free to ask any detail questions in the comments or the FB page!  :)

The Menu
  • CAMping Chili
  • CAMping Corn Chowder
  • Baked Potatoes
  • Potato Bar
  • Fresh Cut Vegetables & Dip
  • Dirt Pudding Cups
  • Dirt Cupcakes
  • S'Mores Bars
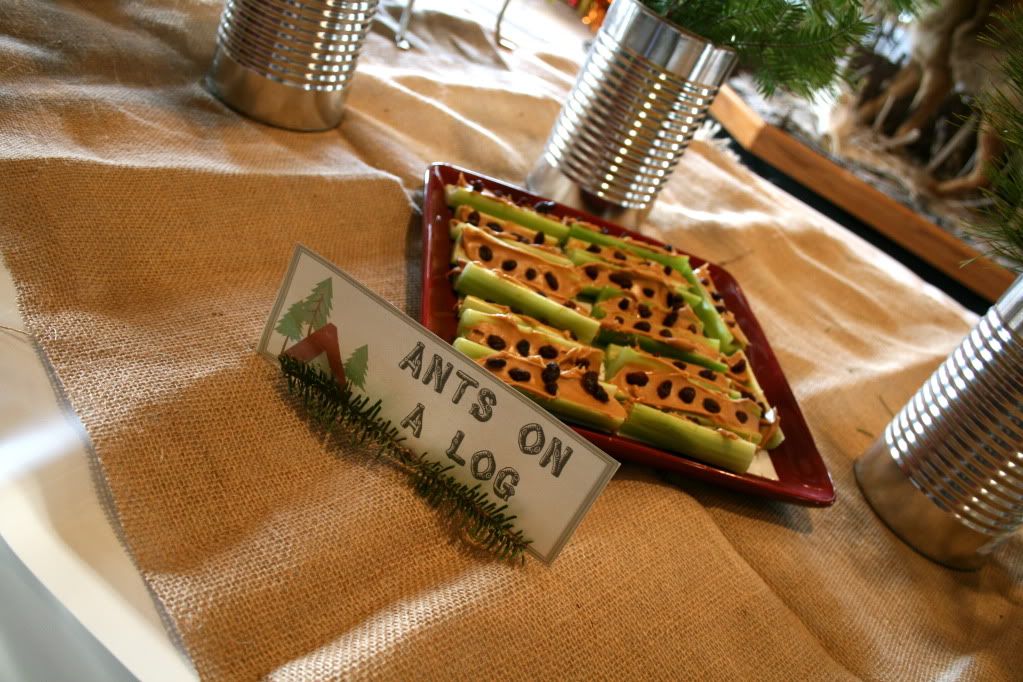
  • Ants on a Log
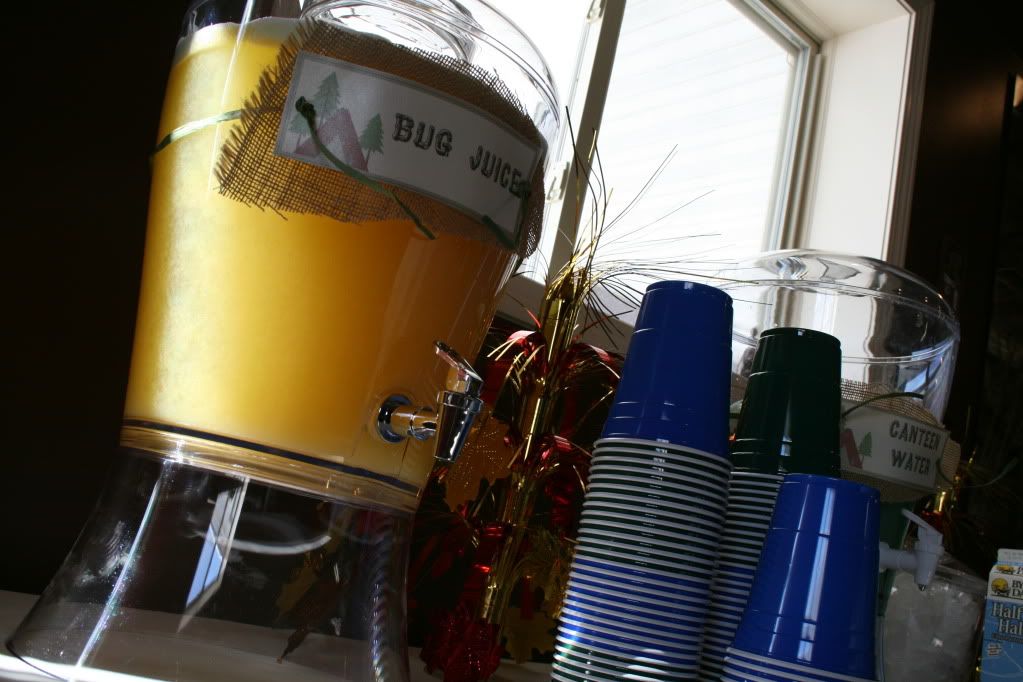
  • Bug Juice (Punch)
  • Canteen Water (Punch)
  • Bottled Water
  • Assorted Beer
  • Coffee


Weekend Prior: All decor and favors were completed
Thursday Prior: Cupcakes were baked
Friday: Chili and Chowder were made and refrigerated.  Dirt cups made and refrigerated.  S'mores Bars made and refrigerated.  Set up was started.
Day of: Cupcakes frosted, punch made, ants on a log made, all food was set up.


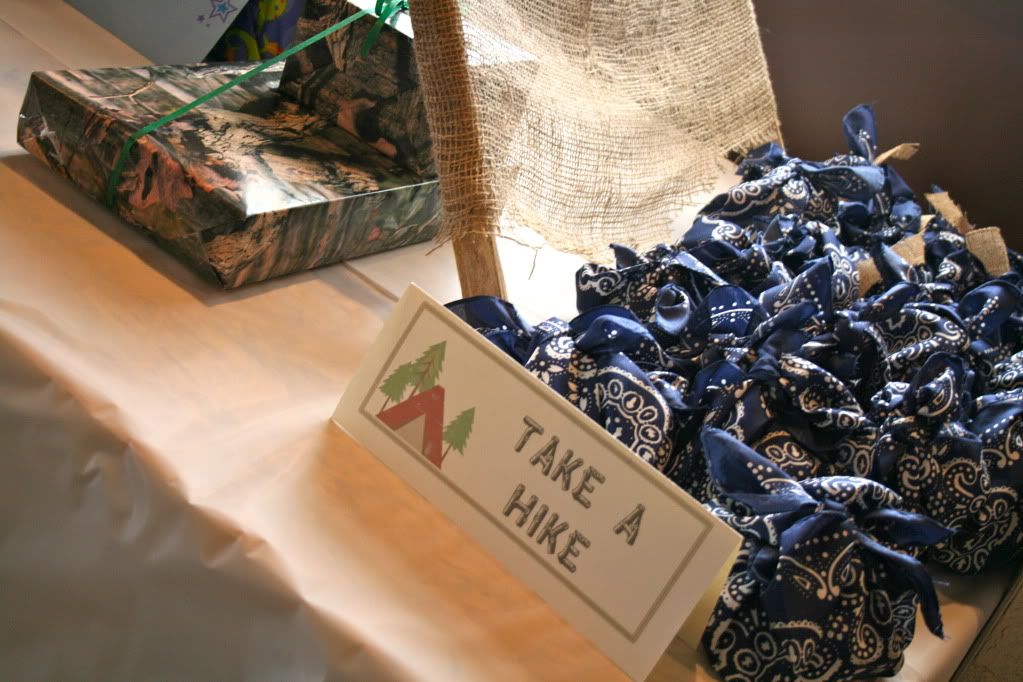
Kids received a "hiking bandana" with candy, homemade hot chocolate packets & Play-Doh


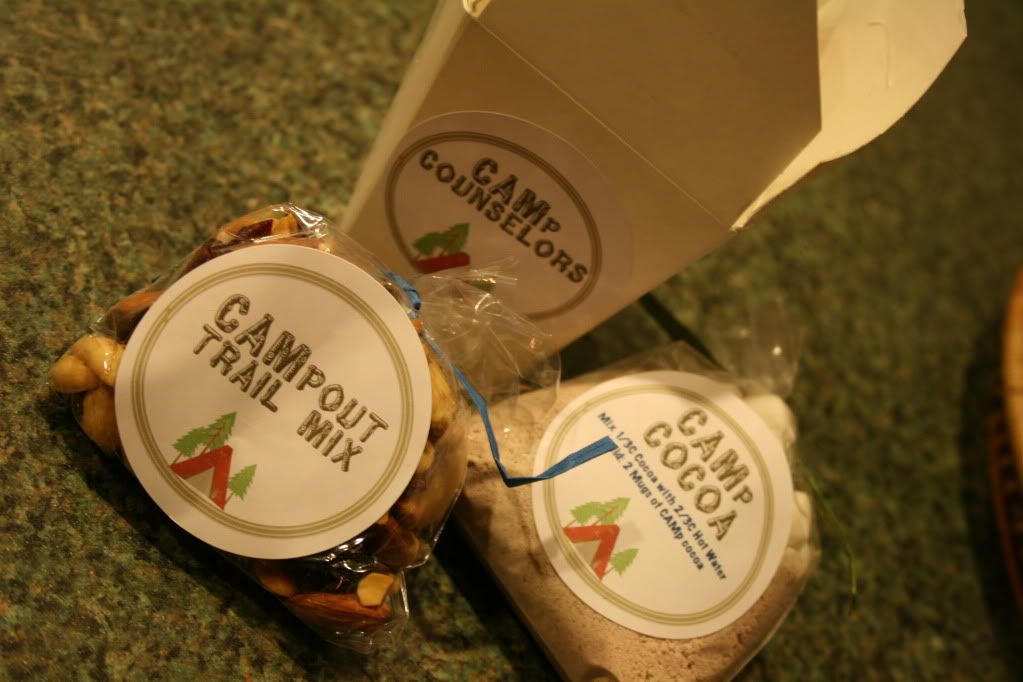
Adults received a take out box with homemade hot chocolate packets and homemade trail mix

I couldn't have been happier with how it all turned out.  We had about 50 guests, and just to tell you how big our families are, that accounted for no friends...at least that aren't family. :)  We are so fortunate to have had so many people come and celebrate with Cam!

Happy Birthday Baby Boy!!!


Wednesday, January 11, 2012

Laundry Room Update: Storage Storage and MORE Storage!

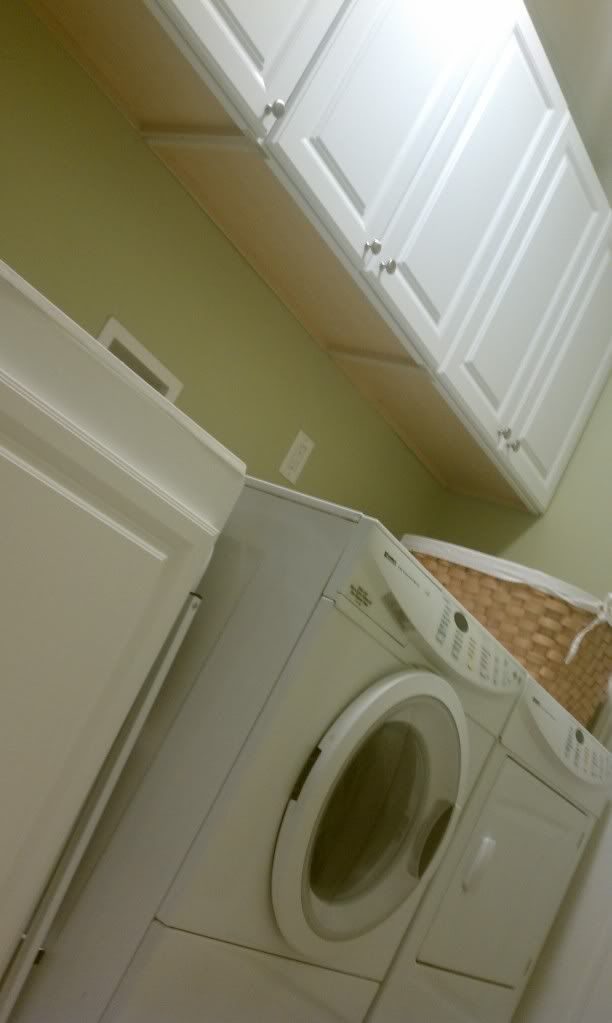
A little while ago, I shared with you my newly improved pantry. Part of the reason I was able to improve it so greatly was due to some added storage. Storage. I love that word. Anyway, back to the laundry room. When we first moved in, it looked a little something like this:

But not really, because that is our stuff and we had already painted the walls. See that little wire shelf above the dryer? Yeah, that was my laundry storage, and to be honest, I didn't even think it was that bad. That is, until I wanted to redo the pantry and I realized a good 25%+ of my pantry was being used by cleaning supplies. Pantry =/= Cleaning. At least not to the amount I had in there. This was definitely one of those things that we kept thinking "Why didn't we do this sooner?"

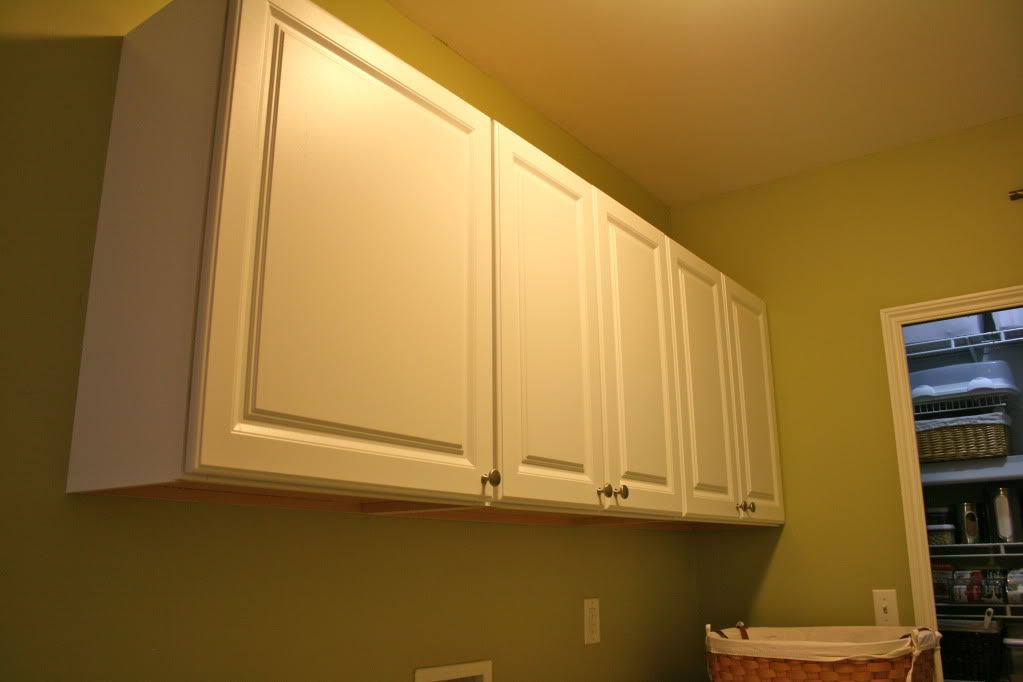
We bought stock white cabinets from Home Depot, one single door and two double door.

(thank goodness for my cell phone. this was the only way i could get a semi-decent shot of the front)


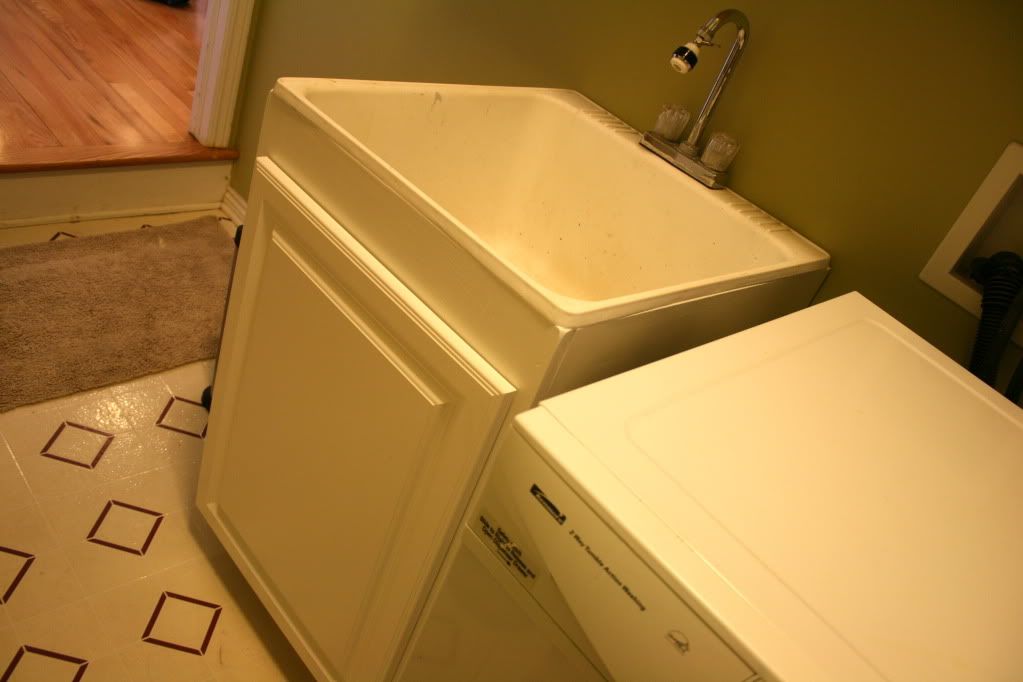
We also looked for a laundry tub solution, but were not interested in spending $200+ for something we didn't love. And it's a laundry tub for crying out loud. And after a quick search on Pinterest, I promptly exited that window. Apparently some people just want a regular sink with a pretty faucet. Yeah, no. We DIY. We need a large ugly tub that functions when we are working on a project. Not another bathroom vanity. So DIY we did. Carl and his Dad worked on it, and oddly, luckily, his Dad had a lone cabinet door that would match. Between some melamine and that random cabinet door, they came up with this.


I still want to change out the floors eventually, and possibly repaint. Don't tell Carl. We'll also come up with some sort of countertop solution for above the washer and dryer so I can 1. stop losing things behind it and 2. use that space for a drink area when we have large parties. And then of course I'd like to make it pretty, so perhaps I'll venture back to Pinterest and just ignore the sinks.

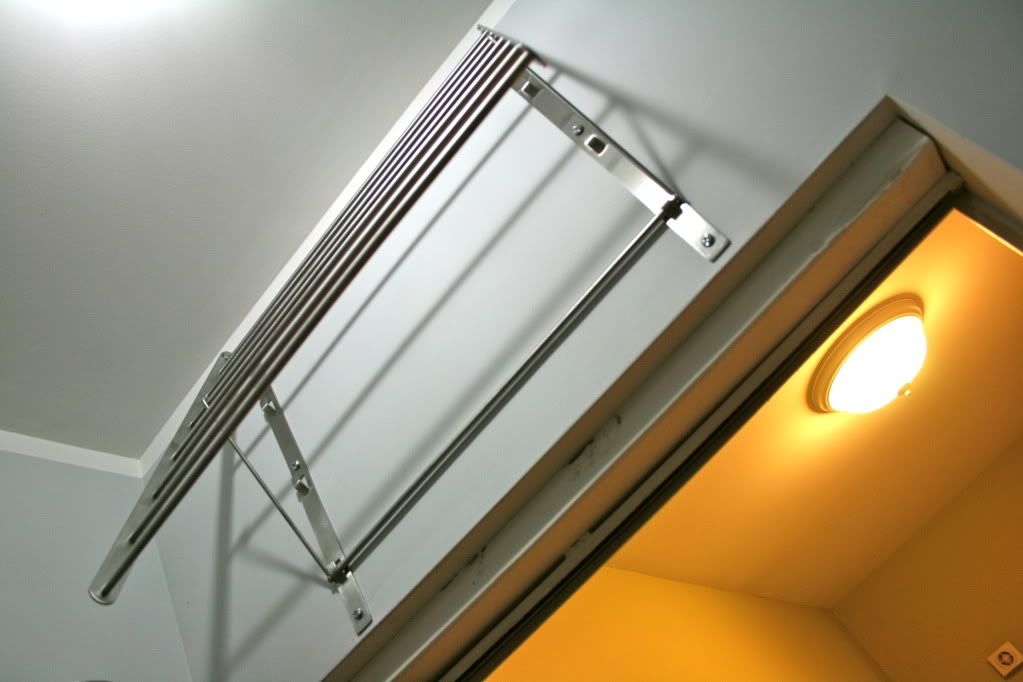
Then lastly, I didn't show you this in the pantry reveal, but it is in the pantry. I needed a space to hang clothes to dry, and the regular hanging part of the pantry wasn't very functional. The wet vac and vacuum would get in the way. The solution was a hanging rack mounted above the door. Always using that vertical space I tell ya! The clothes hang up high enough so they aren't in the way, but I can also just use hangers for a quick item here and there.

Alright, that's enough for today. I'll be back later to show you how I organized the interiors of the cabinets, but this room is a pain to photograph so I'm taking a break!

Friday, December 23, 2011

On the 11th Day Again of Christmas...

.....the Happy House gives to you....finished oodles of treats!

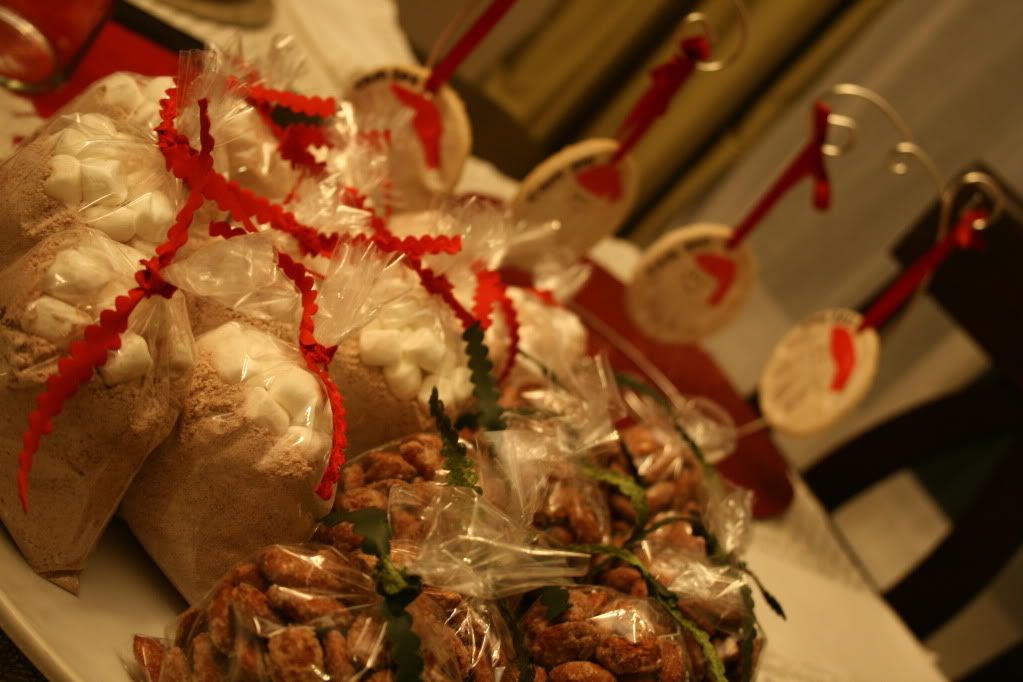
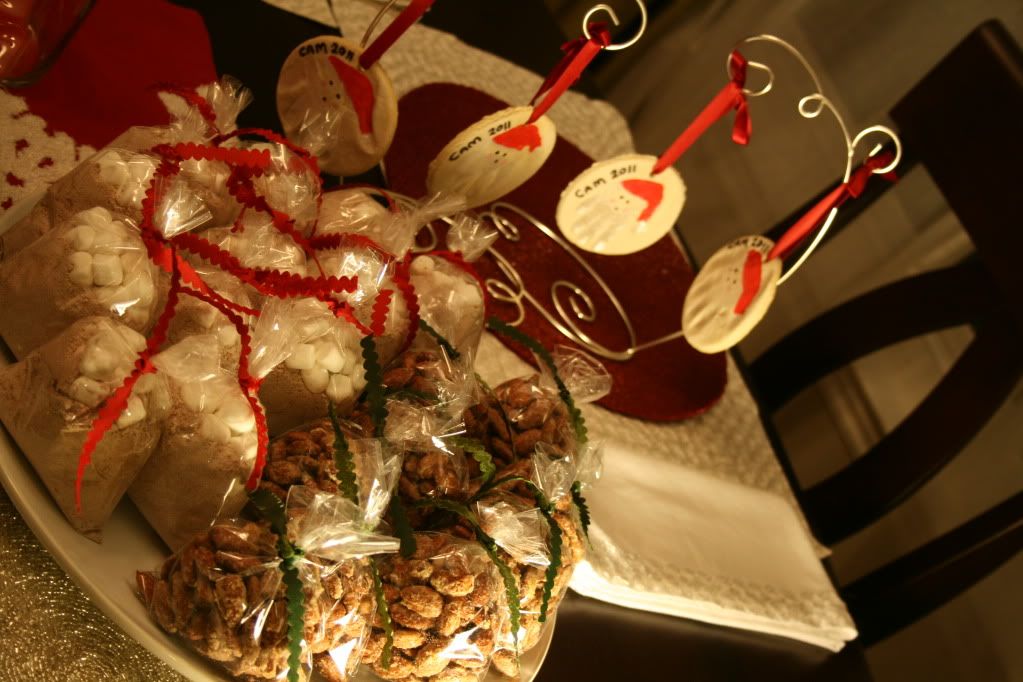
I want to share my Christmas Eve table with you, but I didn't get my pictures yet. So, instead, we're revisiting Day 11. Here are yesterday's treats all done up! (Recipes Below)


Roasted Cinnamon Almonds

Almonds: 8 Cups
Cinnamon: 1 tsp
Sugar: 1 cup
Salt: 1/2 tsp
Water: 2 tsp
2 Egg Whites

So what do you do? It's easy! And you'll never pay $8 for the almonds at the mall again, promise!

Preheat the oven to 250 degrees and lightly coat a large jelly roll pan with nonstick spray. Whisk the egg white and water just until frothy. Dump in the almonds and coat them in the egg. Mix together the sugar, cinnamon and salt. Sprinkle the mixture over the almonds and toss to coat. Place them in the oven for an hour, flipping the almonds every 15 minutes. Allow them to cool and store them in an airtight container. (I like to use our vacuum saver for this!)


Hot Cocoa Mix

11 Cups Dry Non-fat Milk
1 Cup Dry Creamer
3 Cups Powdered Sugar
2 Cups Chocolate Drink Mix (Like Nesquik)
1/4 Cup of Cocoa

Mix all the dry ingredients together. The ratio is 1/3c mix to 2/3c hot water.


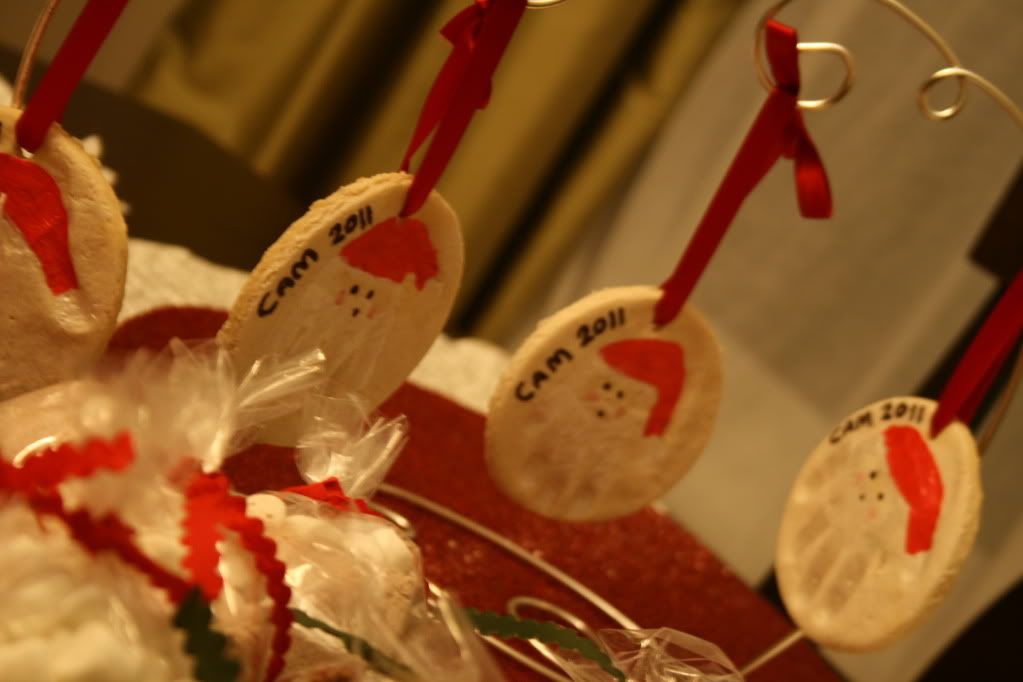
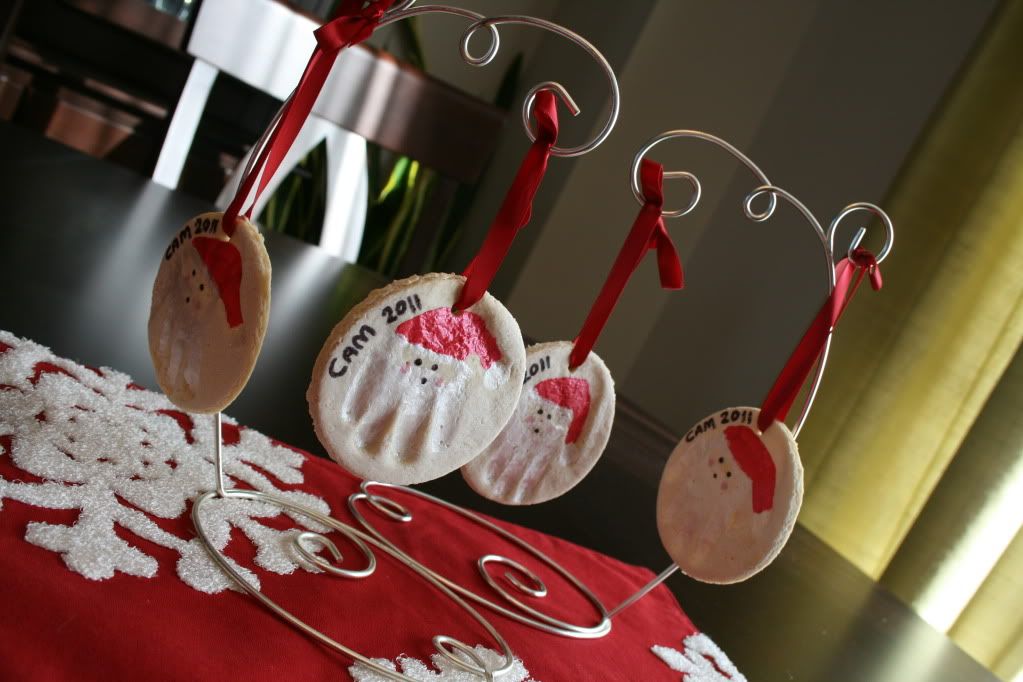
Santa Handprint Ornaments
I followed these instructions for the ornaments and painted with acrylic paints.

Wednesday, December 14, 2011

On the 3rd Day of Christmas....

I thought about this the other day when I posted the Christmas Tree. I was 12 days away from Christmas, but I didn't want to jinx myself. However, now I feel like I'm on a roll and it's more of a challenge! I'm going to try to give you a Christmas post (decor, entertaining, gift, etc.) up until Christmas. Let's see if I can fulfill my own challenge!

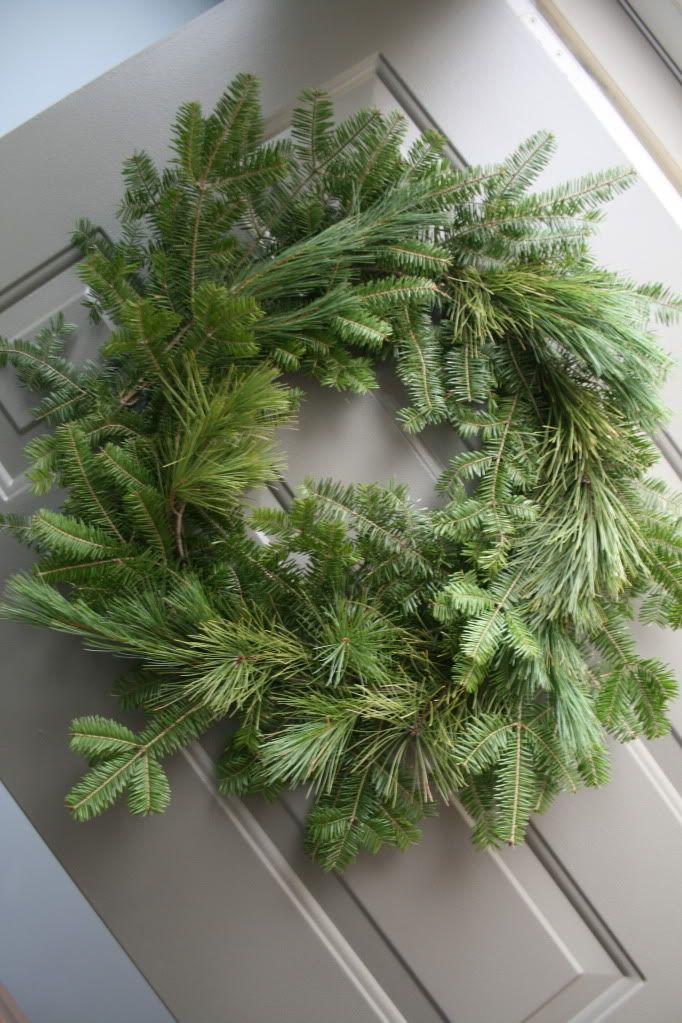
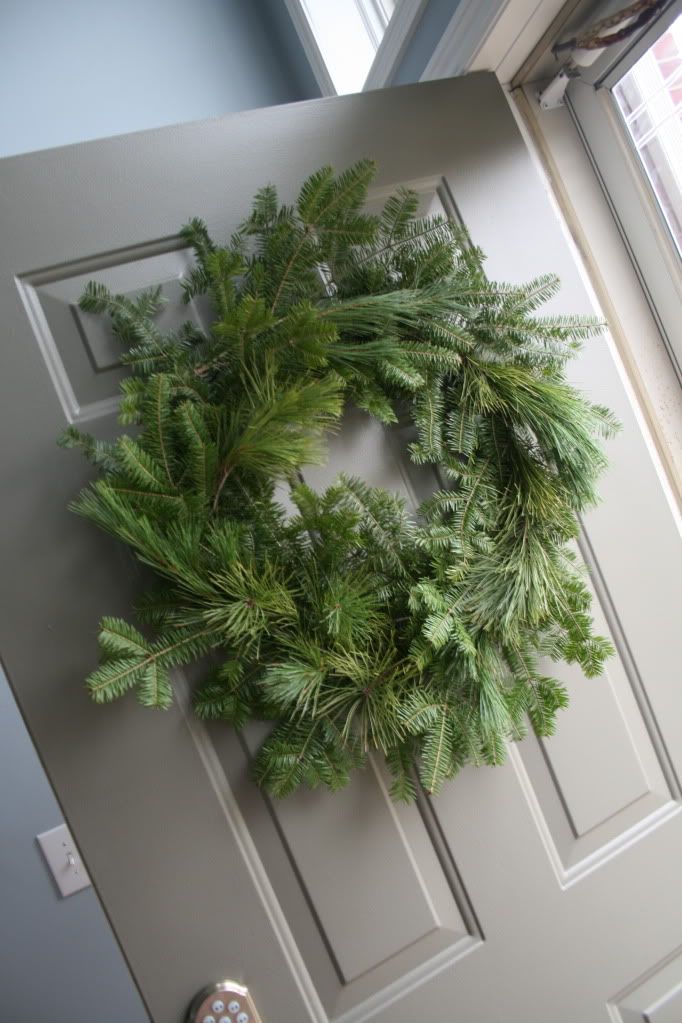
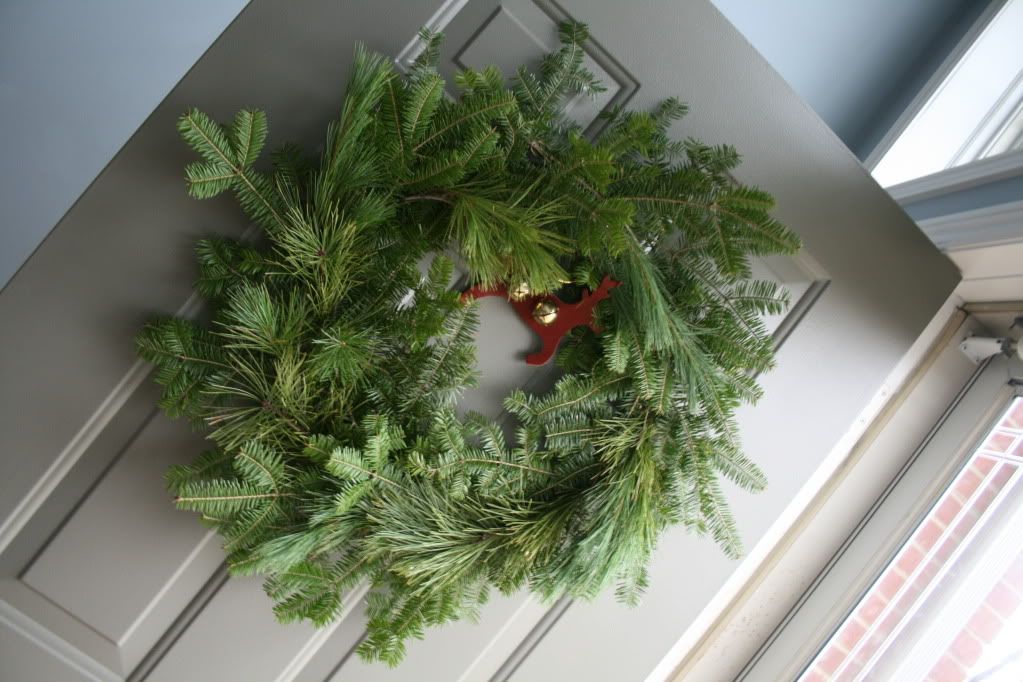
On the 3rd day of Christmas the Happy House gives to you...the annual DIY Fresh Greenery Wreath. I showed you how to make your own here, and then I also showed you last year's version here. They aren't all that different from one another, mostly because I like it to be really simple and unrefined.


This year, we bought a cute, little, leather reindeer with jingle bells. I can't wait to hear the holidays every time we open the door!

I haven't decided if I want to add a ribbon to hang it from as I've done in years passed. I might give it a try later today to see if I like it, but I'm kind of digging this extremely simple version this year! But of course I like your opinions...ribbon or no ribbon?

Sunday, November 20, 2011

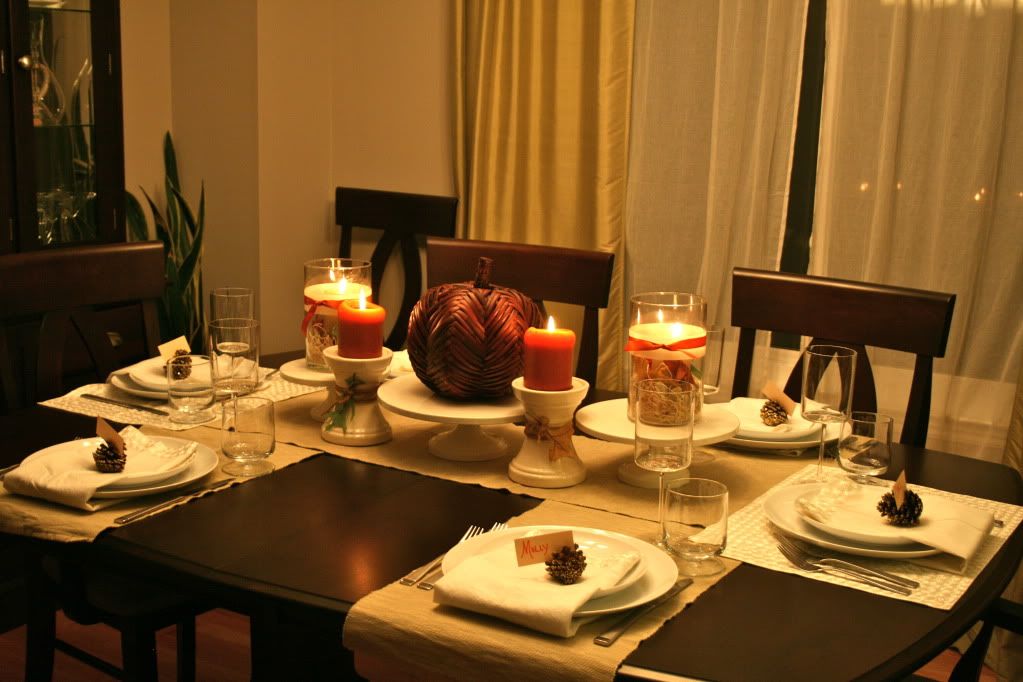
Thanksgiving Tablescape

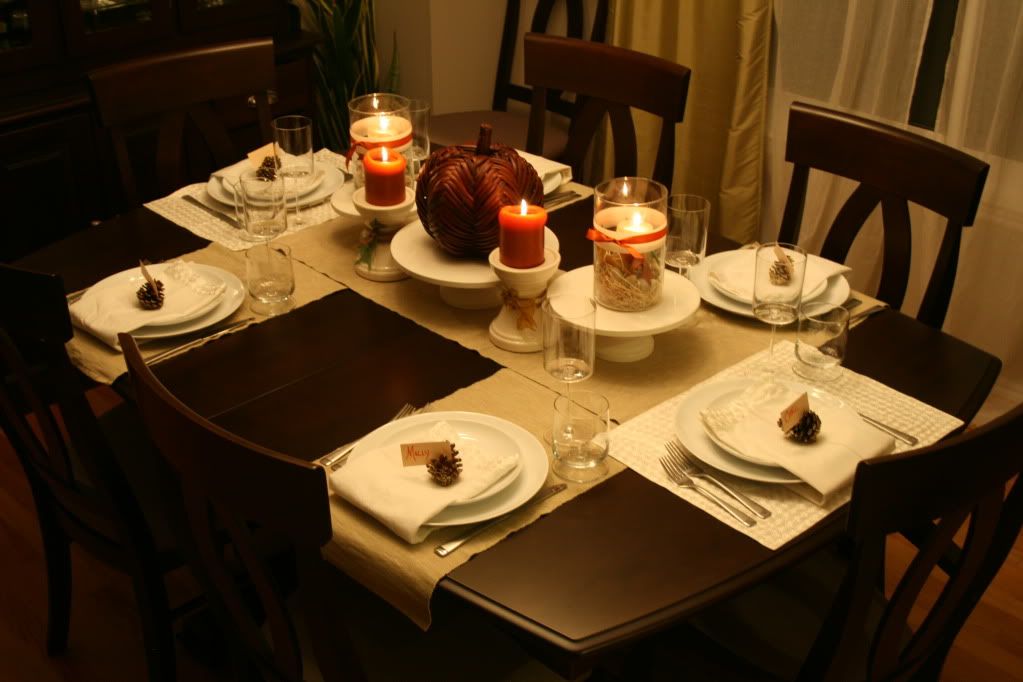
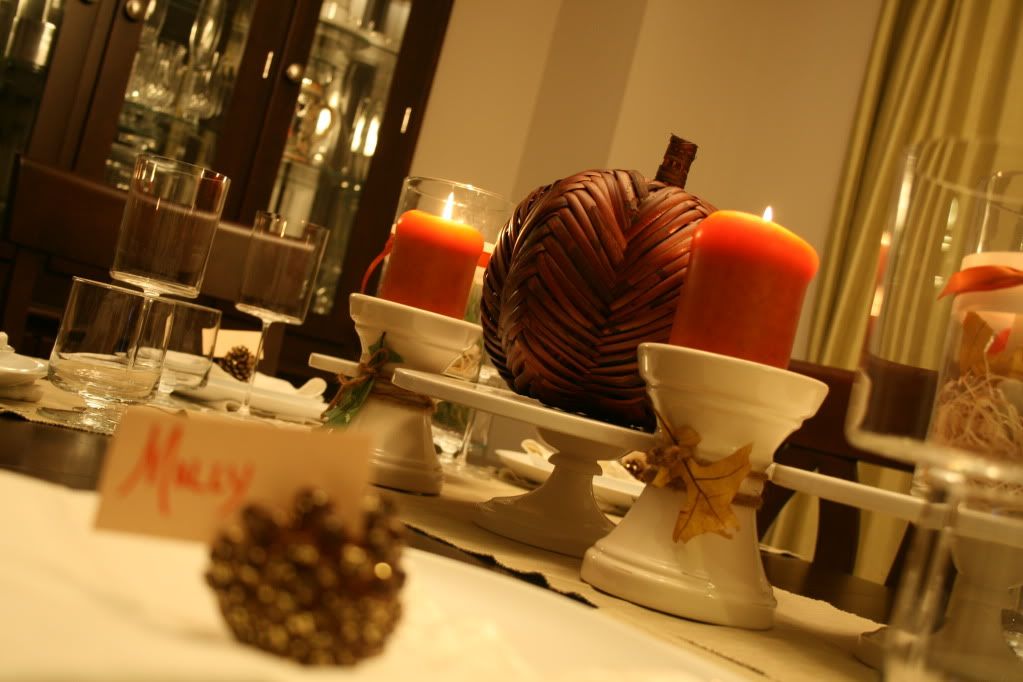
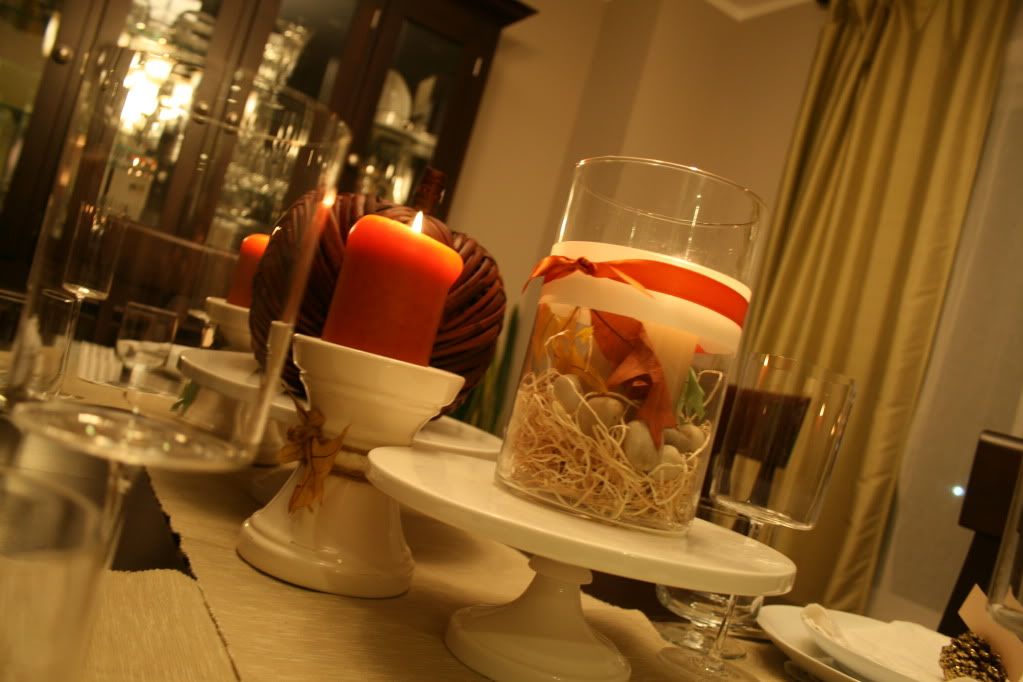
Since the only Thanksgiving I got to host this year was the Mock Thanksgiving, I didn't have a chance to do a formal table. I linked my previous post up with the Dare to DIY Party over at the NewlyWoodwards, but I wanted to take my challenge a step further and set out table. Had our group been smaller, it would have looked a little something like this...


Not that I'm complaining! I loved our big group, I just wanted in on the small group fun :) Did you set your table this week? Go share it at the Dare to DIY Party!

Dare to DIY

Sunday, November 13, 2011

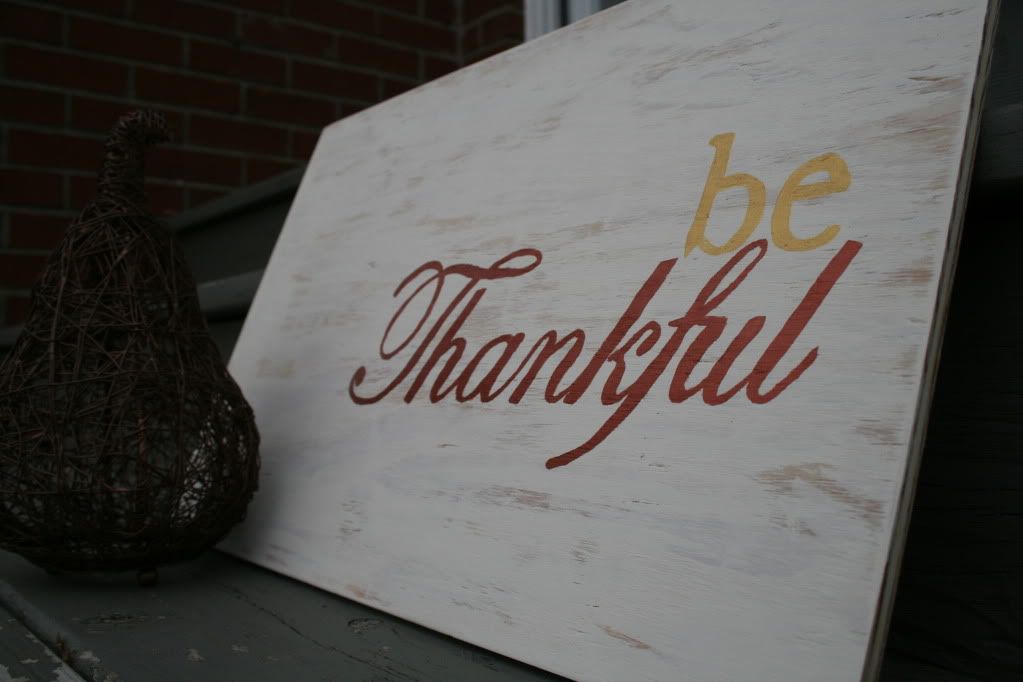
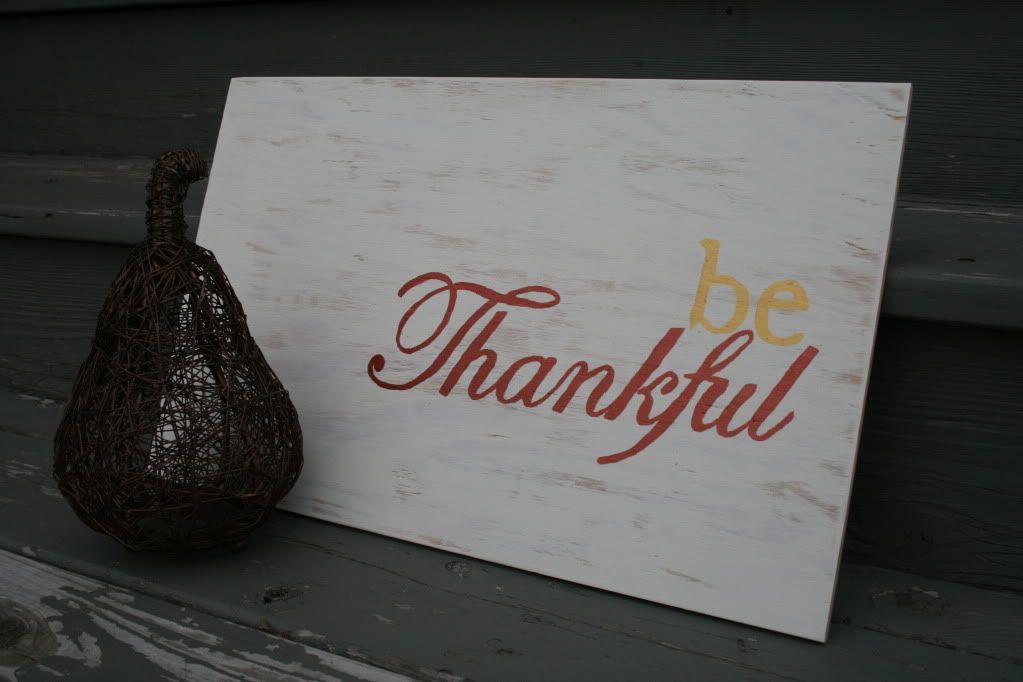
DIY Rustic Thanksigiving Sign


How cute is my little sign? Cute huh? After browsing around Pinterest and seeing tons of cute little holiday signs, I decided I needed to make my own. I especially decided I would be making it since they can cost upwards of $70. $70. I am not even kidding. I made mine for less than $17. I say less than because I have more supplies than I really need, and let's just say I have enough to make more signs :)

What you need:
  • A piece of plywood, cut to 18in x 11 1/4in
  • Antique White Paint
  • Colored paint of your choice
  • A foam brush
  • Small paint brushes
  • Carbon Paper


1. Give the plywood a light sanding, wipe off dust

2. Using the foam brush, paint the wood with the Antique White paint. Use long strokes and if you want the rustic look, don't worry about complete coverage. Allow that to dry for one hour.

3. Decide on a saying, font and placement of your saying. I chose "be Thankful." The "be" is Baskerville, font size 200. The "Thankful" is Edwardian Script, font size 288. You can easily download different fonts at websites like www.dafont.com.

4. Print the saying out, and cut it down to the word. It doesn't have to be perfect, just cut off the major excess.

5. Tape the saying on your board as you want it, (I just did one word at a time) and place the carbon paper, carbon facing down, under your piece of paper. Trace the outline of your word.

6. Remove the carbon paper, and paint your traced word.

7. Repeat steps 4-6 until your words are complete.

8. Give your words at least 2 coats of paint to really have full coverage.


I haven't given it permanent home yet, but I'm having fun trying it out in new spots around the house! I'll have to figure out where it will go before Saturday's Mock Thanksgiving though! So that's it. Are you going to make your own sign? Are you following my little sign's advice? Be thankful :)


I'm linking up at the....

Dare to DIY
The DIY Show Off

Tuesday, September 6, 2011

Our DIY Daily Organization System

I've been coveting Pottery Barn's Daily System for I don't even know how long! I've been telling Carl for quite some time that we need a family calendar. And as much as I love my technology, I just really like to be able to view a calendar, right in front of me and not have to check a device to see what I have coming up that month. Once we furnished the office, I knew the calendar would find a home there. We measured, configured and tried to determine a way to make the PB Daily System work for us. It wasn't happening. We decided the cons outweighed the pros.


Pros:
Molly really likes it.

Cons:
The dimensions weren't fitting on either available wall in the office
The cost...it would have been over $250 to get what we needed, plus shipping

Boo, friends, major boo. But the bonus is that we came up with a new plan! Yippee! I came up with the idea to make our own daily system out of frames- using them as whiteboards. I wanted two calendar boards so I could see a month ahead at a glance, one blackboard for quick notes, and such and then one frame to house our to do and to file folders.

Step 1: Buy the materials
4 frames
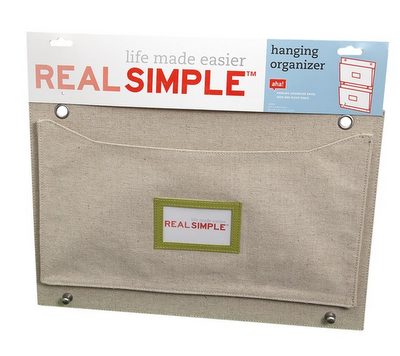
2 wall organizers (pictured below)
Black chalkboard spray paint
Frosted glass spray paint
Black poster paint marker
Wall hooks
Clear silicone

We chose these hanging organizers because of the simplicity and the fact that they hooked on to one another. Love em! More on these later.

Step 2: Make the whiteboards
We removed all the materials from the frames. We used two rectangle frames for two calendars, so we could view a month ahead at a glance. We used a ruler and level to draw out the lines for the calendar on the backside of the glass, then sprayed it with two coats of frosted glass spray paint. We inserted the glass back in the frame and used some clear silicone to keep the glass from moving around. Leaving the back off would allow the wall to show through, making that the background color.


Then, for the blackboard, we used a longer, skinnier rectangle frame. Again, we removed all the inserts, but this time we sprayed the back with a blackboard paint. Upon turning it around, we realized it looked really awesome and went with making it a black dry erase board. However, we can always turn the glass around if we want since we were able to put the backing on that one.

Step 3: Configure hanging organizers

We took the hanging organizers, and hooked them together, as they are made to do that. We purchased a larger frame, replace the inserts with a backer board cut down to the frame size. Carl simply stapled the organizers to the backer board, and put it back in the frame.


Step 4: Time to hang!

We used some one step brass hooks. We wanted something that would make the frames easy to come off the wall, especially for the calendars. It makes filling out an entire month much easier!


Step 6: Enjoy Your Organized Life :)


Now I just need to sort the top shelf, including finding a fun way to keep all my dry erase markers organized! I'll be keeping a look out for a good solution.


So what was the cost on our project?
4 frames.................................................$81
2 wall organizers (pictured below).......$30
Black chalkboard spray paint...............$4
Frosted glass spray paint......................$4
Black poster paint marker....................$3
Wall hooks............................................$2
Clear silicone........................................ Free- we had some on hand
Total......................................................$124!

That's quite the cost difference! Not to mention, it was the right size for our wall! I'm loving filling out the calendars and I finally have an easy spot for my "To Dos" and "To Files." The second is especially helpful when I can't really be in the office during the day, but I can sneak in there to toss some stuff up there to organize later.

So did I inspire you to make your own daily organization system? Maybe not, but perhaps you can find inspiration in another pricey item and make it your own!
Blog Widget by LinkWithin