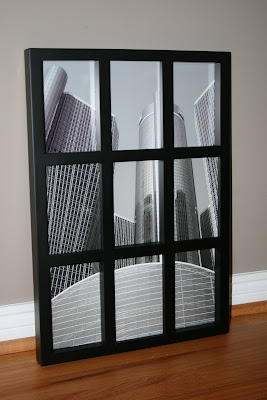
Yesterday, we were browsing for picture frames at Target and stumbled upon the one below. It is hard to tell, but the top left, top right, middle, bottom left and bottom right slots are all sunken deeper than the other slots. It gave it some visual interest, and Carl actually suggested we use it for a landscape picture.
So tonight, I put the picture we had taken years ago and this new frame to work. I really really really love it and can't wait to finish the other pieces that will go with it! Stay tuned for the rest of the project!

Not to mention- it was a super inexpensive project.
Frame = $20
Photos = $0* (we already had photo paper)
Total= $20!!
*Ok, even if you have to print them, we are talking like $3. So your total would be like $23!
Want step by step instructions on how to do this yourself? Keep reading.
1. Pick your favorite photo. I think a landscape photo will work best...but a portrait might actually look really awesome as well! (note to self...try this with a portrait...)
2. Open PowerPoint. Go to the page setup and make the height and width the same size as your frame. Mine was 12x18, so that is the size I made the slide.
3. Insert your picture onto the slide. Double click on the photo and make your picture the same size as the slide/frame. You may have to do a little cropping at this point to get it to the right size, but it shouldn't take much.
4. Copy the slide and paste it 9 times or as many openings you have +1 (you'll want to keep one extra just to have a fresh slide).
5. Make sure the ruler is visible. Then, starting with slide number 1, crop the photo to the top left down to 4x6- or whatever size your openings are. Move on to slide 2, and crop down to the middle top. Continue doing this until 9 slides each have one portion of the large photo.
6. Save each individual photo (not slide...right click on the actual photo) as a jpeg. Print the photos. Put in the frame. Ta da!


Very clever! That is awesome! It looks great! Thanks for sharing!
ReplyDeleteThis looks great! I'm trying to think of where in my house I could put something like this....
ReplyDelete