Showing posts with label Fall. Show all posts
Showing posts with label Fall. Show all posts
Monday, November 26, 2012
Peace Out Fall
Christmas is in full swing around these parts, so I'll get all the photos of the decor taken real soon! But I realized I never shared the living room fall decor. So one last piece before we say an official peace out to fall.
Sunday, November 25, 2012
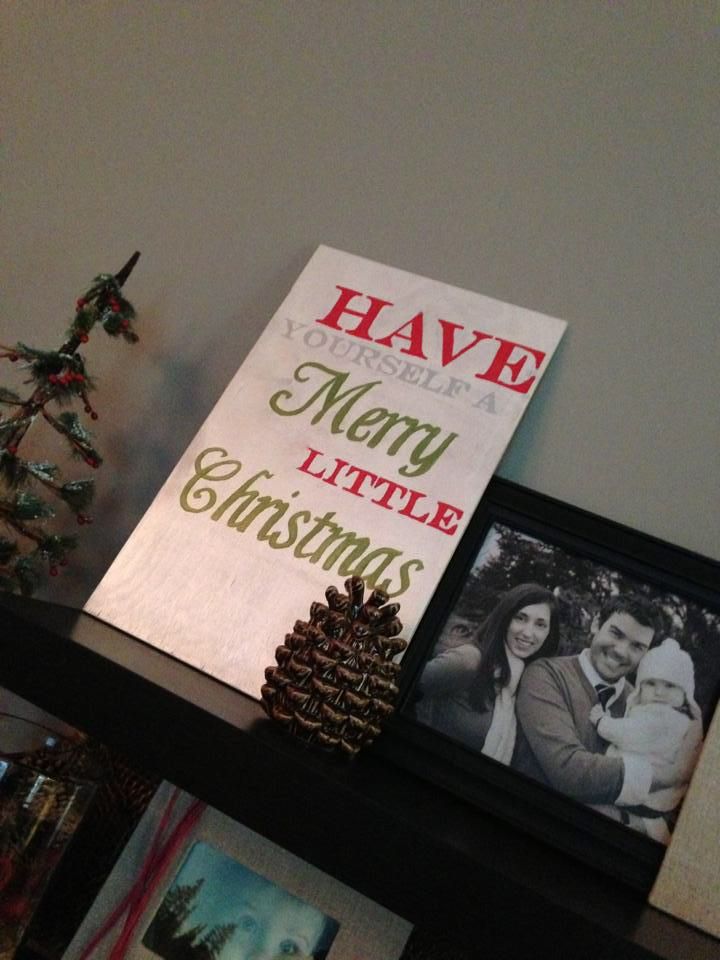
DIY Christmas Sign
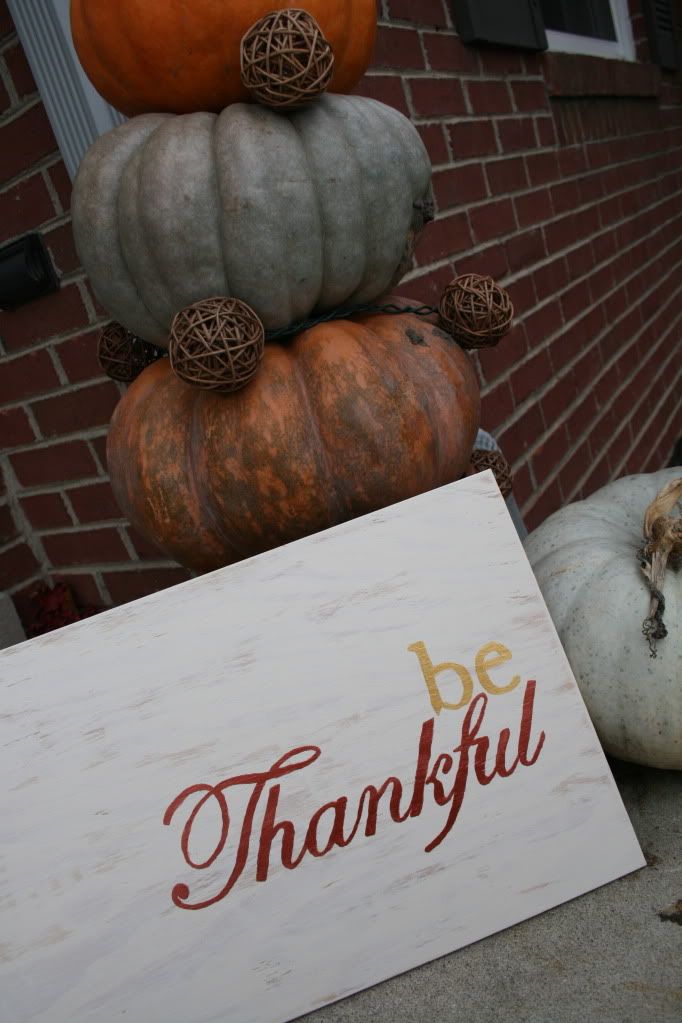
Last year, I made this adorable "be thankful" sign to add to my fall decor.
For about $17, I made what others are selling for upwards of $70. For no additional money, I flipped the sign and made a Christmas version this year.
What you need:
1. Give the plywood a light sanding, wipe off dust
2. Using the foam brush, paint the wood with the Metallic White paint. Use long strokes and if you want the rustic look, don't worry about complete coverage. Allow that to dry for one hour.
3. Decide on a saying, font, size and placement of your saying. You can easily download different fonts at websites like www.dafont.com.
4. Print the saying out, and cut it down to the word. It doesn't have to be perfect, just cut off the major excess.
5. Tape the saying on your board as you want it, (I just did one word at a time) and place the carbon paper, carbon facing down, under your piece of paper. Trace the outline of your word.
6. Remove the carbon paper, and paint your traced word.
7. Repeat steps 4-6 until your words are complete.
8. Give your words at least 2 coats of paint to really have full coverage. Allowing the paint to dry completely between coats helps to cover the carbon outline faster.
For about $17, I made what others are selling for upwards of $70. For no additional money, I flipped the sign and made a Christmas version this year.
What you need:
- A piece of plywood, cut to 18in x 11 1/4in
- White Metallic Paint
- Colored paints of your choice (For this I used a metallic green, red and silver)
- A foam brush
- Small paint brushes
- Carbon Paper
1. Give the plywood a light sanding, wipe off dust
2. Using the foam brush, paint the wood with the Metallic White paint. Use long strokes and if you want the rustic look, don't worry about complete coverage. Allow that to dry for one hour.
3. Decide on a saying, font, size and placement of your saying. You can easily download different fonts at websites like www.dafont.com.
4. Print the saying out, and cut it down to the word. It doesn't have to be perfect, just cut off the major excess.
5. Tape the saying on your board as you want it, (I just did one word at a time) and place the carbon paper, carbon facing down, under your piece of paper. Trace the outline of your word.
6. Remove the carbon paper, and paint your traced word.
7. Repeat steps 4-6 until your words are complete.
8. Give your words at least 2 coats of paint to really have full coverage. Allowing the paint to dry completely between coats helps to cover the carbon outline faster.
Tuesday, September 25, 2012
Family Room Fall
My oh my has my blogging life changed. Coming to you using the Mega Blocks table as a desk in the play room. :) Apparently 6 months of life is a lot to sum up, and the basement is just as large of a project for a post. So while I work on those, you get to enjoy my weekend project. The start of fall decor around these parts!!
The mantle is pretty similar to last year's version. I just loved it so much, I knew it wouldn't change a whole lot. It's just a mix of fall products like indian corn and gourds plus some ribbon to dress up plain candles. I put my "be thankful" sign up there this year. We sit in this room most often, so I thought it'd be the best place for that daily reminder as we head into the holiday season.


The mantle is pretty similar to last year's version. I just loved it so much, I knew it wouldn't change a whole lot. It's just a mix of fall products like indian corn and gourds plus some ribbon to dress up plain candles. I put my "be thankful" sign up there this year. We sit in this room most often, so I thought it'd be the best place for that daily reminder as we head into the holiday season.


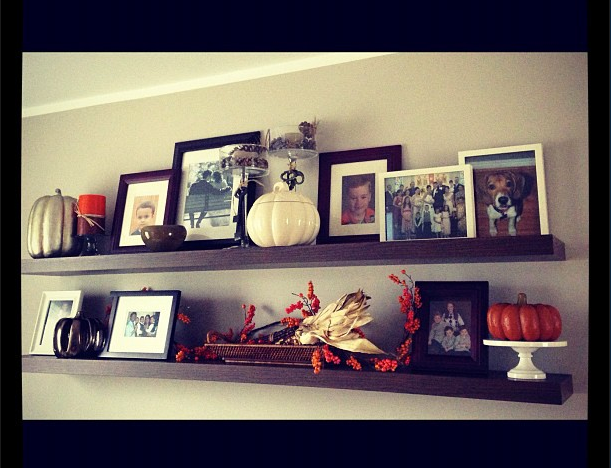
The floating shelves in the family room are also similar, but still different. I wasn't 100% pleased with last year's outcome, so I definitely wanted to change them up a bit.


That sums up the family room. I have to work on the rest of the house this week. Have you started yours now that it is officially fall? It's pretty much a guarantee to make your house feel cozy and warm!
Saturday, December 3, 2011
Friday Friendsgiving
As we were eating our 3rd, and what should have been our final, Thanksgiving dinner up at the cabin, I told Carl I needed more. Just one more turkey dinner, with all the fixings, and I'd be set. I decided to buy a turkey when we got home, invite a couple of friends over and enjoy Thanksgiving one more time!
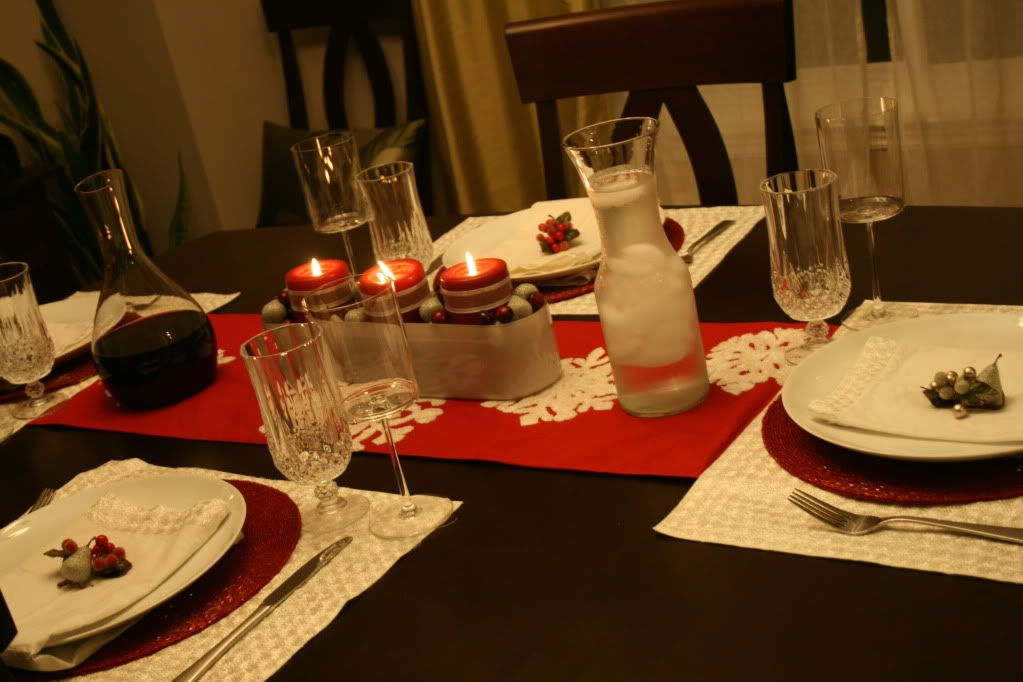
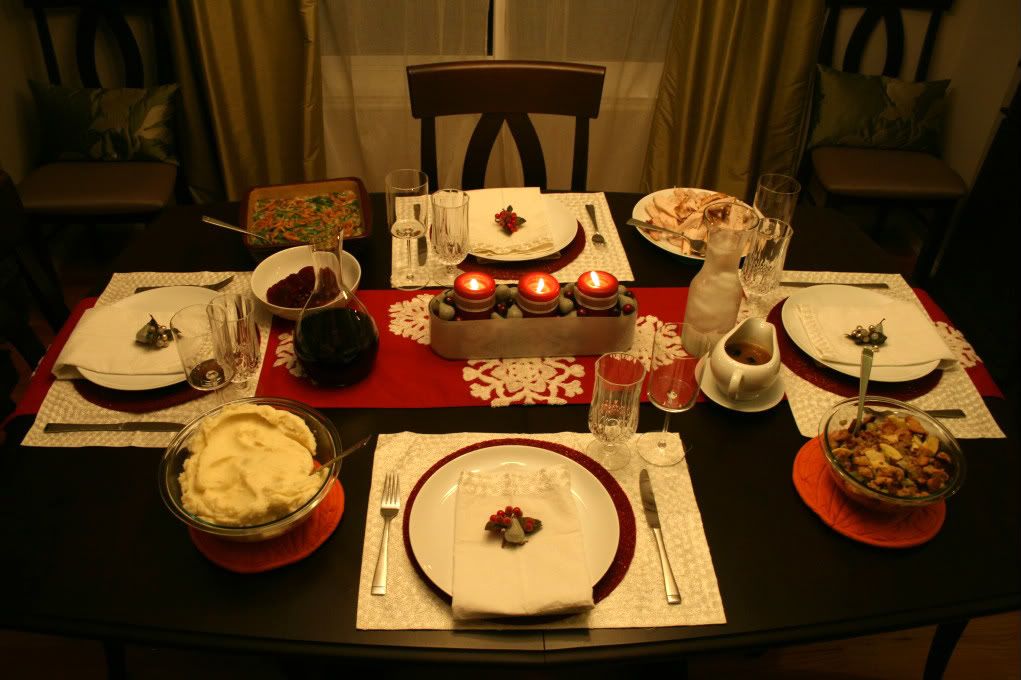
I wasn't going to do anything with the table, but at the last minute just dressed it up a bit to welcome in the Christmas season. I just used things I had from last year and regular season items as well. Just goes to show you can entertain any time for any reason. It was a mix of fancy and casual and completely delicious!
The menu was seriously traditional:
2:30p start the stuffing and prep the turkey
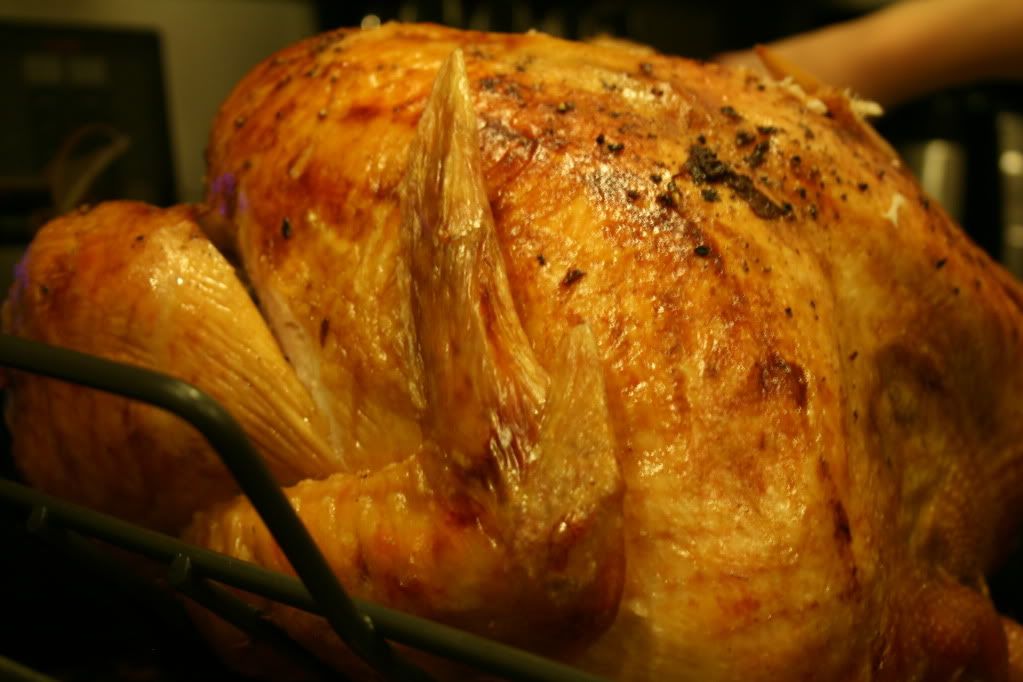
3p: Start the turkey (8.5lb turkey to be done about 6:30p in time to rest and carve)
5p: peel and cut potatoes, put in water to keep from browning
5:30p put together green bean casserole
6p: set the table, wine in the decanter, ice water in the carafe
6:30p boil and mash potatoes, take turkey out and cover with aluminum foil, put casserole and stuffing in the oven
7p: light candles, guests arrive, carve turkey, get everything on the table
If you are hosting this year, here is my quick guideline for entertaining.
1-2 weeks out: Choose the Menu
2-3 days before: Grocery Shop
1-2 days before: Prep your table to be sure you aren't missing anything
1 day before: Do as much cleaning as possible
Day of: Start cooking early, be sure to leave time to get ready and enjoy!

I wasn't going to do anything with the table, but at the last minute just dressed it up a bit to welcome in the Christmas season. I just used things I had from last year and regular season items as well. Just goes to show you can entertain any time for any reason. It was a mix of fancy and casual and completely delicious!
The menu was seriously traditional:
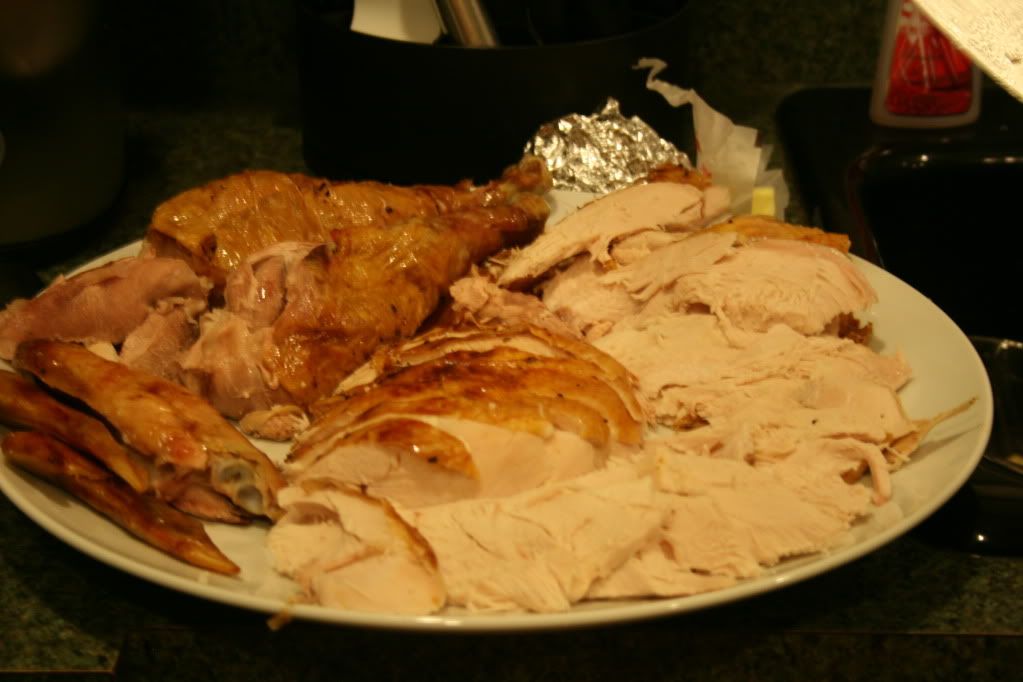
- Roast Turkey and Drippings Gravy
- Creamy Mashed Potatoes
- Homemade Sweet & Savory Stuffing
- Green Bean Casserole
- Cranberry Sauce
- Wine
- Ice Water
2:30p start the stuffing and prep the turkey
3p: Start the turkey (8.5lb turkey to be done about 6:30p in time to rest and carve)
5p: peel and cut potatoes, put in water to keep from browning
5:30p put together green bean casserole
6p: set the table, wine in the decanter, ice water in the carafe
6:30p boil and mash potatoes, take turkey out and cover with aluminum foil, put casserole and stuffing in the oven
7p: light candles, guests arrive, carve turkey, get everything on the table
If you are hosting this year, here is my quick guideline for entertaining.
1-2 weeks out: Choose the Menu
2-3 days before: Grocery Shop
1-2 days before: Prep your table to be sure you aren't missing anything
1 day before: Do as much cleaning as possible
Day of: Start cooking early, be sure to leave time to get ready and enjoy!
Sunday, November 20, 2011
Thanksgiving Tablescape
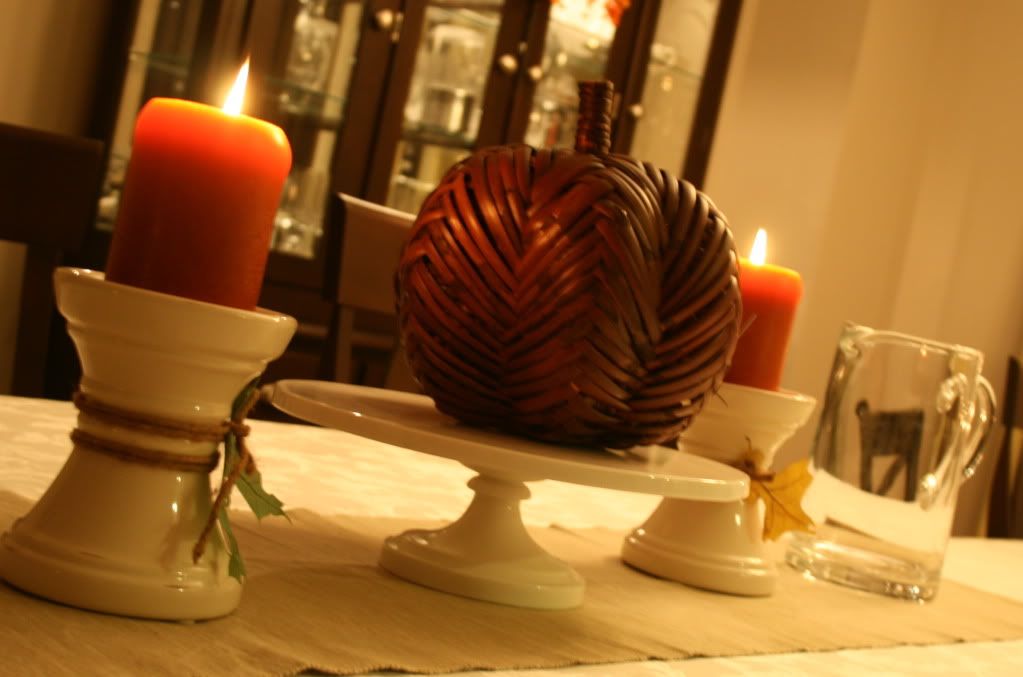
Since the only Thanksgiving I got to host this year was the Mock Thanksgiving, I didn't have a chance to do a formal table. I linked my previous post up with the Dare to DIY Party over at the NewlyWoodwards, but I wanted to take my challenge a step further and set out table. Had our group been smaller, it would have looked a little something like this...


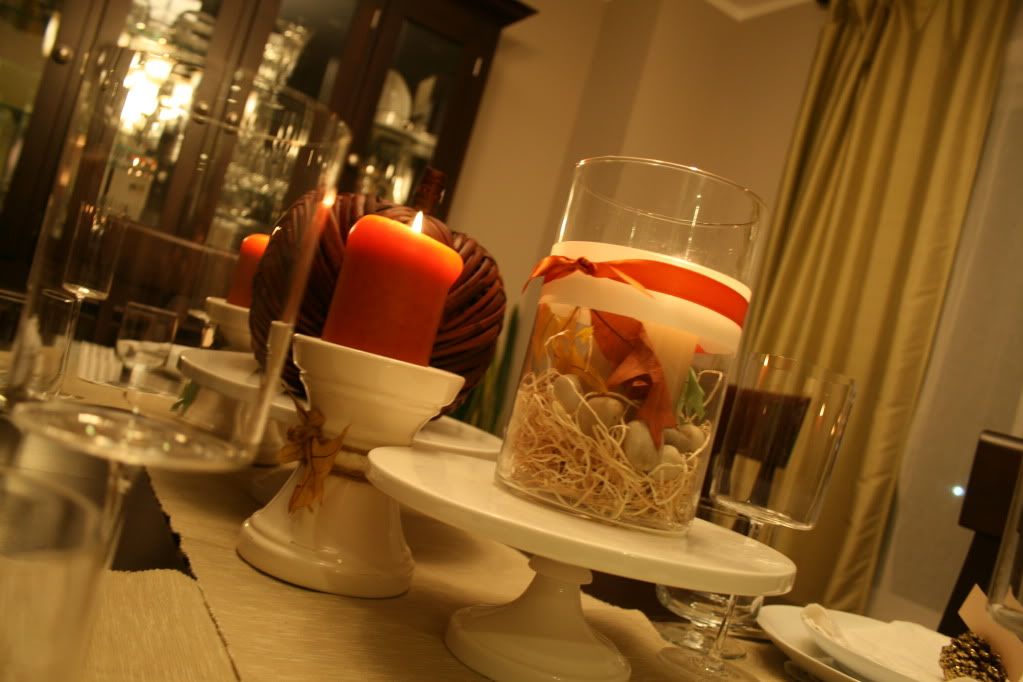
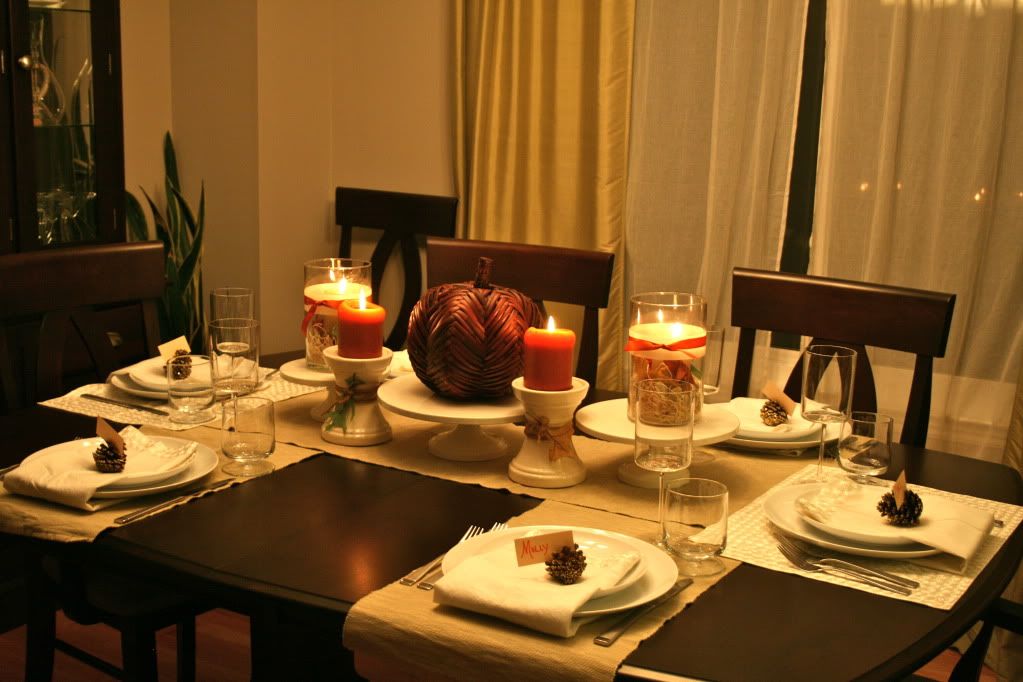
Not that I'm complaining! I loved our big group, I just wanted in on the small group fun :) Did you set your table this week? Go share it at the Dare to DIY Party!

Not that I'm complaining! I loved our big group, I just wanted in on the small group fun :) Did you set your table this week? Go share it at the Dare to DIY Party!
Mock Thanksgiving: Tips, Tricks & Photos Galore!
What do you do when you normally don't host more than 12 people for dinner at a time and you realize you are about to host 18? You improvise!
I hosted a Mock Thanksgiving in 2009, then took a year off because I couldn't see my feet last Thanksgiving. This year, I wanted to bring it back in style! I invited 17 of my favorite ladies to join in a holiday dinner without the family politics :) Oh and all the mommas left the babies with the husbands. Including me. Carl took Cam AND Gibson to his parents' house.
But I'm getting ahead of myself.
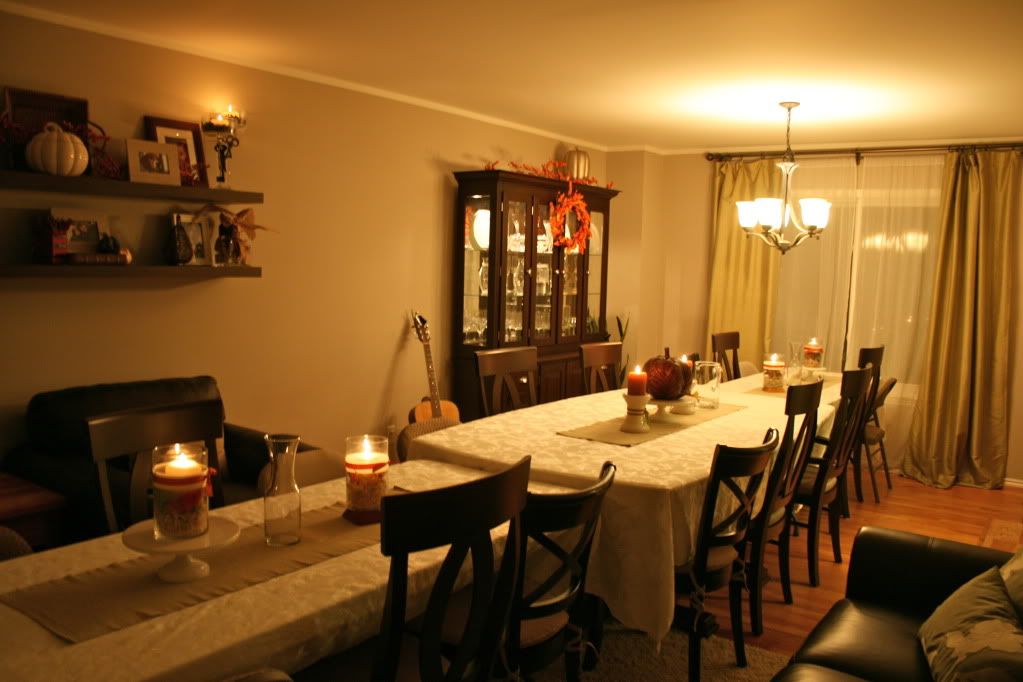
Scene: Friday Night. Carl and I are in the living/dining room trying to figure out how to seat 18 people.
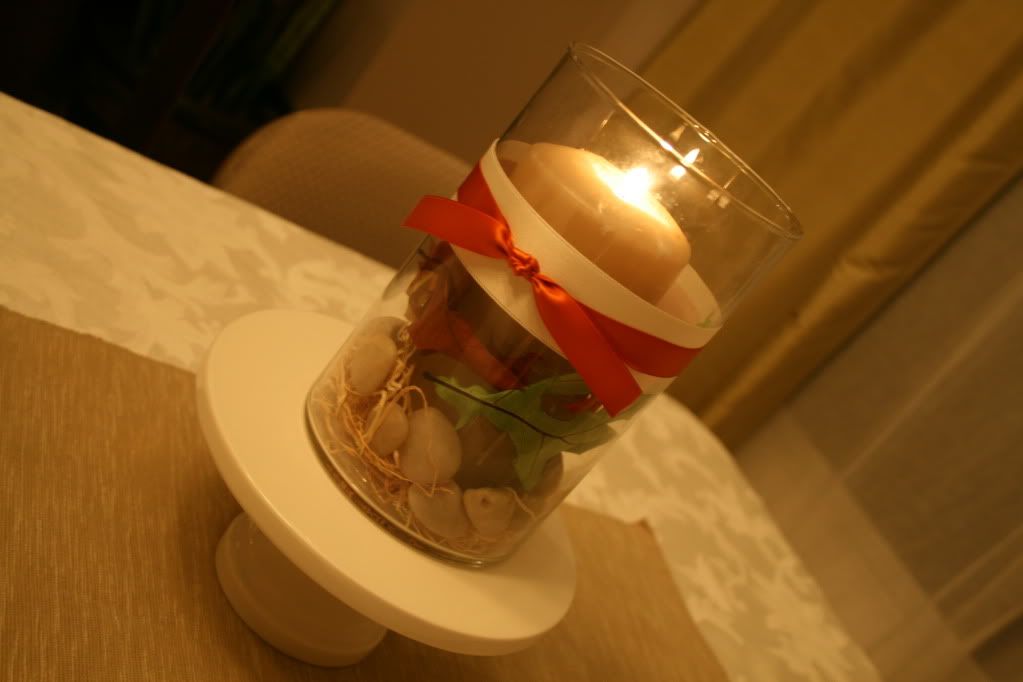
Our dining table and two 6ft folding tables later, we came up with a solution. In my head, I needed it to be symmetrical, so we created one long table. It was hard to photograph the whole thing, but I think we succeeded in 1. it being symmetrical and 2. it not looking like a soup kitchen (right Tricia?). I didn't buy anything new for decor, I just used what I had- a mix of decorative basket filler, stones, faux leaves, candles and ribbon seems to do the trick. The glass candleholders were bought for our wedding and I've used them countless times now!
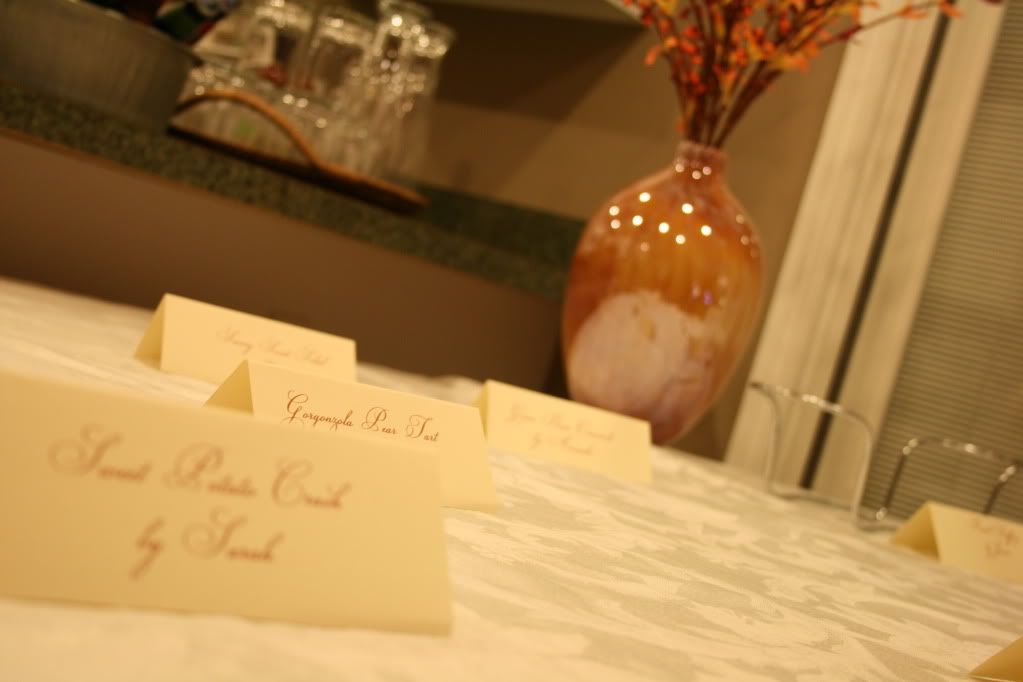
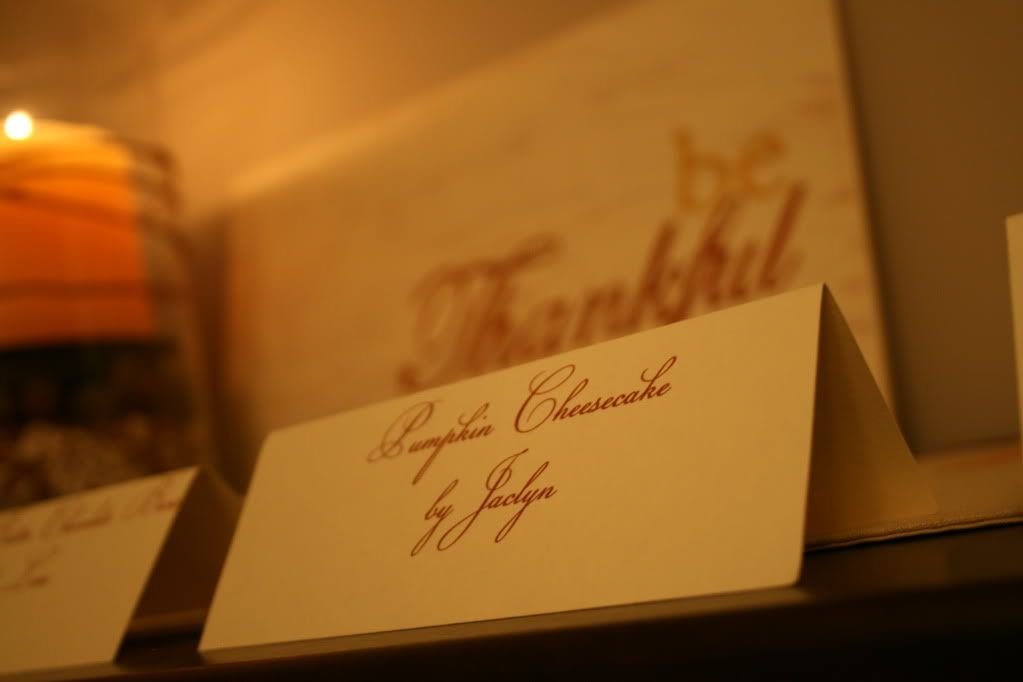
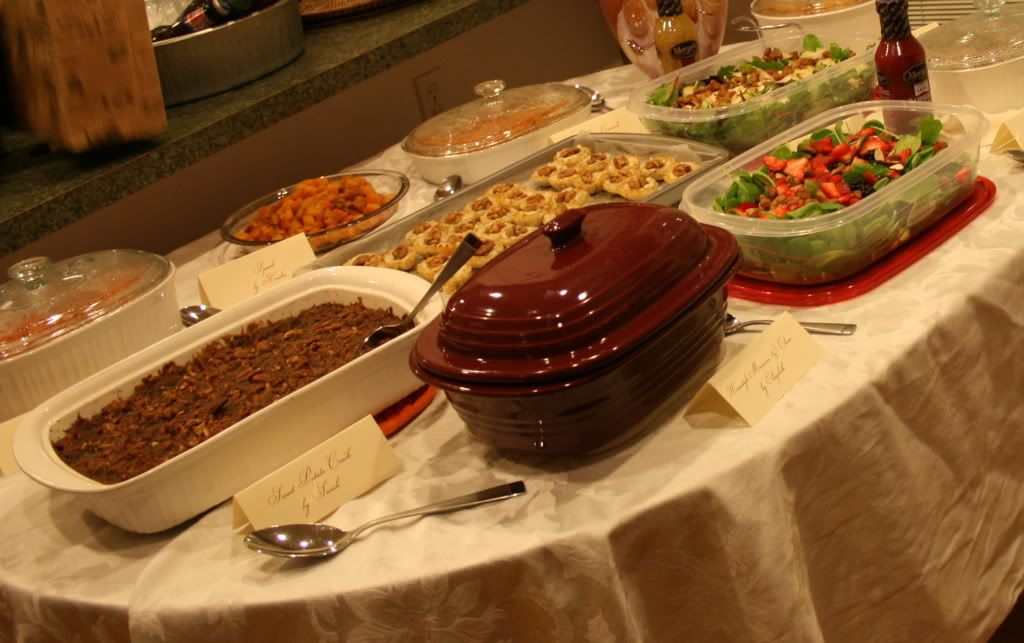
I created little name cards for all the dishes being brought. This way, people knew who made what.
Drink Station + Tricia:
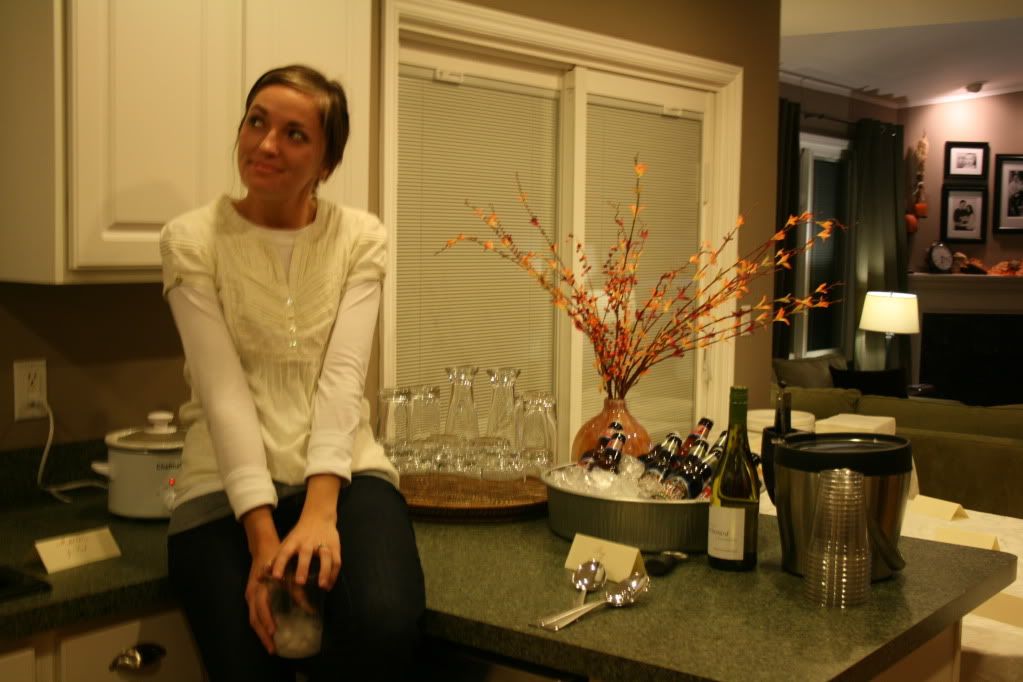 Hot cider (like we did for the game night party), seasonal beer, wine, liquor and soda.
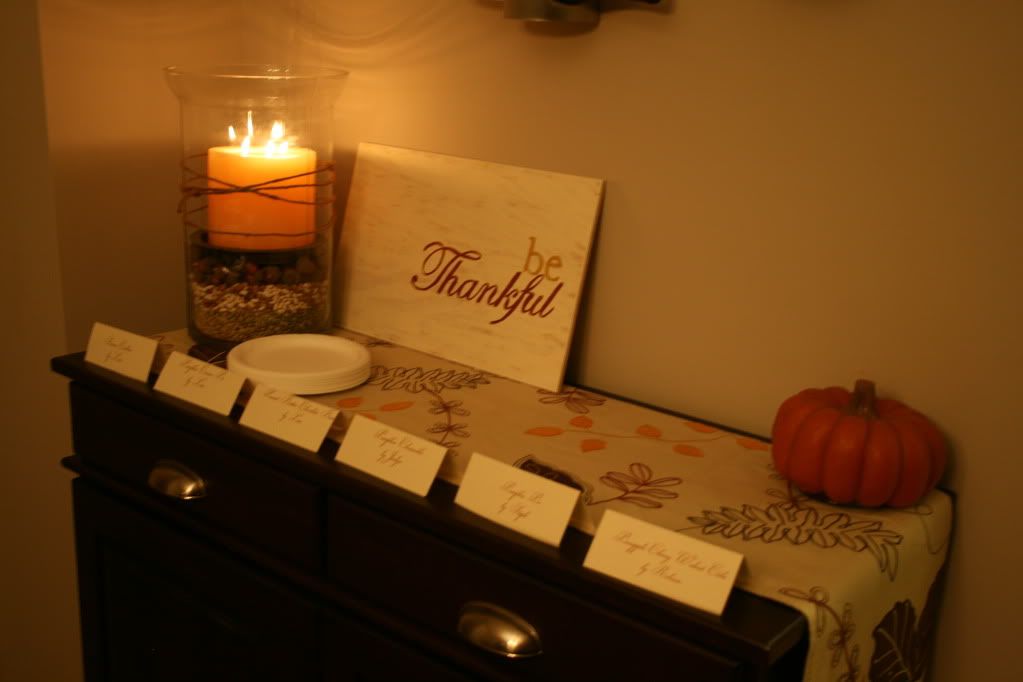
The sideboard was prepped and awaiting the desserts:
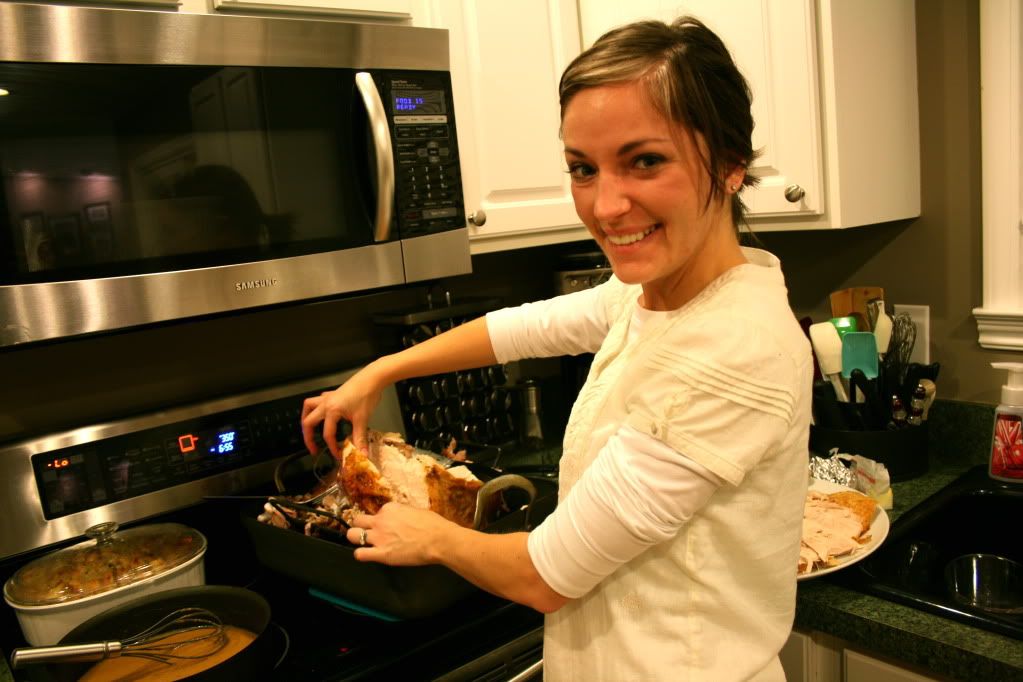
I love cooking a turkey. I really, really do. But when it comes time to carve, I move myself as far away as possible and wait for a hero to step in. Today's hero: Tricia.
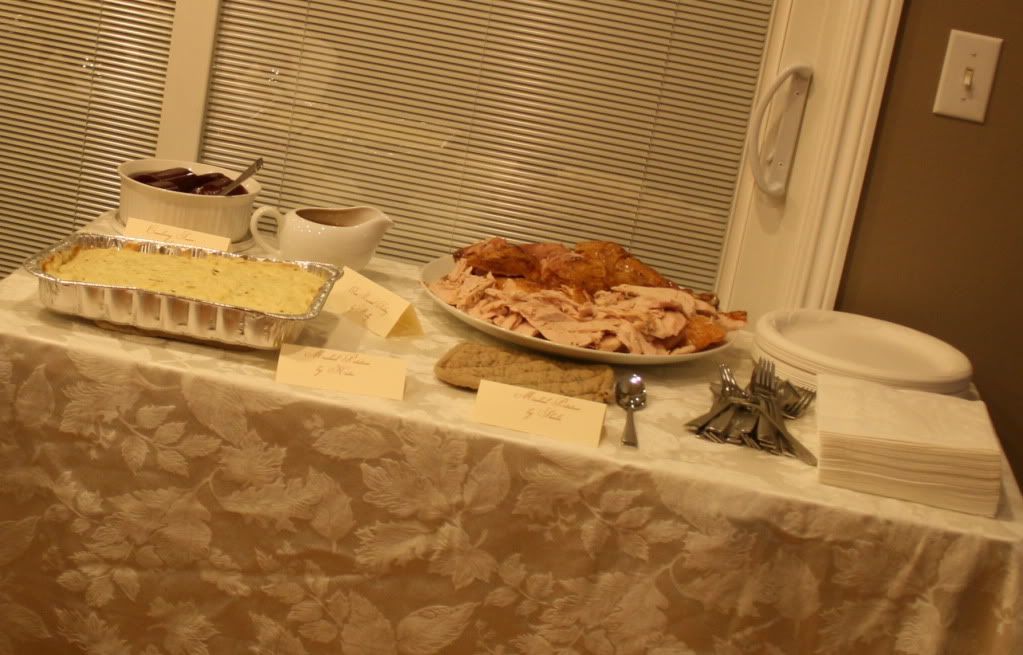
As the guests arrived, they just placed their dish by their name tag. Food!!!
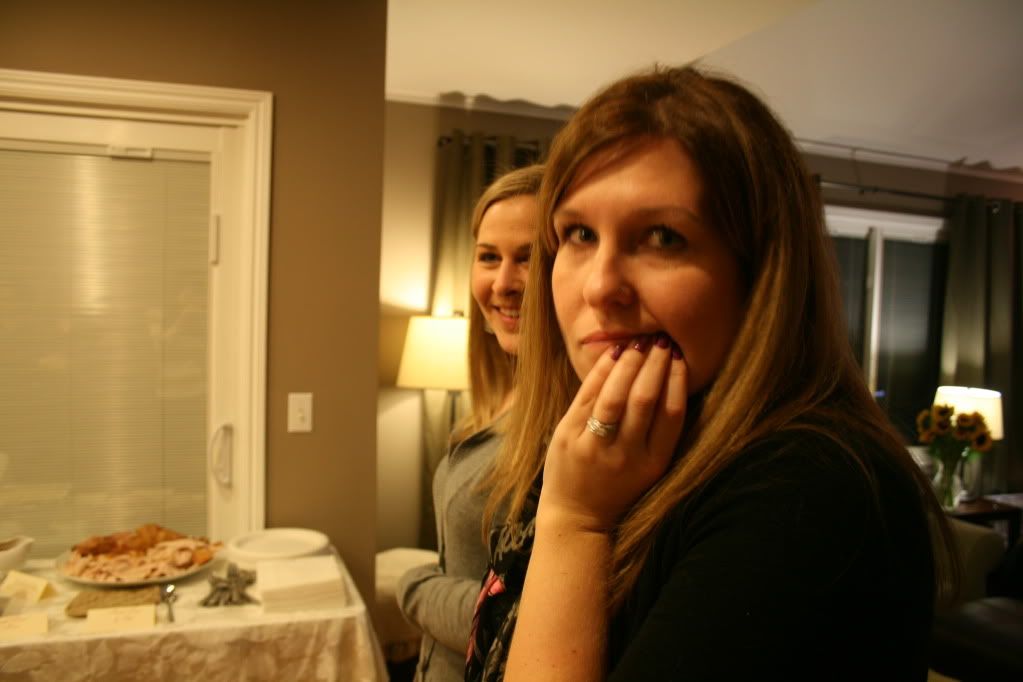
I had to keep my pictures quick, because Jess was not pleased I was making her wait to get to all that amazing food!
So that's the Mock Thanksgiving. How about some tips and tricks?
I hosted a Mock Thanksgiving in 2009, then took a year off because I couldn't see my feet last Thanksgiving. This year, I wanted to bring it back in style! I invited 17 of my favorite ladies to join in a holiday dinner without the family politics :) Oh and all the mommas left the babies with the husbands. Including me. Carl took Cam AND Gibson to his parents' house.
But I'm getting ahead of myself.
Scene: Friday Night. Carl and I are in the living/dining room trying to figure out how to seat 18 people.
Our dining table and two 6ft folding tables later, we came up with a solution. In my head, I needed it to be symmetrical, so we created one long table. It was hard to photograph the whole thing, but I think we succeeded in 1. it being symmetrical and 2. it not looking like a soup kitchen (right Tricia?). I didn't buy anything new for decor, I just used what I had- a mix of decorative basket filler, stones, faux leaves, candles and ribbon seems to do the trick. The glass candleholders were bought for our wedding and I've used them countless times now!
I created little name cards for all the dishes being brought. This way, people knew who made what.
Drink Station + Tricia:
Hot cider (like we did for the game night party), seasonal beer, wine, liquor and soda.The sideboard was prepped and awaiting the desserts:
I love cooking a turkey. I really, really do. But when it comes time to carve, I move myself as far away as possible and wait for a hero to step in. Today's hero: Tricia.
As the guests arrived, they just placed their dish by their name tag. Food!!!
I had to keep my pictures quick, because Jess was not pleased I was making her wait to get to all that amazing food!
So that's the Mock Thanksgiving. How about some tips and tricks?
- Send out your invites at least 3 weeks in advance. I think we settled on a date about 5 weeks out.
- Keep track of who is bringing what. I basically asked everyone to request their two favorite dishes, and then figured out who should bring what. We purposely had a couple duplicates, but otherwise, you can see the assortment was fantastic!
- The only item I cooked was the turkey + the gravy. My efforts were better spent on prepping the house. I do enjoy the occasional event where my guests don't lift a finger, but this is not that kind of event. The best part about Mock Thanksgiving is seeing what everyone wants to bring, tasting different versions of stuffing and sweet potatoes. Everyone has a favorite recipe, let them share it! Just make sure you have a variety.
- I highly recommend printing up food name cards. Not only does it allow people to see who brought what, but it gives you a good idea of how much space you'll need for food.
- As always, do as much the night before as possible. I had everything set up as much as I could so Saturday was easy going. Just some light cleaning and set up, plus cooking the prized bird.
- Don't be afraid to go big. Was this a formal get together? Nope. Not even close. But was it comfortable, relaxing and great to just eat some good food with a bunch of gal pals? YUP!
- A pot luck, buffet style party can be just as fancy looking as a formal event. OK...maybe not quite as fancy, but light some candles and put extra touches where you can. I've said it before; little details matter.
- Kick back and enjoy! What's the fun in hosting if you are hustling around trying to make sure everything is going smoothly? Tricia was my right hand girl the entire night. Designate someone to help out with answering the door and making sure people have drinks. Just because you want to be the hostess with the mostest doesn't mean you have to be a solo worker bee!
Enough tips for you? Are you ready to host a big event? Not so much you say. OK, start small! With the holidays fast approaching (seriously...Thanksgiving is 4 days away!), set aside a weekend night and invite some friends over. I promise you'll enjoy it :)
Sunday, November 13, 2011
DIY Rustic Thanksigiving Sign
How cute is my little sign? Cute huh? After browsing around Pinterest and seeing tons of cute little holiday signs, I decided I needed to make my own. I especially decided I would be making it since they can cost upwards of $70. $70. I am not even kidding. I made mine for less than $17. I say less than because I have more supplies than I really need, and let's just say I have enough to make more signs :)
What you need:
- A piece of plywood, cut to 18in x 11 1/4in
- Antique White Paint
- Colored paint of your choice
- A foam brush
- Small paint brushes
- Carbon Paper
1. Give the plywood a light sanding, wipe off dust
2. Using the foam brush, paint the wood with the Antique White paint. Use long strokes and if you want the rustic look, don't worry about complete coverage. Allow that to dry for one hour.
3. Decide on a saying, font and placement of your saying. I chose "be Thankful." The "be" is Baskerville, font size 200. The "Thankful" is Edwardian Script, font size 288. You can easily download different fonts at websites like www.dafont.com.
4. Print the saying out, and cut it down to the word. It doesn't have to be perfect, just cut off the major excess.
5. Tape the saying on your board as you want it, (I just did one word at a time) and place the carbon paper, carbon facing down, under your piece of paper. Trace the outline of your word.
6. Remove the carbon paper, and paint your traced word.
7. Repeat steps 4-6 until your words are complete.
8. Give your words at least 2 coats of paint to really have full coverage.
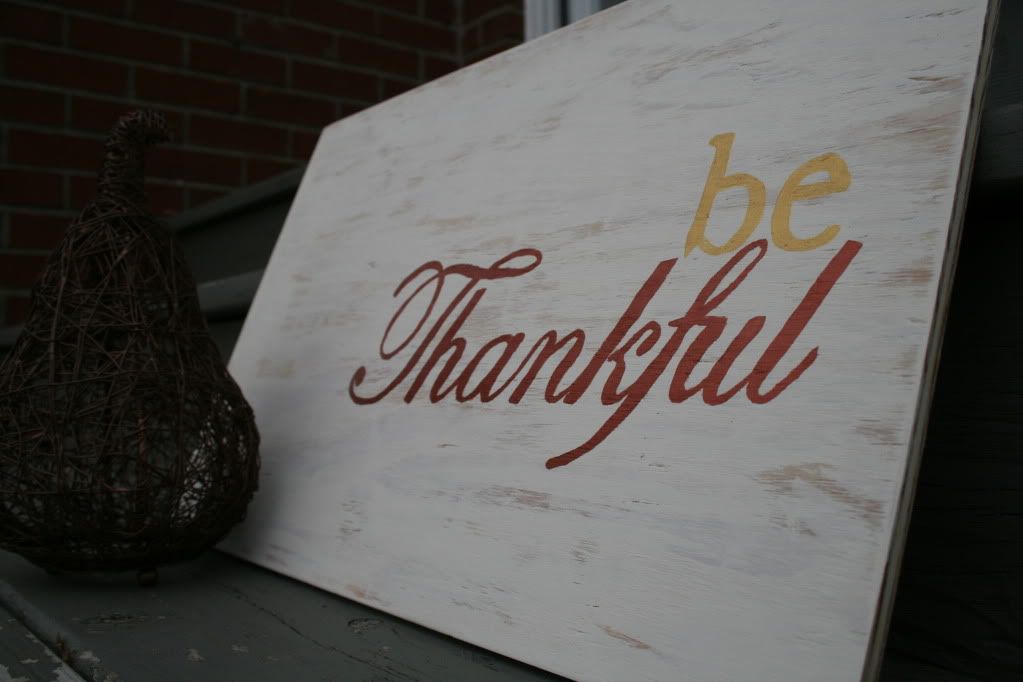

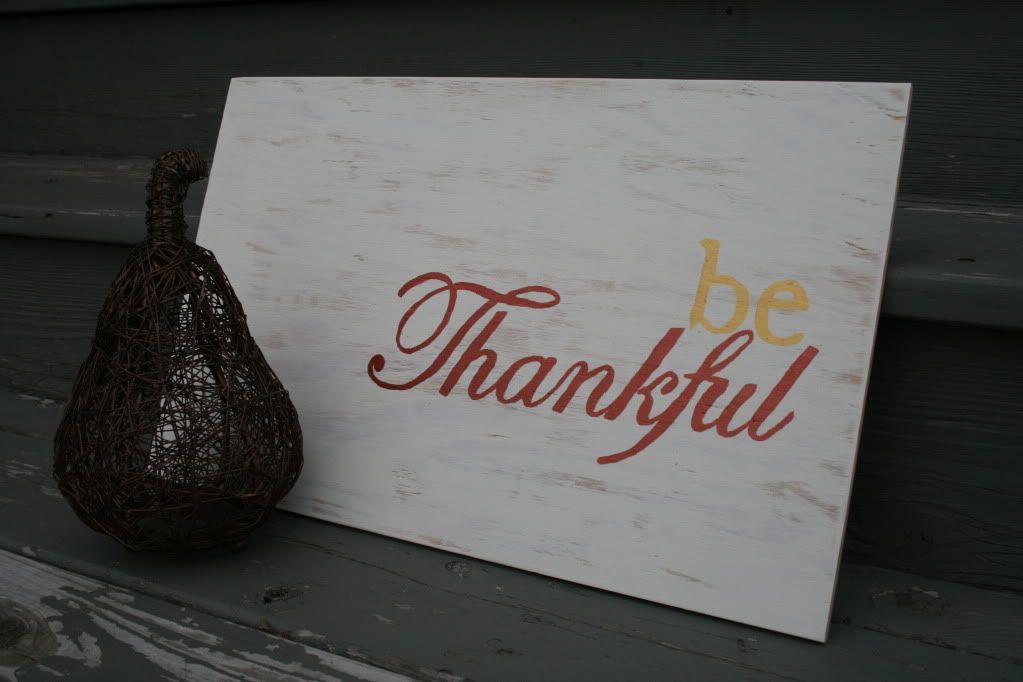
I haven't given it permanent home yet, but I'm having fun trying it out in new spots around the house! I'll have to figure out where it will go before Saturday's Mock Thanksgiving though! So that's it. Are you going to make your own sign? Are you following my little sign's advice? Be thankful :)
I'm linking up at the....

Sunday, October 16, 2011
Dining & Living Room Dressed Up for Fall
I had the toughest time finishing the dining and living room fall decor. It was my hang up for the last couple weeks. I'd walk in there, rearrange, create, sit back, evaluate, raise my brow and walk out with no improvement from when I walked in there. It was this weekend that I decided enough was enough and I was finishing it. Well, I almost met my goal, but I suppose I have a little more time to finish before the weekend is over. The only area left to do is the sideboard. But I felt I should reward myself for at least getting the table and shelves done by featuring them this Sunday morning.
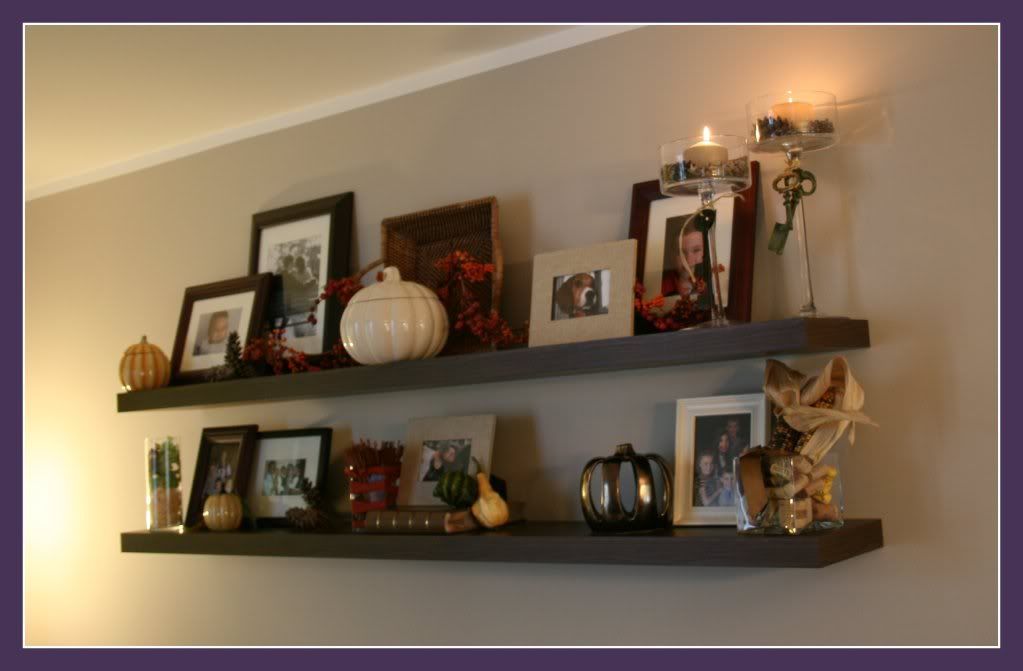
The living room shelves are where we focus on some family photos, but it's also a fun spot to decorate for the holidays :)
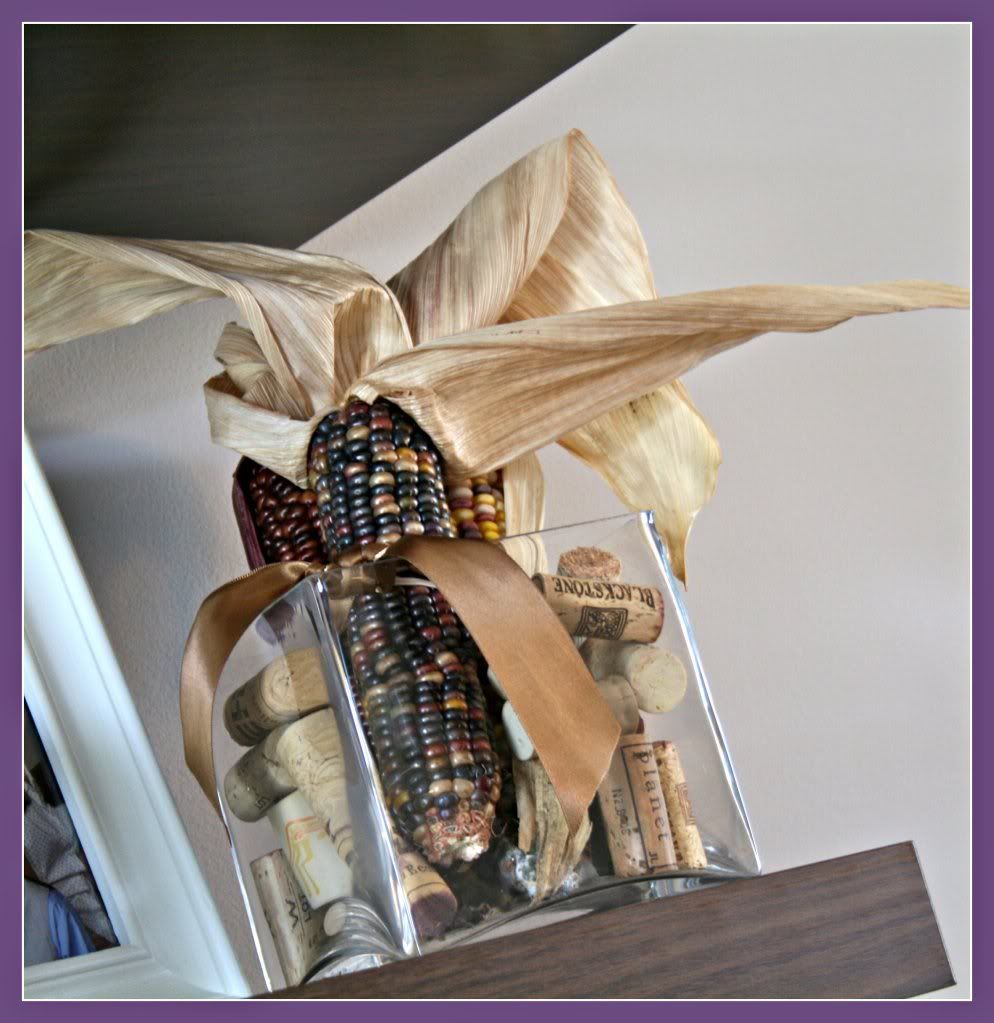
I'm just loving Indian corn. I took three ears of it, bound it up with some bronze ribbon and placed it in a square glass vase filled with our "important corks." They are just the corks we've collected from important events in our lives.
*Little tip on Indian Corn. If you want to manipulate the husks, just soak the corn for a few minutes, it will soften the husks enough to move them around without breaking. Just be sure to dry the corn out completely.
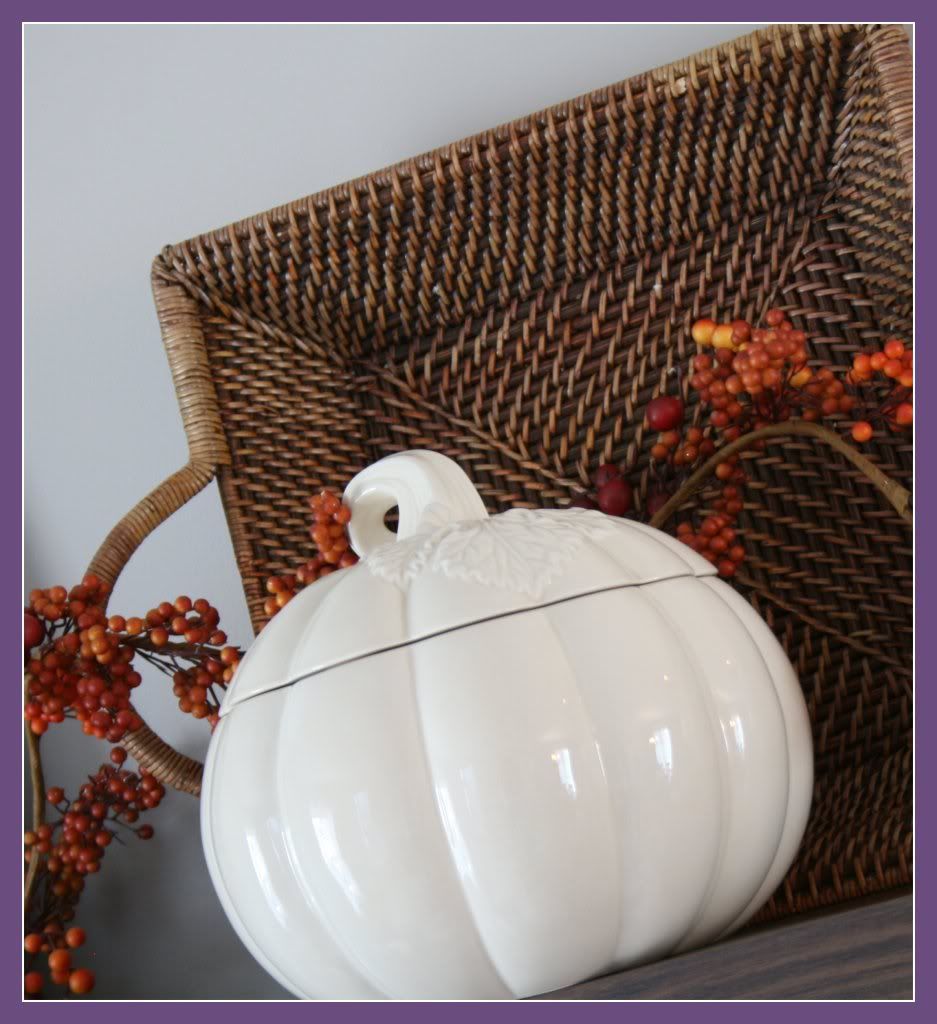
I just love this sweet little ivory pumpkin, so he gets a close up :)
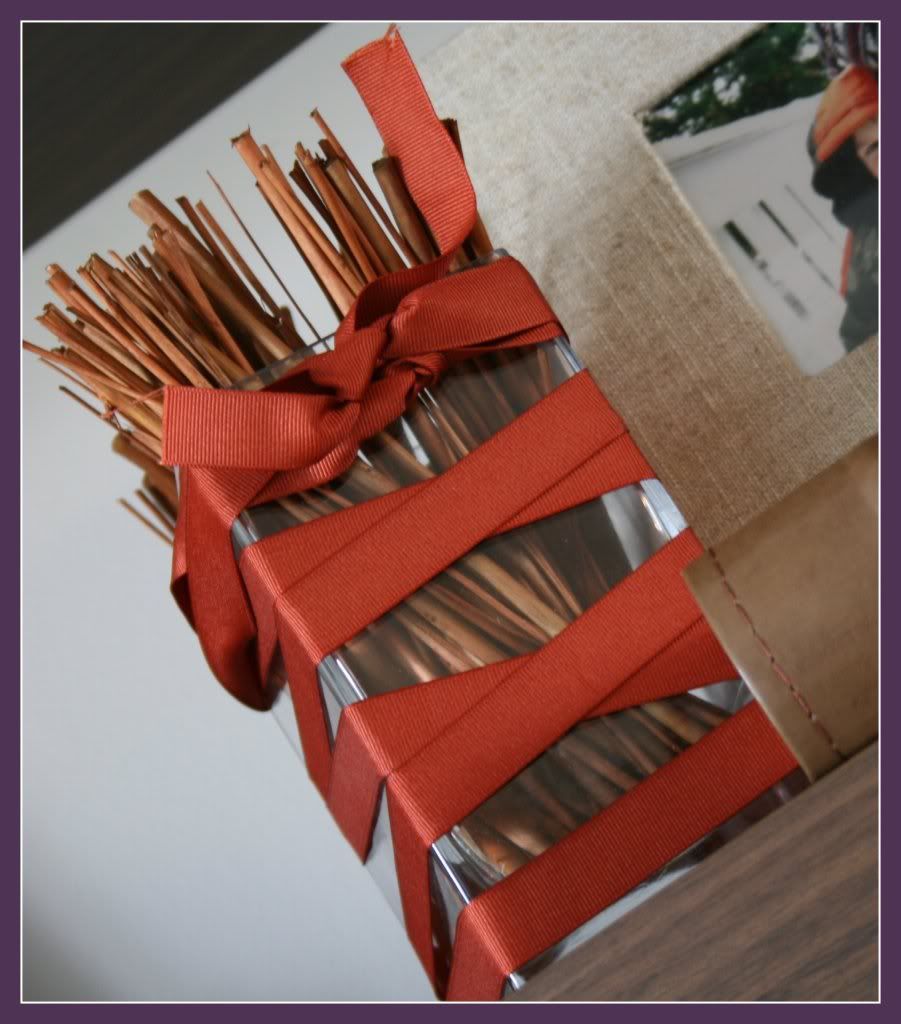
Some simple decorative sticks and a rust colored ribbon dress up a rectangle glass vase.
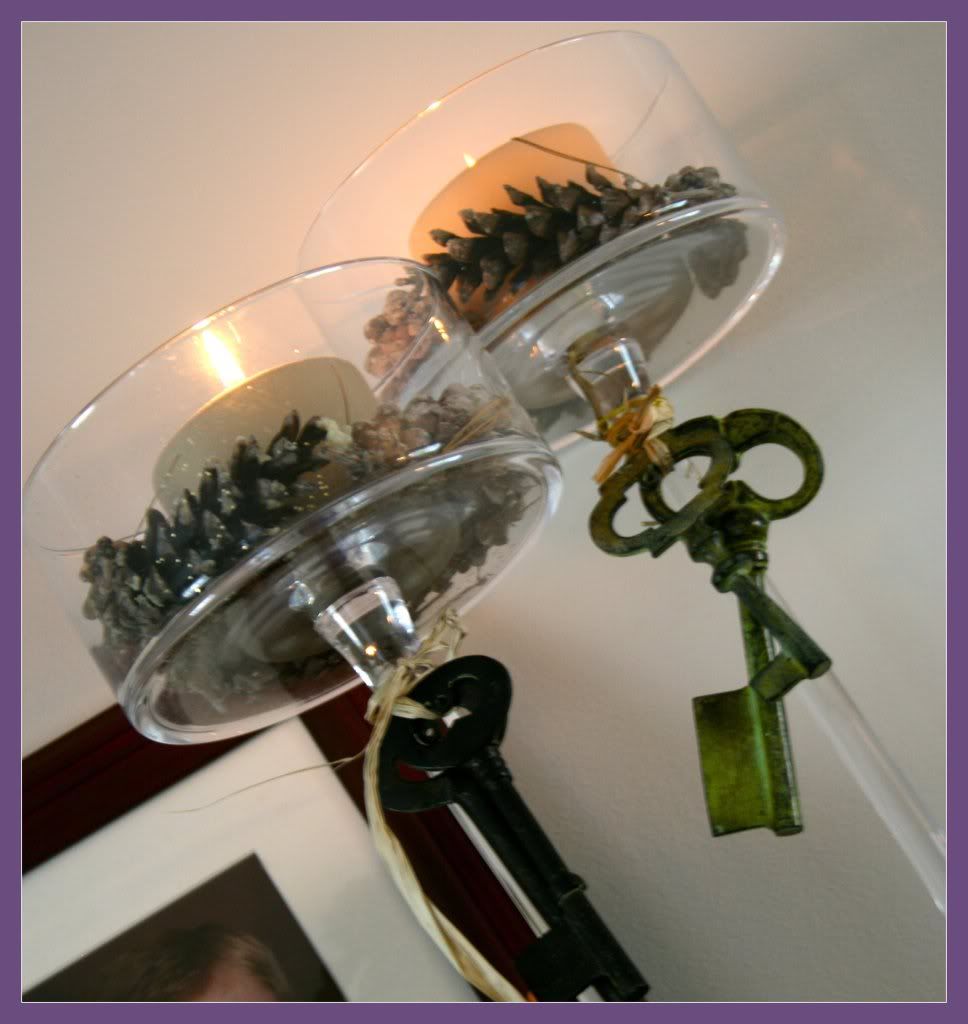
Last close up: Pedestal candy jars each with a pillar candle, surrounded by natural pine cones that I snatched from my very own back yard :) Then I just used some raffia to attach the antique (right...) keys from PB.
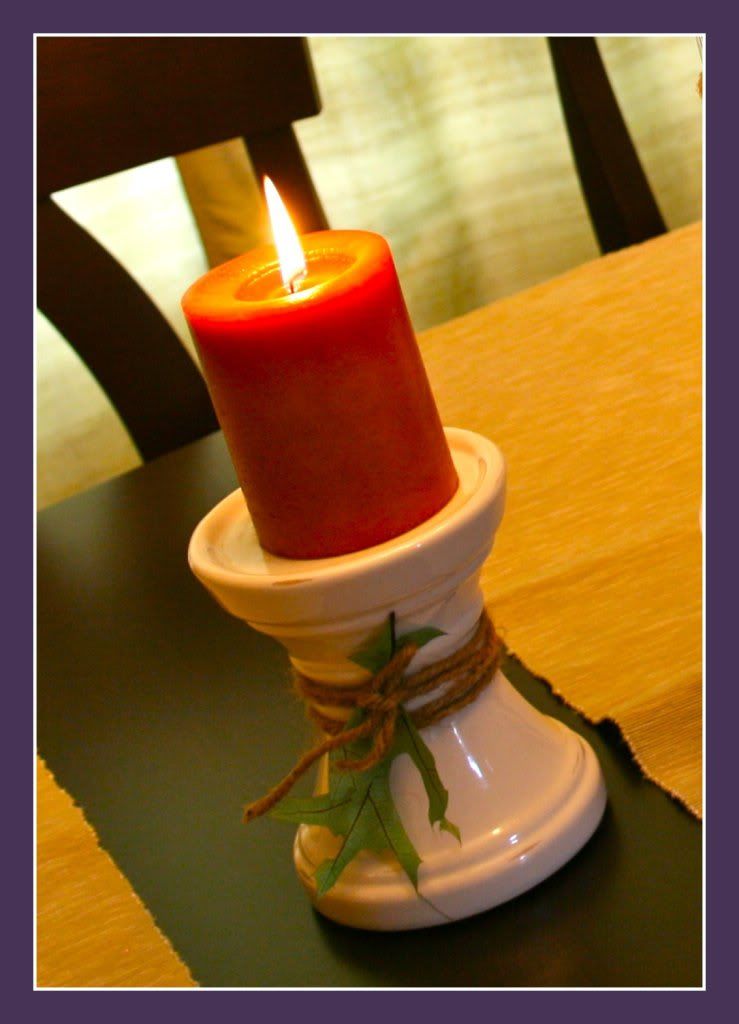
I love Pinterest. It helped inspire the center piece to my dining table. The layers are split peas, mixed beans and some faux acorns, and then it's tied up with some twine from Carl's stash of... twine I guess. Then I just carried the twine over and added some faux leaves to embellish the simple ivory pillar candle holders. I wanted to keep this simple because I'm hosting a Mock Thanksgiving, and we're going to need lots of room for food!


That's it for now! I suppose I'll attempt to finish the sideboard and then perhaps I'll do a complete 2011 Fall Decor Round Up post to put it all together. Now...if the wind would slow down a bit and stop knocking over my mums and corn stalks!!!!
The living room shelves are where we focus on some family photos, but it's also a fun spot to decorate for the holidays :)
I'm just loving Indian corn. I took three ears of it, bound it up with some bronze ribbon and placed it in a square glass vase filled with our "important corks." They are just the corks we've collected from important events in our lives.
*Little tip on Indian Corn. If you want to manipulate the husks, just soak the corn for a few minutes, it will soften the husks enough to move them around without breaking. Just be sure to dry the corn out completely.
I just love this sweet little ivory pumpkin, so he gets a close up :)
Some simple decorative sticks and a rust colored ribbon dress up a rectangle glass vase.
Last close up: Pedestal candy jars each with a pillar candle, surrounded by natural pine cones that I snatched from my very own back yard :) Then I just used some raffia to attach the antique (right...) keys from PB.
I love Pinterest. It helped inspire the center piece to my dining table. The layers are split peas, mixed beans and some faux acorns, and then it's tied up with some twine from Carl's stash of... twine I guess. Then I just carried the twine over and added some faux leaves to embellish the simple ivory pillar candle holders. I wanted to keep this simple because I'm hosting a Mock Thanksgiving, and we're going to need lots of room for food!
That's it for now! I suppose I'll attempt to finish the sideboard and then perhaps I'll do a complete 2011 Fall Decor Round Up post to put it all together. Now...if the wind would slow down a bit and stop knocking over my mums and corn stalks!!!!
Monday, October 10, 2011
The Mantle: Complete Redo and Fall Decor
This was quite the work in progress, and it's the second and last piece to my teaser post the other day. One of the main priorities we had when looking for a house was that it had to have a fireplace. Check. It was one of the first places I decorated. This was actually after a few changes had been made from the original design.

And this is the most recent look.

I was ready for a major change. Pretty much immediately after we put up the round mirror, I wasn't liking it. As Carl stated "it's a mirror for nothing." He was right. Sadface. But I dealt with it for quite awhile. That is, until now. I convinced Carl it was time for a change, and he finally agreed to go with it. I usually need his buy in because I make him do the hanging, patching, painting, etc.
So, this reveal is a seasonal reveal, for obvious reasons. It's fall people! It's all about the fall decorating right now! So with no further ado....I give you, the new My Happy House Mantle. Momma's in love :)


I'll break it down for you.
1. The mirror is down and the frames are up now. I decided it would be OK to have some family photos up now for a few reasons. The largest family photo we had anywhere was a 5x7 and a few 4x6s from our wedding. Now that we have Cam and have had some professional family photos taken, I decided it was time to display them in a significant way.
2. The candlesticks, tea light holders, and clock all carried over to the new design. I've liked all those pieces since we got them and have no plans to get rid of them anytime soon!
3. The last piece of "regular" decor that will stay season to season are the new sconces. The old ones served their purpose, but were a little more ornate than I wanted. I wanted something sleek with clean lines. We bought two pillar holder sconces from Pottery Barn.
 4. Tied to the sconces, are ears of Indian Corn. This was part of the reason I wanted sleek, simple lines for the sconces. I wanted to be able to dress them up for the holidays. I just used some twine and ivory ribbon to affix the corn to the sconce. I also used flameless candles here, these ones are orange for the season, so I wouldn't have any "burning down the house with my decor" issues.
5. The leaf is just a basic leaf garland and the gourds are just that, gourds. Pretty simple.
That's the breakdown of the fall/updated mantle. I can't wait to see what I can come up with for Christmas. But I'm telling myself to be patient. You definitely won't see a change until at least the Monday after Thanksgiving.
We made some other changes in the family room, but I think this post is long enough so I'll save that for another day. Soon...but another day.
p.s. I didn't forget about my Monday Morning Round Up. I'll be back later today with that! And I'll be posting an InLinkz for all your round ups too, so get to writing :)

And this is the most recent look.
I was ready for a major change. Pretty much immediately after we put up the round mirror, I wasn't liking it. As Carl stated "it's a mirror for nothing." He was right. Sadface. But I dealt with it for quite awhile. That is, until now. I convinced Carl it was time for a change, and he finally agreed to go with it. I usually need his buy in because I make him do the hanging, patching, painting, etc.
So, this reveal is a seasonal reveal, for obvious reasons. It's fall people! It's all about the fall decorating right now! So with no further ado....I give you, the new My Happy House Mantle. Momma's in love :)
I'll break it down for you.
1. The mirror is down and the frames are up now. I decided it would be OK to have some family photos up now for a few reasons. The largest family photo we had anywhere was a 5x7 and a few 4x6s from our wedding. Now that we have Cam and have had some professional family photos taken, I decided it was time to display them in a significant way.
2. The candlesticks, tea light holders, and clock all carried over to the new design. I've liked all those pieces since we got them and have no plans to get rid of them anytime soon!
3. The last piece of "regular" decor that will stay season to season are the new sconces. The old ones served their purpose, but were a little more ornate than I wanted. I wanted something sleek with clean lines. We bought two pillar holder sconces from Pottery Barn.
4. Tied to the sconces, are ears of Indian Corn. This was part of the reason I wanted sleek, simple lines for the sconces. I wanted to be able to dress them up for the holidays. I just used some twine and ivory ribbon to affix the corn to the sconce. I also used flameless candles here, these ones are orange for the season, so I wouldn't have any "burning down the house with my decor" issues.5. The leaf is just a basic leaf garland and the gourds are just that, gourds. Pretty simple.
That's the breakdown of the fall/updated mantle. I can't wait to see what I can come up with for Christmas. But I'm telling myself to be patient. You definitely won't see a change until at least the Monday after Thanksgiving.
We made some other changes in the family room, but I think this post is long enough so I'll save that for another day. Soon...but another day.
p.s. I didn't forget about my Monday Morning Round Up. I'll be back later today with that! And I'll be posting an InLinkz for all your round ups too, so get to writing :)
Tuesday, September 27, 2011
Fall Decorating 2011 Part 1
Or is it Part 2 since I already showed a little snippet of the porch? Either way, more fall decorating coming at you! I'm changing all kinds of things this year. Looking back on last year's attempt, meh. Let's just not. I'm so much happier this time around! I've got to order a few things before the family room is finished, but the floating shelves are D-U-N! Done!
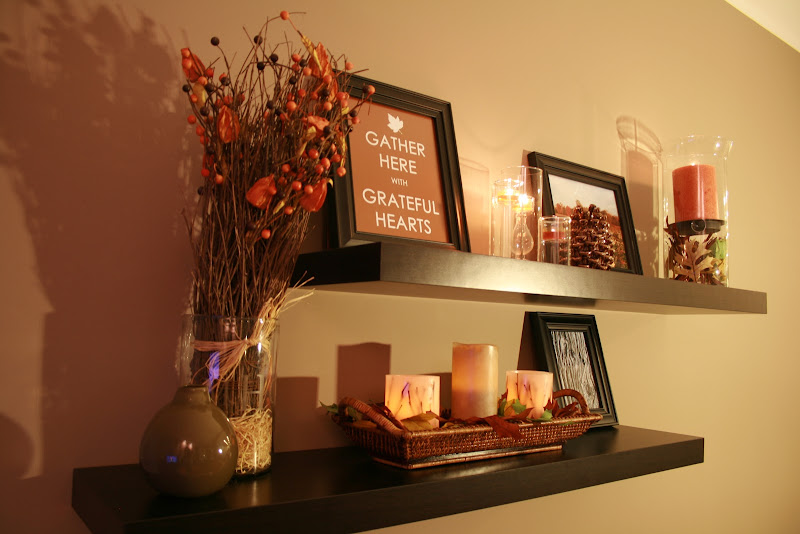
Let's break it down! Everything carried over from last year with the exception of a few pieces. I swapped out our normal photos for the free fall printable, found here, as well as a shot of the pumpkin patch from when we went last year. The bottom right is a close up of a tree up at the cabin. There are some new sticks as filler under the large orange candle and since I couldn't use real candles on the bottom shelf, I bought 3 flameless ones. LOVE the flameless candles. Plus, they are versatile enough to be used at times other than fall!

Here's just a straight on shot so you can see the prints a little better.

So that's that. Family room floating shelves complete. Have you started your fall decorating? Have you blogged about it? Share it here in the InLinkz!

Let's break it down! Everything carried over from last year with the exception of a few pieces. I swapped out our normal photos for the free fall printable, found here, as well as a shot of the pumpkin patch from when we went last year. The bottom right is a close up of a tree up at the cabin. There are some new sticks as filler under the large orange candle and since I couldn't use real candles on the bottom shelf, I bought 3 flameless ones. LOVE the flameless candles. Plus, they are versatile enough to be used at times other than fall!
Here's just a straight on shot so you can see the prints a little better.
So that's that. Family room floating shelves complete. Have you started your fall decorating? Have you blogged about it? Share it here in the InLinkz!
Subscribe to:
Posts (Atom)