

Pros:
Molly really likes it.
Cons:
The dimensions weren't fitting on either available wall in the office
The cost...it would have been over $250 to get what we needed, plus shipping
Boo, friends, major boo. But the bonus is that we came up with a new plan! Yippee! I came up with the idea to make our own daily system out of frames- using them as whiteboards. I wanted two calendar boards so I could see a month ahead at a glance, one blackboard for quick notes, and such and then one frame to house our to do and to file folders.
Step 1: Buy the materials
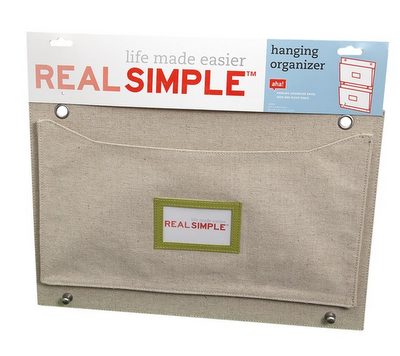
4 frames
2 wall organizers (pictured below)
Black chalkboard spray paint
Frosted glass spray paint
Black poster paint marker
Wall hooks
Clear silicone
We chose these hanging organizers because of the simplicity and the fact that they hooked on to one another. Love em! More on these later.
Step 2: Make the whiteboards
We removed all the materials from the frames. We used two rectangle frames for two calendars, so we could view a month ahead at a glance. We used a ruler and level to draw out the lines for the calendar on the backside of the glass, then sprayed it with two coats of frosted glass spray paint. We inserted the glass back in the frame and used some clear silicone to keep the glass from moving around. Leaving the back off would allow the wall to show through, making that the background color.

Then, for the blackboard, we used a longer, skinnier rectangle frame. Again, we removed all the inserts, but this time we sprayed the back with a blackboard paint. Upon turning it around, we realized it looked really awesome and went with making it a black dry erase board. However, we can always turn the glass around if we want since we were able to put the backing on that one.
Step 3: Configure hanging organizers
We took the hanging organizers, and hooked them together, as they are made to do that. We purchased a larger frame, replace the inserts with a backer board cut down to the frame size. Carl simply stapled the organizers to the backer board, and put it back in the frame.

Step 4: Time to hang!
We used some one step brass hooks. We wanted something that would make the frames easy to come off the wall, especially for the calendars. It makes filling out an entire month much easier!


Step 6: Enjoy Your Organized Life :)


Now I just need to sort the top shelf, including finding a fun way to keep all my dry erase markers organized! I'll be keeping a look out for a good solution.
So what was the cost on our project?
4 frames.................................................$81
2 wall organizers (pictured below).......$30
Black chalkboard spray paint...............$4
Frosted glass spray paint......................$4
Black poster paint marker....................$3
Wall hooks............................................$2
Clear silicone........................................ Free- we had some on hand
Total......................................................$124!
That's quite the cost difference! Not to mention, it was the right size for our wall! I'm loving filling out the calendars and I finally have an easy spot for my "To Dos" and "To Files." The second is especially helpful when I can't really be in the office during the day, but I can sneak in there to toss some stuff up there to organize later.
So did I inspire you to make your own daily organization system? Maybe not, but perhaps you can find inspiration in another pricey item and make it your own!


I love this!! I have been obsessing over the PB organizer as well. Maybe I will take on the challenge also! Thanks for the great DIY info!
ReplyDeleteBookmarking this! It looks great!
ReplyDeleteYou are my hero.
ReplyDeleteBeautiful work - I love it!
ReplyDeleteThis looks great! And I love the pockets. I think I need a few of those for our kitchen. It becomes a dumping ground for papers.
ReplyDeleteThat looks great! I love Pottery Barn, but the stuff is SO expensive! I can only afford things if they're on clearance. :P
ReplyDeleteSuper cute! I just bought the PB daily system though, lol!
ReplyDeleteI love that your husband is all about DIY projects. Definitely makes it easier when you have an idea. This is so clever Molly, I LOVE it.
ReplyDeleteThat's so weird I've been eyeing the Pottery Barn system and was trying to find an alternative. I love your idea! Great job.
ReplyDeleteLove this! Great Idea!
ReplyDeleteNice job! I'm sure the cute doggie was lots of help, too.
ReplyDeleteLove it! And I think it looks WAY better then the PB one! Great job :)
ReplyDeleteLove this so much! I did a knock off of their big bulletin board a while back and love it.
ReplyDeleteI did the black dry erase board too after just seeing this post...what markers do you use on it? My regular EXPO dry erase markers don't show up with the black background. Any suggestions?
ReplyDeleteIt looks great! I just made the black dry erase board too because I had everything I needed on hand but I have a question...what markers do you use on it? My regular EXPO dry erase markers won't show up with the black background. Any suggestions?
ReplyDelete@katie- I use the neon dry erase markers, they work great!
ReplyDeleteWhat size frames did you use for each thing? I am in the process of making my version of this.
ReplyDelete@Alison- Calendars: 17.5"x13.5"
ReplyDeleteBlack Dry Erase: 9.5"x19.5"
Hanging File Holder: 16"x20"